mirror of
https://github.com/tabler/tabler.git
synced 2025-12-22 01:44:25 +04:00
Compare commits
15 Commits
v1.0.0-bet
...
dev-change
| Author | SHA1 | Date | |
|---|---|---|---|
|
|
1b04679c2d | ||
|
|
54454f71d1 | ||
|
|
914bc6a21a | ||
|
|
5be3c0e236 | ||
|
|
3dd6b3b8bc | ||
|
|
58a5b4c2bd | ||
|
|
a2cbd50187 | ||
|
|
4fe9407a19 | ||
|
|
80dd505973 | ||
|
|
191b5f0636 | ||
|
|
5330aaea52 | ||
|
|
df593d2b05 | ||
|
|
e357ab4e4d | ||
|
|
3388a68447 | ||
|
|
b0d759f328 |
89
.all-contributorsrc
Normal file
89
.all-contributorsrc
Normal file
@@ -0,0 +1,89 @@
|
||||
{
|
||||
"projectName": "tabler",
|
||||
"projectOwner": "tabler",
|
||||
"repoType": "github",
|
||||
"repoHost": "https://github.com",
|
||||
"files": [
|
||||
"CONTRIBUTORS.md"
|
||||
],
|
||||
"imageSize": 100,
|
||||
"commit": true,
|
||||
"commitConvention": "angular",
|
||||
"contributors": [
|
||||
{
|
||||
"login": "codecalm",
|
||||
"name": "Paweł Kuna",
|
||||
"avatar_url": "https://avatars.githubusercontent.com/u/1282324?v=4",
|
||||
"profile": "https://tabler.io/",
|
||||
"contributions": [
|
||||
"code",
|
||||
"doc"
|
||||
]
|
||||
},
|
||||
{
|
||||
"login": "martynaaj",
|
||||
"name": "Martyna",
|
||||
"avatar_url": "https://avatars.githubusercontent.com/u/60158888?v=4",
|
||||
"profile": "https://github.com/martynaaj",
|
||||
"contributions": [
|
||||
"doc"
|
||||
]
|
||||
},
|
||||
{
|
||||
"login": "deralaxo",
|
||||
"name": "Dawid Harat",
|
||||
"avatar_url": "https://avatars.githubusercontent.com/u/40028795?v=4",
|
||||
"profile": "https://github.com/deralaxo",
|
||||
"contributions": [
|
||||
"code"
|
||||
]
|
||||
},
|
||||
{
|
||||
"login": "rjd22",
|
||||
"name": "Robert-Jan de Dreu",
|
||||
"avatar_url": "https://avatars.githubusercontent.com/u/160743?v=4",
|
||||
"profile": "https://codersopinion.com/",
|
||||
"contributions": [
|
||||
"code"
|
||||
]
|
||||
},
|
||||
{
|
||||
"login": "FreexD",
|
||||
"name": "Michał Wolny",
|
||||
"avatar_url": "https://avatars.githubusercontent.com/u/7117869?v=4",
|
||||
"profile": "https://github.com/FreexD",
|
||||
"contributions": [
|
||||
"code"
|
||||
]
|
||||
},
|
||||
{
|
||||
"login": "wangkanai",
|
||||
"name": "Sarin Na Wangkanai",
|
||||
"avatar_url": "https://avatars.githubusercontent.com/u/10666633?v=4",
|
||||
"profile": "https://www.wangkanai.com/",
|
||||
"contributions": [
|
||||
"code"
|
||||
]
|
||||
},
|
||||
{
|
||||
"login": "WinterSilence",
|
||||
"name": "Anton",
|
||||
"avatar_url": "https://avatars.githubusercontent.com/u/3521094?v=4",
|
||||
"profile": "https://ensostudio.ru/",
|
||||
"contributions": [
|
||||
"code"
|
||||
]
|
||||
},
|
||||
{
|
||||
"login": "dheineman",
|
||||
"name": "Dave Heineman",
|
||||
"avatar_url": "https://avatars.githubusercontent.com/u/516028?v=4",
|
||||
"profile": "https://github.com/dheineman",
|
||||
"contributions": [
|
||||
"code"
|
||||
]
|
||||
}
|
||||
],
|
||||
"contributorsPerLine": 7,
|
||||
"linkToUsage": false
|
||||
}
|
||||
28
.build/changelog.js
Normal file
28
.build/changelog.js
Normal file
@@ -0,0 +1,28 @@
|
||||
#!/usr/bin/env node
|
||||
|
||||
'use strict'
|
||||
|
||||
const fs = require('fs'),
|
||||
path = require('path'),
|
||||
YAML = require('yaml');
|
||||
|
||||
const content = YAML.parse(fs.readFileSync(path.join(__dirname, '../src/pages/_data/changelog.yml'), 'utf8')).reverse()
|
||||
let readme = `# Changelog
|
||||
|
||||
All notable changes to this project will be documented in this file.\n`
|
||||
|
||||
content.forEach((change) => {
|
||||
readme += `\n\n## \`${change.version}\` - ${change.date}\n\n`
|
||||
|
||||
if (change.description) {
|
||||
readme += `**${change.description}**\n\n`
|
||||
}
|
||||
|
||||
change.changes.forEach((line) => {
|
||||
readme += `- ${line}\n`
|
||||
})
|
||||
|
||||
console.log(change.version);
|
||||
})
|
||||
|
||||
fs.writeFileSync(path.join(__dirname, '../CHANGELOG.md'), readme)
|
||||
@@ -12,6 +12,7 @@ const illustrations = glob
|
||||
return path.basename(file, '.png')
|
||||
})
|
||||
|
||||
|
||||
fs.writeFileSync(
|
||||
path.join(__dirname, `../src/pages/_data/illustrations.json`),
|
||||
JSON.stringify(illustrations)
|
||||
|
||||
@@ -1,36 +0,0 @@
|
||||
#!/usr/bin/env node
|
||||
|
||||
'use strict'
|
||||
|
||||
const fs = require('fs'),
|
||||
path = require('path'),
|
||||
glob = require('glob'),
|
||||
beautifyHtml = require('js-beautify').html;
|
||||
|
||||
const docs = glob
|
||||
.sync(path.join(__dirname, `../docs/**/*.mdx`))
|
||||
|
||||
docs.forEach((file, i) => {
|
||||
const oldContent = fs.readFileSync(file, 'utf8')
|
||||
|
||||
// get codeblocks from markdown
|
||||
const content = oldContent.replace(/(```([a-z0-9]+).*?\n)(.*?)(```)/gs, (m, m1, m2, m3, m4) => {
|
||||
if (m2 === 'html') {
|
||||
let m3m = beautifyHtml(m3, {
|
||||
"indent_size": 2,
|
||||
"indent_char": " ",
|
||||
}).trim();
|
||||
|
||||
// remove empty lines
|
||||
m3m = m3m.replace(/^\s*[\r\n]/gm, '');
|
||||
|
||||
return m1 + m3m + "\n" + m4;
|
||||
}
|
||||
return m
|
||||
})
|
||||
|
||||
if (content !== oldContent) {
|
||||
fs.writeFileSync(file, content, 'utf8')
|
||||
console.log(`Reformatted ${file}`)
|
||||
}
|
||||
})
|
||||
@@ -1,5 +0,0 @@
|
||||
---
|
||||
"@tabler/core": patch
|
||||
---
|
||||
|
||||
Order menu items alphabetically
|
||||
@@ -1,5 +0,0 @@
|
||||
---
|
||||
"@tabler/core": patch
|
||||
---
|
||||
|
||||
Automatically retrieve and display the changelog from the CHANGELOG.md file.
|
||||
@@ -1,5 +0,0 @@
|
||||
---
|
||||
"@tabler/core": patch
|
||||
---
|
||||
|
||||
Make horizontal rule direction aware
|
||||
@@ -1,5 +0,0 @@
|
||||
---
|
||||
"@tabler/core": patch
|
||||
---
|
||||
|
||||
Remove invalid `z-index` setting for dropdowns
|
||||
@@ -1,5 +0,0 @@
|
||||
---
|
||||
"@tabler/core": patch
|
||||
---
|
||||
|
||||
Update Tabler Emails to v2.0
|
||||
@@ -1,5 +0,0 @@
|
||||
---
|
||||
"@tabler/core": patch
|
||||
---
|
||||
|
||||
Replace `.page-center` with `.my-auto` in single page layouts
|
||||
@@ -1,5 +0,0 @@
|
||||
---
|
||||
"@tabler/core": patch
|
||||
---
|
||||
|
||||
Fix icon display issues in the Star Ratings component
|
||||
@@ -1,5 +0,0 @@
|
||||
---
|
||||
"@tabler/core": patch
|
||||
---
|
||||
|
||||
Add social icons plugin
|
||||
@@ -1,5 +0,0 @@
|
||||
---
|
||||
"@tabler/core": patch
|
||||
---
|
||||
|
||||
Update illustrations and enhance SVG handling in HTML
|
||||
@@ -1,5 +0,0 @@
|
||||
---
|
||||
"@tabler/core": patch
|
||||
---
|
||||
|
||||
Fix ids of custom size star ratings
|
||||
@@ -1,5 +0,0 @@
|
||||
---
|
||||
"@tabler/core": patch
|
||||
---
|
||||
|
||||
Set `font-size` of an `i` element with `icon` class in a `button` element
|
||||
@@ -1,5 +0,0 @@
|
||||
---
|
||||
"@tabler/core": patch
|
||||
---
|
||||
|
||||
Fix description of alerts with a description
|
||||
@@ -1,5 +0,0 @@
|
||||
---
|
||||
"@tabler/core": patch
|
||||
---
|
||||
|
||||
Improve base font family loading
|
||||
@@ -1,5 +0,0 @@
|
||||
---
|
||||
"@tabler/core": patch
|
||||
---
|
||||
|
||||
Fix `@charset` CSS declaration in bundle.
|
||||
@@ -1,5 +0,0 @@
|
||||
---
|
||||
"@tabler/core": patch
|
||||
---
|
||||
|
||||
Increase `z-index` of `ts-dropdown` to prevent overlapping by buttons
|
||||
@@ -1,5 +0,0 @@
|
||||
---
|
||||
"@tabler/core": patch
|
||||
---
|
||||
|
||||
Fix padding in code blocks
|
||||
@@ -1,5 +0,0 @@
|
||||
---
|
||||
"@tabler/core": patch
|
||||
---
|
||||
|
||||
Remove duplicated setting of color in `th` element
|
||||
@@ -1,5 +0,0 @@
|
||||
---
|
||||
"@tabler/core": patch
|
||||
---
|
||||
|
||||
Fix layout of search results for small and medium screens
|
||||
@@ -1,5 +0,0 @@
|
||||
---
|
||||
"@tabler/core": patch
|
||||
---
|
||||
|
||||
Remove `text-decoration` on hovering `a` element with class having `icon` class
|
||||
@@ -1,5 +0,0 @@
|
||||
---
|
||||
"@tabler/core": patch
|
||||
---
|
||||
|
||||
Set value of `$font-family-monospace` as default
|
||||
@@ -1,5 +0,0 @@
|
||||
---
|
||||
"@tabler/core": patch
|
||||
---
|
||||
|
||||
Enhance documentation
|
||||
@@ -1,5 +0,0 @@
|
||||
---
|
||||
"@tabler/core": patch
|
||||
---
|
||||
|
||||
Fix cells with inline icons
|
||||
@@ -1,5 +0,0 @@
|
||||
---
|
||||
"@tabler/core": patch
|
||||
---
|
||||
|
||||
Increase contrast of active `dropdown-item` in vertical layout
|
||||
@@ -1,5 +0,0 @@
|
||||
---
|
||||
"@tabler/core": patch
|
||||
---
|
||||
|
||||
Update documentation for Tabler components
|
||||
@@ -1,5 +0,0 @@
|
||||
---
|
||||
"@tabler/core": patch
|
||||
---
|
||||
|
||||
Do not display empty `fieldset` element
|
||||
@@ -1,5 +0,0 @@
|
||||
---
|
||||
"@tabler/core": patch
|
||||
---
|
||||
|
||||
Update Tabler Icons to v3.26.0
|
||||
@@ -1,5 +0,0 @@
|
||||
---
|
||||
"@tabler/core": patch
|
||||
---
|
||||
|
||||
Upgrade Node.js from version 18 to version 20 for improved performance, security, and feature updates.
|
||||
@@ -1,5 +0,0 @@
|
||||
---
|
||||
"@tabler/core": minor
|
||||
---
|
||||
|
||||
New page with payment providers: `payment-providers.html`
|
||||
@@ -1,5 +0,0 @@
|
||||
---
|
||||
"@tabler/core": minor
|
||||
---
|
||||
|
||||
Add support for new payment providers: 2c2p, Adyen, Affirm, Alipay Plus, Allegro Pay, Amazon Pay, Apple Pay, Autopay, Binance USD, Bkash, Cash App, Chime, EasyPaisa, Ethereum, Google Pay, HubSpot, iDeal, Litecoin, Mercado Pago, MetaMask, MoneyGram, OpenSea, Payconiq, Payka, Payline, PayPo, Paysafe, Poli, Revolut Pay, Samsung Pay, Shop Pay, Solana, Spingo, Stax, Tether, True USD, Venmo, WeChat Pay, Wise, Zelle
|
||||
@@ -1,5 +0,0 @@
|
||||
---
|
||||
"@tabler/core": patch
|
||||
---
|
||||
|
||||
Fix link to webfont version of Tabler Icons
|
||||
@@ -1,5 +0,0 @@
|
||||
---
|
||||
"@tabler/core": patch
|
||||
---
|
||||
|
||||
Fix colors in date range datepicker
|
||||
2
.github/workflows/bundlewatch.yml
vendored
2
.github/workflows/bundlewatch.yml
vendored
@@ -9,7 +9,7 @@ on:
|
||||
|
||||
env:
|
||||
FORCE_COLOR: 2
|
||||
NODE: 20
|
||||
NODE: 18
|
||||
|
||||
jobs:
|
||||
bundlewatch:
|
||||
|
||||
63
.github/workflows/release-beta.yml
vendored
Normal file
63
.github/workflows/release-beta.yml
vendored
Normal file
@@ -0,0 +1,63 @@
|
||||
name: Pre-release
|
||||
|
||||
on:
|
||||
push:
|
||||
branches:
|
||||
- beta
|
||||
- dev-changesets
|
||||
|
||||
concurrency: ${{ github.workflow }}-${{ github.ref }}
|
||||
|
||||
jobs:
|
||||
release:
|
||||
name: PR or Release
|
||||
if: ${{ github.repository_owner == 'tabler' }}
|
||||
runs-on: ubuntu-latest
|
||||
permissions:
|
||||
contents: write
|
||||
pull-requests: write
|
||||
steps:
|
||||
- name: Checkout Repo
|
||||
uses: actions/checkout@v4
|
||||
|
||||
- uses: ruby/setup-ruby@v1
|
||||
with:
|
||||
bundler-cache: true
|
||||
|
||||
- name: Enable corepack
|
||||
run: corepack enable pnpm
|
||||
|
||||
- name: Setup Node.js 18
|
||||
uses: actions/setup-node@v4
|
||||
with:
|
||||
cache: 'pnpm'
|
||||
node-version: 18
|
||||
registry-url: 'https://registry.npmjs.org'
|
||||
|
||||
- name: Install Dependencies
|
||||
run: pnpm install
|
||||
|
||||
- name: Build Package
|
||||
run: pnpm run build
|
||||
|
||||
- name: Enable Pre-release
|
||||
run: pnpm changeset pre enter beta
|
||||
|
||||
- name: Creating .npmrc
|
||||
run: |
|
||||
cat << EOF > "$HOME/.npmrc"
|
||||
//registry.npmjs.org/:_authToken=$NPM_TOKEN
|
||||
EOF
|
||||
env:
|
||||
NPM_TOKEN: ${{ secrets.NPM_TOKEN }}
|
||||
|
||||
- name: Create Release Pull Request
|
||||
uses: changesets/action@v1
|
||||
with:
|
||||
# Note: pnpm install after versioning is necessary to refresh lockfile
|
||||
version: pnpm run version
|
||||
publish: pnpm release
|
||||
env:
|
||||
GITHUB_TOKEN: ${{ secrets.GITHUB_TOKEN }}
|
||||
NPM_TOKEN: ${{ secrets.NPM_TOKEN }}
|
||||
NPM_CONFIG_PROVENANCE: true
|
||||
19
.github/workflows/release.yml
vendored
19
.github/workflows/release.yml
vendored
@@ -19,19 +19,26 @@ jobs:
|
||||
- name: Checkout Repo
|
||||
uses: actions/checkout@v4
|
||||
|
||||
- uses: ruby/setup-ruby@v1
|
||||
with:
|
||||
bundler-cache: true
|
||||
|
||||
- name: Enable corepack
|
||||
run: corepack enable pnpm
|
||||
|
||||
- name: Setup Node.js 18
|
||||
uses: actions/setup-node@v4
|
||||
with:
|
||||
node-version: 20
|
||||
|
||||
- name: Install PNPM
|
||||
uses: pnpm/action-setup@v4
|
||||
with:
|
||||
version: 8
|
||||
cache: 'pnpm'
|
||||
node-version: 18
|
||||
registry-url: 'https://registry.npmjs.org'
|
||||
|
||||
- name: Install Dependencies
|
||||
run: pnpm install
|
||||
|
||||
- name: Build Package
|
||||
run: pnpm run build
|
||||
|
||||
- name: Creating .npmrc
|
||||
run: |
|
||||
cat << EOF > "$HOME/.npmrc"
|
||||
|
||||
2
.github/workflows/test.yml
vendored
2
.github/workflows/test.yml
vendored
@@ -5,7 +5,7 @@ on:
|
||||
types: [ opened, reopened ]
|
||||
|
||||
env:
|
||||
NODE: 20
|
||||
NODE: 18
|
||||
|
||||
permissions:
|
||||
contents: read
|
||||
|
||||
1
.gitignore
vendored
1
.gitignore
vendored
@@ -22,6 +22,7 @@ node_modules/
|
||||
/src/pages/playground.html
|
||||
/src/pages/playground-*.html
|
||||
/src/pages/features.html
|
||||
vendor/
|
||||
|
||||
.pnp.loader.mjs
|
||||
.pnp.cjs
|
||||
|
||||
3
.percy.yml
Normal file
3
.percy.yml
Normal file
@@ -0,0 +1,3 @@
|
||||
version: 1
|
||||
snapshot:
|
||||
widths: [1440]
|
||||
1
.ruby-version
Normal file
1
.ruby-version
Normal file
@@ -0,0 +1 @@
|
||||
3.2.2
|
||||
96
CHANGELOG.md
96
CHANGELOG.md
@@ -1,101 +1,7 @@
|
||||
# Changelog
|
||||
|
||||
## `1.0.0-beta23` - 2025-01-07
|
||||
All notable changes to this project will be documented in this file.
|
||||
|
||||
- Documentation improvements.
|
||||
- Added countup functionality and updated documentation example.
|
||||
- Do not display empty `<fieldset>`.
|
||||
- Set font-size of webfont icon inside a button.
|
||||
- Ordered menu items alphabetically.
|
||||
- Marked value of `$font-family-monospace` as `!default`.
|
||||
- Fixed unpkg links to static-files icons.
|
||||
- Fixed description of alerts with a description.
|
||||
- Fixed layout of search results for small and medium screens.
|
||||
- Removed invalid z-index setting for dropdown.
|
||||
- Fixed IDs of custom size star ratings.
|
||||
- Removed text-decoration on hover for elements with child icons.
|
||||
- Fixed link to webfont icons.
|
||||
- Updated color reference links in UI component documentation.
|
||||
- Fixed typo in browser support documentation summary.
|
||||
- Enhanced Figma plugin documentation with detailed usage instructions.
|
||||
- Added documentation for Tabler Illustrations and updated index with a link.
|
||||
- Enhanced documentation for various UI and icon sections.
|
||||
- Added new documentation files for icons and UI components; restructured existing files.
|
||||
- Updated documentation structure and content for icons and UI components.
|
||||
- Removed outdated `menu.json` and added `index.mdx` files for UI documentation structure.
|
||||
- General docs update.
|
||||
- Increased contrast of active dropdown-item in vertical layout.
|
||||
- Removed duplicated color setting in table headers.
|
||||
- Increased `z-index` of `ts-dropdown`.
|
||||
- Added social icons plugin.
|
||||
- Described variables for datagrid in docs.
|
||||
- Fixed multiple documentation issues.
|
||||
- Removed unused config from the code.
|
||||
- Fixed links to Tabler Icons.
|
||||
- Updated dark image.
|
||||
- Updated screenshot.
|
||||
- Fixed icon issues.
|
||||
- Fixed URL in documentation.
|
||||
|
||||
## `1.0.0-beta22` - 2025-01-02
|
||||
|
||||
- Fixed `@charset` CSS declaration in bundle.
|
||||
- Fixed cells with inline icons.
|
||||
- Fixed padding in code blocks.
|
||||
- Fixed colors in date range datepicker.
|
||||
- Fixed icon display issues in the Star Ratings component.
|
||||
- Fixed `z-index` value of the `nav-tab` inside `card-tab`.
|
||||
- Fixed wrong gray colors.
|
||||
- Fixed incorrect CDN URL in `webfont.mdx`.
|
||||
- Ensured border color works in dark mode.
|
||||
- Replaced `.page-center` with `.my-auto` in single-page layouts.
|
||||
- Updated Tabler Emails to v2.0.
|
||||
- Updated Tabler Icons to v3.26.0.
|
||||
- Updated docs structure.
|
||||
- Updated `download.mdx`.
|
||||
- Updated Node.js to version 20.
|
||||
- Improved base font family.
|
||||
- Made horizontal rule direction-aware.
|
||||
- Added new payment providers.
|
||||
- Read changelog from `CHANGELOG.md` file.
|
||||
- Initialized VS Code configuration.
|
||||
|
||||
## `1.0.0-beta21` - 2024-09-8
|
||||
|
||||
- Updated dependencies.
|
||||
- Updated Tabler Icons to v3.14.0 and the import script.
|
||||
- Fixed invisible scrollbar in dark mode when navigating the preview.
|
||||
- Styled `btn-close` specifically for `.modal-header`.
|
||||
- Added proper borders to the ribbon start class.
|
||||
- Changed brand color.
|
||||
- Included `docs` in the `npm` package.
|
||||
- Added Tabler Illustrations.
|
||||
- Fixed use of the secondary color in specific form elements.
|
||||
- Introduced Docker Compose Config for local Tabler builds.
|
||||
- Allowed usage of `tinymce` v7.x as a peer dependency.
|
||||
- Updated TinyMCE to v7.0.
|
||||
- Rebranded Twitter to X.
|
||||
- Replaced undraw illustrations with Tabler Illustrations.
|
||||
- Added punctuation to `SECURITY.md`.
|
||||
- Updated `_navbar.scss` to correct disabled dropdown menu item colors.
|
||||
- Removed unused packages.
|
||||
- Fixed map pages.
|
||||
- Resolved issues with toasts in dark mode.
|
||||
- Fixed alert background prefix.
|
||||
- Corrected a typo in CHANGELOG.md.
|
||||
- Fixed radial chart issue.
|
||||
- Added documentation on running the site locally in Site README.
|
||||
- Updated colors in `colors.mdx`.
|
||||
- Fixed dynamic SCSS prefix in mixins.
|
||||
- Changed `<h1>` to `<div>` in `navbar-logo.html`.
|
||||
- Resolved vertical centering on error pages.
|
||||
- Fixed navbar menu issues.
|
||||
- Added `background-clip: border-box` to `.dropdown-menu` class.
|
||||
- Replaced `href="#"` with `href="javascript:void(0)"`.
|
||||
- Fixed disabled CSS class for links.
|
||||
- Addressed missing variables and minor color adjustments.
|
||||
- Improved heights, scrolls, and layouts in Docs examples.
|
||||
- Fixed flags display in preview.
|
||||
|
||||
## `1.0.0-beta20` - 2023-08-24
|
||||
|
||||
|
||||
47
Gemfile.lock
47
Gemfile.lock
@@ -1,28 +1,24 @@
|
||||
GEM
|
||||
remote: https://rubygems.org/
|
||||
specs:
|
||||
addressable (2.8.7)
|
||||
public_suffix (>= 2.0.2, < 7.0)
|
||||
bigdecimal (3.1.9)
|
||||
addressable (2.8.6)
|
||||
public_suffix (>= 2.0.2, < 6.0)
|
||||
bigdecimal (3.1.8)
|
||||
colorator (1.1.0)
|
||||
concurrent-ruby (1.3.4)
|
||||
concurrent-ruby (1.2.3)
|
||||
em-websocket (0.5.3)
|
||||
eventmachine (>= 0.12.9)
|
||||
http_parser.rb (~> 0)
|
||||
eventmachine (1.2.7)
|
||||
ffi (1.17.1)
|
||||
ffi (1.17.1-arm64-darwin)
|
||||
ffi (1.16.3)
|
||||
forwardable-extended (2.6.0)
|
||||
google-protobuf (4.29.2)
|
||||
google-protobuf (4.27.5)
|
||||
bigdecimal
|
||||
rake (>= 13)
|
||||
google-protobuf (4.29.2-arm64-darwin)
|
||||
bigdecimal
|
||||
rake (>= 13)
|
||||
htmlbeautifier (1.4.3)
|
||||
htmlbeautifier (1.4.2)
|
||||
htmlcompressor (0.4.0)
|
||||
http_parser.rb (0.8.0)
|
||||
i18n (1.14.6)
|
||||
i18n (1.14.4)
|
||||
concurrent-ruby (~> 1.0)
|
||||
jekyll (4.3.3)
|
||||
addressable (~> 2.4)
|
||||
@@ -54,8 +50,8 @@ GEM
|
||||
mini_i18n (>= 0.8.0)
|
||||
jekyll-watch (2.2.1)
|
||||
listen (~> 3.0)
|
||||
kramdown (2.5.1)
|
||||
rexml (>= 3.3.9)
|
||||
kramdown (2.4.0)
|
||||
rexml
|
||||
kramdown-parser-gfm (1.1.0)
|
||||
kramdown (~> 2.0)
|
||||
liquid (4.0.4)
|
||||
@@ -66,26 +62,23 @@ GEM
|
||||
mini_i18n (0.9.0)
|
||||
pathutil (0.16.2)
|
||||
forwardable-extended (~> 2.6)
|
||||
public_suffix (6.0.1)
|
||||
public_suffix (5.0.5)
|
||||
rake (13.2.1)
|
||||
rb-fsevent (0.11.2)
|
||||
rb-inotify (0.11.1)
|
||||
rb-inotify (0.10.1)
|
||||
ffi (~> 1.0)
|
||||
rexml (3.4.0)
|
||||
rouge (4.5.1)
|
||||
rexml (3.3.9)
|
||||
rouge (4.2.1)
|
||||
safe_yaml (1.0.5)
|
||||
sass-embedded (1.83.0)
|
||||
google-protobuf (~> 4.28)
|
||||
rake (>= 13)
|
||||
sass-embedded (1.83.0-arm64-darwin)
|
||||
google-protobuf (~> 4.28)
|
||||
sass-embedded (1.75.0)
|
||||
google-protobuf (>= 3.25, < 5.0)
|
||||
rake (>= 13.0.0)
|
||||
terminal-table (3.0.2)
|
||||
unicode-display_width (>= 1.1.1, < 3)
|
||||
unicode-display_width (2.6.0)
|
||||
webrick (1.9.1)
|
||||
unicode-display_width (2.5.0)
|
||||
webrick (1.8.2)
|
||||
|
||||
PLATFORMS
|
||||
arm64-darwin-24
|
||||
ruby
|
||||
|
||||
DEPENDENCIES
|
||||
@@ -96,4 +89,4 @@ DEPENDENCIES
|
||||
jekyll-timeago
|
||||
|
||||
BUNDLED WITH
|
||||
2.6.2
|
||||
2.4.19
|
||||
|
||||
2
LICENSE
2
LICENSE
@@ -1,6 +1,6 @@
|
||||
The MIT License (MIT)
|
||||
|
||||
Copyright (c) 2018-2025 The Tabler Authors
|
||||
Copyright (c) 2018-2023 The Tabler Authors
|
||||
|
||||
Permission is hereby granted, free of charge, to any person obtaining a copy
|
||||
of this software and associated documentation files (the "Software"), to deal
|
||||
|
||||
18
README.md
18
README.md
@@ -13,29 +13,12 @@ A premium and open source dashboard template with a responsive and high-quality
|
||||
<a href="https://github.com/tabler/tabler" target="__blank"><img alt="GitHub stars" src="https://img.shields.io/github/stars/tabler/tabler?style=social"></a>
|
||||
</p>
|
||||
|
||||
## Sponsors
|
||||
|
||||
**If you want to support our project and help me grow it, you can [become a sponsor on GitHub](https://github.com/sponsors/codecalm) or just [donate on PayPal](https://paypal.me/codecalm) :)**
|
||||
|
||||
<p align="center">
|
||||
<a href="https://github.com/sponsors/codecalm">
|
||||
<img src='https://raw.githubusercontent.com/tabler/static/main/sponsors.svg'>
|
||||
</a>
|
||||
</p>
|
||||
|
||||
## Testing
|
||||
|
||||
<p align="center">Browser testing via:</p>
|
||||
|
||||
<p align="center">
|
||||
<a href="https://www.lambdatest.com/" target="_blank">
|
||||
<picture>
|
||||
<source media="(prefers-color-scheme: dark)" srcset="https://github.com/user-attachments/assets/14dd2a0a-bafe-436e-a6cb-29636278c781">
|
||||
<source media="(prefers-color-scheme: light)" srcset="https://github.com/user-attachments/assets/d3dede5a-d702-47c3-bb66-4d887948ed83">
|
||||
<img src="https://github.com/user-attachments/assets/d3dede5a-d702-47c3-bb66-4d887948ed83" alt="Tabler Icons preview" width="296">
|
||||
</picture>
|
||||
</a>
|
||||
</p>
|
||||
|
||||
## 🔎 Preview
|
||||
|
||||
@@ -85,6 +68,7 @@ Support this project by becoming a sponsor. Your logo will show up in this READM
|
||||
<a href="https://opencollective.com/tabler/tiers/sponsor/8/website" target="_blank"><img src="https://opencollective.com/tabler/tiers/sponsor/8/avatar.svg" /></a>
|
||||
<a href="https://opencollective.com/tabler/tiers/sponsor/9/website" target="_blank"><img src="https://opencollective.com/tabler/tiers/sponsor/9/avatar.svg" /></a>
|
||||
|
||||
|
||||
## 📦 Setup environment
|
||||
|
||||
To use our build system and run our documentation locally, you'll need a copy of Tabler's source files. Follow the steps below:
|
||||
|
||||
@@ -45,10 +45,8 @@ plugins:
|
||||
|
||||
tabler-css-plugins:
|
||||
- tabler-flags
|
||||
- tabler-socials
|
||||
- tabler-payments
|
||||
- tabler-vendors
|
||||
- tabler-marketing
|
||||
|
||||
exclude:
|
||||
- .jekyll-cache
|
||||
@@ -267,10 +265,11 @@ months-short: ['Jan', 'Feb', 'Mar', 'Apr', 'May', 'Jun', 'Jul', 'Aug', 'Sep', 'O
|
||||
months-long: ['January', 'February', 'March', 'April', 'May', 'June', 'July', 'August', 'September', 'October', 'November', 'December']
|
||||
|
||||
icons:
|
||||
link: https://tabler.io/icons
|
||||
link: https://tabler-icons.io
|
||||
|
||||
emails:
|
||||
price: "$29"
|
||||
count: 54
|
||||
buy_link: https://r.tabler.io/buy-emails
|
||||
|
||||
illustrations:
|
||||
|
||||
25
docs/base/colors.mdx
Normal file
25
docs/base/colors.mdx
Normal file
@@ -0,0 +1,25 @@
|
||||
---
|
||||
title: Colors
|
||||
description: The choice of colors for a website or app interface has an big influence on how users interact with the product and what decisions they make. Harmonic colors can contribute to a nice first impression and encourage users to engage with your product, so it's a very important aspect of a successful design, which needs to be well thought out.
|
||||
bootstrapLink: utilities/colors/
|
||||
---
|
||||
|
||||
## Base colors
|
||||
|
||||
Choose one of the available colors from the basic color palette and make your design attractive for users. You can use the colors to customize the design of components, indicate different states or suggest actions you want users to take.
|
||||
|
||||
<ColorsTable name="base" />
|
||||
|
||||
## Light colors
|
||||
|
||||
All available colors can come in pastel shades, which are perfect for more subtle designs and can be easily combined with the basic palette to create eye-catching designs.
|
||||
|
||||
<ColorsTable name="light" />
|
||||
|
||||
## Gray palette
|
||||
|
||||
<ColorsTable name="grays" />
|
||||
|
||||
## Social colors
|
||||
|
||||
<ColorsTable name="social" />
|
||||
@@ -1,16 +1,14 @@
|
||||
---
|
||||
title: Typography
|
||||
summary: Typography plays an important role in creating an attractive and clear interface design. Good typography will make the content easy to follow and improve the usability of your website.
|
||||
description: Typography plays an important role in creating an attractive and clear interface design. Good typography will make the content easy to follow and improve the usability of your website.
|
||||
bootstrapLink: content/typography/
|
||||
description: Role of typography in interface design.
|
||||
---
|
||||
|
||||
## Headings
|
||||
|
||||
Use HTML headings to organize content on your website and make the structure clear and user-friendly. The `h1` to `h6` tags are used to define HTML headings.
|
||||
The `h1` tag is the highest level and the `h6` tag is the lowest level.
|
||||
Use HTML headings to organize content on your website and make the structure clear and user-friendly.
|
||||
|
||||
```html
|
||||
```html example vertical
|
||||
<h1>H1 Heading</h1>
|
||||
<h2>H2 Heading</h2>
|
||||
<h3>H3 Heading</h3>
|
||||
@@ -19,9 +17,7 @@ The `h1` tag is the highest level and the `h6` tag is the lowest level.
|
||||
<h6>H6 Heading</h6>
|
||||
```
|
||||
|
||||
There is example of headings with different levels:
|
||||
|
||||
```html example vertical columns={1}
|
||||
```html
|
||||
<h1>H1 Heading</h1>
|
||||
<h2>H2 Heading</h2>
|
||||
<h3>H3 Heading</h3>
|
||||
@@ -32,13 +28,7 @@ There is example of headings with different levels:
|
||||
|
||||
## Paragraphs
|
||||
|
||||
Organize longer pieces of text into paragraphs using the `p` tag. It is the most common element for text content.
|
||||
|
||||
```html
|
||||
<p>At vero eos et accusam et justo duo dolores et ea rebum.</p>
|
||||
```
|
||||
|
||||
If you use second paragraph, it will be separated from the first one by a blank line.
|
||||
Organize longer pieces of text into paragraphs using the `p` tag.
|
||||
|
||||
```html example vertical centered columns={2}
|
||||
<div>
|
||||
@@ -47,10 +37,34 @@ If you use second paragraph, it will be separated from the first one by a blank
|
||||
</div>
|
||||
```
|
||||
|
||||
```html
|
||||
<p>Lorem ipsum dolor sit amet, consetetur sadipscing elitr, sed diam nonumy eirmod tempor invidunt ut labore et dolore magna aliquyam erat, sed diam voluptua.</p>
|
||||
<p>At vero eos et accusam et justo duo dolores et ea rebum.</p>
|
||||
```
|
||||
|
||||
## Semantic text elements
|
||||
|
||||
Use a variety of semantic text elements, depending of how you want to display particular fragments of content.
|
||||
Use a variety of semantic text elements, depending of how you want to display particular fragments of content.
|
||||
|
||||
```html example vertical separated columns={1}
|
||||
<div><abbr title="Internationalization">I1f8N</abbr></div>
|
||||
<div><strong>Bold</strong></div>
|
||||
<div><cite>Citation</cite></div>
|
||||
<div><code>Hello World!</code></div>
|
||||
<div><del>Deleted</del></div>
|
||||
<div><em>Emphasis</em></div>
|
||||
<div><i>Italic</i></div>
|
||||
<div><ins>Inserted</ins></div>
|
||||
<div><kbd>Ctrl + S</kbd></div>
|
||||
<div><mark>Highlighted</mark></div>
|
||||
<div><s>Strikethrough</s></div>
|
||||
<div><samp>Sample</samp></div>
|
||||
<div>Text <sub>Subscripted</sub></div>
|
||||
<div>Text <sup>Superscripted</sup></div>
|
||||
<div><time>20:00</time></div>
|
||||
<div><u>Underline</u></div>
|
||||
<div><var>x</var> = <var>y</var> + 2</div>
|
||||
```
|
||||
|
||||
```html
|
||||
<abbr title="Internationalization">I18N</abbr>
|
||||
@@ -72,60 +86,6 @@ Text <sup>Superscripted</sup>
|
||||
<var>x</var> = <var>y</var> + 2
|
||||
```
|
||||
|
||||
Here is an example of semantic text elements:
|
||||
|
||||
```html example vertical separated columns={1}
|
||||
<div>
|
||||
<abbr title="Internationalization">I1f8N</abbr>
|
||||
</div>
|
||||
<div><strong>Bold</strong></div>
|
||||
<div>
|
||||
<cite>Citation</cite>
|
||||
</div>
|
||||
<div>
|
||||
<code>Hello World!</code>
|
||||
</div>
|
||||
<div>
|
||||
<del>Deleted</del>
|
||||
</div>
|
||||
<div>
|
||||
<em>Emphasis</em>
|
||||
</div>
|
||||
<div>
|
||||
<i>Italic</i>
|
||||
</div>
|
||||
<div>
|
||||
<ins>Inserted</ins>
|
||||
</div>
|
||||
<div>
|
||||
<kbd>Ctrl + S</kbd>
|
||||
</div>
|
||||
<div>
|
||||
<mark>Highlighted</mark>
|
||||
</div>
|
||||
<div>
|
||||
<s>Strikethrough</s>
|
||||
</div>
|
||||
<div>
|
||||
<samp>Sample</samp>
|
||||
</div>
|
||||
<div>Text <sub>Subscripted</sub>
|
||||
</div>
|
||||
<div>Text <sup>Superscripted</sup>
|
||||
</div>
|
||||
<div>
|
||||
<time>20:00</time>
|
||||
</div>
|
||||
<div>
|
||||
<u>Underline</u>
|
||||
</div>
|
||||
<div>
|
||||
<var>x</var> = <var>y</var> + 2
|
||||
</div>
|
||||
```
|
||||
|
||||
|
||||
|
||||
## Horizontal rules
|
||||
|
||||
Use the `hr` tag to represent a thematic break between paragraphs within one section.
|
||||
@@ -146,7 +106,7 @@ Use the `hr` tag to represent a thematic break between paragraphs within one sec
|
||||
|
||||
You can also add a label to a horizontal rule and align it as you see fit.
|
||||
|
||||
```html example vertical centered columns={2}
|
||||
```html code example vertical centered columns={2}
|
||||
<p>
|
||||
Lorem ipsum dolor sit amet, consetetur sadipscing elitr, sed diam nonumy eirmod tempor invidunt ut labore et dolore magna aliquyam erat, sed diam voluptua.
|
||||
</p>
|
||||
@@ -186,11 +146,40 @@ Tabler has been optimized to correctly display content in any language. It suppo
|
||||
<p>อักษรไทย</p>
|
||||
```
|
||||
|
||||
```html
|
||||
<h5>Chinese</h5>
|
||||
<p>汉字</p>
|
||||
|
||||
<h5>Japanese</h5>
|
||||
<p>日本語の表記体系</p>
|
||||
|
||||
<h5>Cyrillic</h5>
|
||||
<p>Кириллица</p>
|
||||
|
||||
<h5>Greek</h5>
|
||||
<p>Eλληνική</p>
|
||||
|
||||
<h5>Georgian</h5>
|
||||
<p>ქართული დამწერლობა</p>
|
||||
|
||||
<h5>Armenian</h5>
|
||||
<p>Հայերենի այբուբեն</p>
|
||||
|
||||
<h5>Arabic</h5>
|
||||
<p>الحروف العربية</p>
|
||||
|
||||
<h5>Hebrew</h5>
|
||||
<p>אלפבית עברי</p>
|
||||
|
||||
<h5>Thai</h5>
|
||||
<p>อักษรไทย</p>
|
||||
```
|
||||
|
||||
## Text transform
|
||||
|
||||
Transform the content of components with text capitalization classes.
|
||||
|
||||
```html example vertical centered separated columns={1}
|
||||
```html example vertical
|
||||
<div class="text-lowercase">Lowercased text.</div>
|
||||
<div class="text-uppercase">Uppercased text.</div>
|
||||
<div class="text-capitalize">Capitalized text.</div>
|
||||
@@ -206,7 +195,7 @@ Transform the content of components with text capitalization classes.
|
||||
|
||||
Control the tracking (letter spacing) of an element and make it tight, wide or normal.
|
||||
|
||||
```html example vertical centered separated columns={1}
|
||||
```html example vertical
|
||||
<div class="tracking-tight">Lorem ipsum dolor sit amet. Tight letter spacing.</div>
|
||||
<div class="tracking-normal">Lorem ipsum dolor sit amet. Normal letter spacing.</div>
|
||||
<div class="tracking-wide">Lorem ipsum dolor sit amet. Wide letter spacing.</div>
|
||||
@@ -222,28 +211,44 @@ Control the tracking (letter spacing) of an element and make it tight, wide or n
|
||||
|
||||
Control the leading (line height) of an element.
|
||||
|
||||
```html example vertical centered separated columns={1} height="20rem"
|
||||
<p class="lh-1">
|
||||
This is the long text with line height 1. Lorem ipsum dolor sit amet. Dolor sit amet.
|
||||
</p>
|
||||
<p class="lh-sm">
|
||||
This is the long text with small line height. Lorem ipsum dolor sit amet. Dolor sit amet.
|
||||
</p>
|
||||
<p class="lh-base">
|
||||
This is the long text with base line height. Lorem ipsum dolor sit amet. Dolor sit amet.
|
||||
</p>
|
||||
<p class="lh-lg">
|
||||
This is the long text with large line height. Lorem ipsum dolor sit amet. Dolor sit amet.
|
||||
</p>
|
||||
```html example
|
||||
<div class="row">
|
||||
<div class="col">
|
||||
<div class="card">
|
||||
<div class="card-body">
|
||||
<div class="lh-1">Lorem ipsum dolor sit amet. Dolor sit amet.</div>
|
||||
</div>
|
||||
</div>
|
||||
</div>
|
||||
<div class="col">
|
||||
<div class="card">
|
||||
<div class="card-body">
|
||||
<div class="lh-sm">Lorem ipsum dolor sit amet. Dolor sit amet.</div>
|
||||
</div>
|
||||
</div>
|
||||
</div>
|
||||
<div class="col">
|
||||
<div class="card">
|
||||
<div class="card-body">
|
||||
<div class="lh-base">Lorem ipsum dolor sit amet. Dolor sit amet.</div>
|
||||
</div>
|
||||
</div>
|
||||
</div>
|
||||
<div class="col">
|
||||
<div class="card">
|
||||
<div class="card-body">
|
||||
<div class="lh-lg">Lorem ipsum dolor sit amet. Dolor sit amet.</div>
|
||||
</div>
|
||||
</div>
|
||||
</div>
|
||||
</div>
|
||||
```
|
||||
|
||||
To control the line height of an element, use the following classes:
|
||||
|
||||
```html
|
||||
<p class="lh-1">...</p>
|
||||
<p class="lh-sm">...</p>
|
||||
<p class="lh-base">...</p>
|
||||
<p class="lh-lg">...</p>
|
||||
<p class="lh-1">Lorem ipsum dolor sit amet. Dolor sit amet.</p>
|
||||
<p class="lh-sm">Lorem ipsum dolor sit amet. Dolor sit amet.</p>
|
||||
<p class="lh-base">Lorem ipsum dolor sit amet. Dolor sit amet.</p>
|
||||
<p class="lh-lg">Lorem ipsum dolor sit amet. Dolor sit amet.</p>
|
||||
```
|
||||
|
||||
## Antialiasing
|
||||
@@ -252,7 +257,7 @@ Control the font smoothing of an element.
|
||||
|
||||
Use the `.antialiased` utility to render text using subpixel antialiasing or use the `.subpixel-antialiased` utility to remove antialiasing.
|
||||
|
||||
```html example vertical centered separated columns={1}
|
||||
```html code example
|
||||
<div class="antialiased">Text with antialiasing</div>
|
||||
<div class="subpixel-antialiased">Text without antialiasing</div>
|
||||
```
|
||||
@@ -261,7 +266,7 @@ Use the `.antialiased` utility to render text using subpixel antialiasing or use
|
||||
|
||||
Use the `<kbd>` to indicate input that is typically entered via keyboard.
|
||||
|
||||
```html example vertical centered
|
||||
```html example centered
|
||||
<div>
|
||||
To edit settings, press <kbd>ctrl</kbd> + <kbd>,</kbd> or <kbd>ctrl</kbd> + <kbd>C</kbd>.
|
||||
</div>
|
||||
@@ -273,9 +278,9 @@ To edit settings, press <kbd>ctrl</kbd> + <kbd>,</kbd> or <kbd>ctrl</kbd> + <kbd
|
||||
|
||||
## Markdown elements
|
||||
|
||||
If you can't use the CSS classes you want or if you just want to use HTML tags, use the `.markdown` class in a container. It will apply the default styles for markdown elements.
|
||||
If you can't use the CSS classes you want or if you just want to use HTML tags, use the `.markdown` class in a container. It can handle almost any HTML tag.
|
||||
|
||||
```html example centered background="white" columns={2} height="30rem"
|
||||
```html code example centered background="white" columns={2} height="30rem"
|
||||
<div class="markdown">
|
||||
<h1>Hello World</h1>
|
||||
<p>Lorem ipsum<sup>[1]</sup> dolor sit amet, consectetur adipiscing elit. Nulla accumsan, metus ultrices eleifend gravida, nulla nunc varius lectus, nec rutrum justo nibh eu lectus. Ut vulputate semper dui. Fusce erat odio, sollicitudin vel erat vel, interdum mattis neque. Sub<sub>script</sub> works as well!</p>
|
||||
@@ -1,15 +1,14 @@
|
||||
---
|
||||
title: Alerts
|
||||
summary: Alert messages are used to inform users of the status of their action and help them solve any problems that might have occurred. Good design of alert modals is very important for the overall user experience of a website or app.
|
||||
description: Alert messages are used to inform users of the status of their action and help them solve any problems that might have occurred. Good design of alert modals is very important for the overall user experience of a website or app.
|
||||
bootstrapLink: components/alerts/
|
||||
description: Alert messages for user notifications.
|
||||
---
|
||||
|
||||
## Default markup
|
||||
|
||||
Depending on the information you need to convey, you can use one of the following types of alert messages - **success**, **info**, **warning** or **danger**. Using the right type of alert modal will help draw users' attention to the message and prompt them to take action.
|
||||
|
||||
```html example vertical background="surface" columns={2} centered separated
|
||||
```html example vertical height="420px"
|
||||
<div class="alert alert-success" role="alert">
|
||||
<h4 class="alert-title">Wow! Everything worked!</h4>
|
||||
<div class="text-secondary">Your account has been saved!</div>
|
||||
@@ -39,7 +38,7 @@ Depending on the information you need to convey, you can use one of the followin
|
||||
|
||||
Add a link to your alert message to redirect users to the details they need to complete or additional information they should read.
|
||||
|
||||
```html example vertical background="surface" columns={2} centered
|
||||
```html example vertical code height="7rem"
|
||||
<div class="alert alert-danger m-0">
|
||||
This is a danger alert — <a href="#" class="alert-link">check it out</a>!
|
||||
</div>
|
||||
@@ -49,7 +48,7 @@ Add a link to your alert message to redirect users to the details they need to c
|
||||
|
||||
Add the `x` close button to make an alert modal dismissible. Thanks to that, your alert modal will disappear only once the user closes it.
|
||||
|
||||
```html example vertical background="surface" columns={2} centered separated
|
||||
```html example height="420px"
|
||||
<div class="alert alert-success alert-dismissible" role="alert">
|
||||
<div class="d-flex">
|
||||
<div>
|
||||
@@ -121,7 +120,7 @@ Add the `x` close button to make an alert modal dismissible. Thanks to that, you
|
||||
<div class="alert alert-success alert-dismissible" role="alert">
|
||||
<div class="d-flex">
|
||||
<div>
|
||||
<!-- SVG icon from http://tabler.io/icons/icon/check -->
|
||||
<!-- SVG icon from http://tabler-icons.io/i/check -->
|
||||
<svg>...</svg>
|
||||
</div>
|
||||
<div>
|
||||
@@ -137,24 +136,7 @@ Add the `x` close button to make an alert modal dismissible. Thanks to that, you
|
||||
|
||||
Add an icon to your alert modal to make it more user-friendly and help users easily identify the message.
|
||||
|
||||
```html
|
||||
<div class="alert alert-success" role="alert">
|
||||
<div class="d-flex">
|
||||
<div>
|
||||
<!-- SVG icon from http://tabler.io/icons/icon/check -->
|
||||
<svg>...</svg>
|
||||
</div>
|
||||
<div>
|
||||
<h4 class="alert-title">Wow! Everything worked!</h4>
|
||||
<div class="text-secondary">Your account has been saved!</div>
|
||||
</div>
|
||||
</div>
|
||||
</div>
|
||||
```
|
||||
|
||||
To see how the icon affects the alert modal, look at the example below.
|
||||
|
||||
```html example vertical background="surface" columns={2} centered separated
|
||||
```html example height="420px"
|
||||
<div class="alert alert-success" role="alert">
|
||||
<div class="d-flex">
|
||||
<div>
|
||||
@@ -218,17 +200,66 @@ To see how the icon affects the alert modal, look at the example below.
|
||||
</div>
|
||||
```
|
||||
|
||||
|
||||
```html
|
||||
<div class="alert alert-success" role="alert">
|
||||
<div class="d-flex">
|
||||
<div>
|
||||
<!-- SVG icon from http://tabler-icons.io/i/check -->
|
||||
<svg>...</svg>
|
||||
</div>
|
||||
<div>
|
||||
<h4 class="alert-title">Wow! Everything worked!</h4>
|
||||
<div class="text-secondary">Your account has been saved!</div>
|
||||
</div>
|
||||
</div>
|
||||
</div>
|
||||
<div class="alert alert-info" role="alert">
|
||||
<div class="d-flex">
|
||||
<div>
|
||||
<!-- SVG icon from http://tabler-icons.io/i/info-circle -->
|
||||
<svg>...</svg>
|
||||
</div>
|
||||
<div>
|
||||
<h4 class="alert-title">Did you know?</h4>
|
||||
<div class="text-secondary">Here is something that you might like to know.</div>
|
||||
</div>
|
||||
</div>
|
||||
</div>
|
||||
<div class="alert alert-warning" role="alert">
|
||||
<div class="d-flex">
|
||||
<div>
|
||||
<!-- SVG icon from http://tabler-icons.io/i/alert-triangle -->
|
||||
<svg>...</svg>
|
||||
</div>
|
||||
<div>
|
||||
<h4 class="alert-title">Uh oh, something went wrong</h4>
|
||||
<div class="text-secondary">Sorry! There was a problem with your request.</div>
|
||||
</div>
|
||||
</div>
|
||||
</div>
|
||||
<div class="alert alert-danger" role="alert">
|
||||
<div class="d-flex">
|
||||
<div>
|
||||
<!-- SVG icon from http://tabler-icons.io/i/alert-circle -->
|
||||
<svg>...</svg>
|
||||
</div>
|
||||
<div>
|
||||
<h4 class="alert-title">I'm so sorry…</h4>
|
||||
<div class="text-secondary">Your account has been deleted and can't be restored.</div>
|
||||
</div>
|
||||
</div>
|
||||
</div>
|
||||
```
|
||||
|
||||
## Alert with avatar
|
||||
|
||||
Add an avatar to your alert modal to make it more personalized.
|
||||
|
||||
```html example vertical background="surface" columns={2} centered separated
|
||||
```html code example height="420px"
|
||||
<div class="alert alert-success" role="alert">
|
||||
<div class="d-flex">
|
||||
<div>
|
||||
<span class="avatar me-3" style="background-image: url(/static/samples/avatars/039m.jpg)"></span>
|
||||
<span class="avatar float-start me-3"></span>
|
||||
</div>
|
||||
<div>
|
||||
Lorem ipsum dolor sit amet, consectetur adipisicing elit. Lorem ipsum dolor sit amet, consectetur adipisicing elit. Lorem ipsum dolor sit amet, consectetur adipisicing elit.
|
||||
@@ -238,7 +269,7 @@ Add an avatar to your alert modal to make it more personalized.
|
||||
<div class="alert alert-info" role="alert">
|
||||
<div class="d-flex">
|
||||
<div>
|
||||
<span class="avatar me-3">JL</span>
|
||||
<span class="avatar float-start me-3">JL</span>
|
||||
</div>
|
||||
<div>
|
||||
Lorem ipsum dolor sit amet, consectetur adipisicing elit. Lorem ipsum dolor sit amet, consectetur adipisicing elit. Lorem ipsum dolor sit amet, consectetur adipisicing elit.
|
||||
@@ -248,7 +279,7 @@ Add an avatar to your alert modal to make it more personalized.
|
||||
<div class="alert alert-warning" role="alert">
|
||||
<div class="d-flex">
|
||||
<div>
|
||||
<span class="avatar me-3" style="background-image: url(/static/samples/avatars/035f.jpg)"></span>
|
||||
<span class="avatar float-start me-3"></span>
|
||||
</div>
|
||||
<div>
|
||||
Lorem ipsum dolor sit amet, consectetur adipisicing elit. Lorem ipsum dolor sit amet, consectetur adipisicing elit. Lorem ipsum dolor sit amet, consectetur adipisicing elit.
|
||||
@@ -258,7 +289,7 @@ Add an avatar to your alert modal to make it more personalized.
|
||||
<div class="alert alert-danger" role="alert">
|
||||
<div class="d-flex">
|
||||
<div>
|
||||
<span class="avatar me-3" style="background-image: url(/static/samples/avatars/056f.jpg)"></span>
|
||||
<span class="avatar float-start me-3"></span>
|
||||
</div>
|
||||
<div>
|
||||
Lorem ipsum dolor sit amet, consectetur adipisicing elit. Lorem ipsum dolor sit amet, consectetur adipisicing elit. Lorem ipsum dolor sit amet, consectetur adipisicing elit.
|
||||
@@ -271,7 +302,7 @@ Add an avatar to your alert modal to make it more personalized.
|
||||
|
||||
Add primary and secondary buttons to your alert modals if you want users to take a particular action based on the information included in the modal message.
|
||||
|
||||
```html example vertical background="surface" columns={2} centered separated
|
||||
```html code example height="500px" scrollable
|
||||
<div class="alert alert-success alert-dismissible" role="alert">
|
||||
<h3 class="mb-1">Some Title</h3>
|
||||
<p>Lorem ipsum Minim ad pariatur eiusmod ea ut nulla aliqua est quis id dolore minim voluptate.</p>
|
||||
@@ -314,25 +345,18 @@ Add primary and secondary buttons to your alert modals if you want users to take
|
||||
|
||||
If you want your alert to be really eye-catching, you can add a class `alert-important`.
|
||||
|
||||
```html
|
||||
<div class="alert alert-important alert-success alert-dismissible" role="alert">
|
||||
...
|
||||
</div>
|
||||
```
|
||||
|
||||
Look at the example below to see how the important alert affects the alert modal.
|
||||
|
||||
```html example vertical background="surface" columns={2} centered separated
|
||||
```html example vertical height="210px"
|
||||
<div class="alert alert-important alert-success alert-dismissible" role="alert">
|
||||
<div class="d-flex">
|
||||
<div>
|
||||
<svg xmlns="http://www.w3.org/2000/svg" class="icon alert-icon" width="24" height="24" viewBox="0 0 24 24" stroke-width="2" stroke="currentColor" fill="none" stroke-linecap="round" stroke-linejoin="round">
|
||||
<path stroke="none" d="M0 0h24v24H0z" fill="none"></path>
|
||||
<path d="M5 12l5 5l10 -10"></path>
|
||||
</svg>
|
||||
</div>
|
||||
<div>
|
||||
Wow! Everything worked!
|
||||
<h4 class="alert-title">Wow! Everything worked!</h4>
|
||||
<div class="text-secondary">Your account has been saved!</div>
|
||||
</div>
|
||||
</div>
|
||||
<a class="btn-close btn-close-white" data-bs-dismiss="alert" aria-label="close"></a>
|
||||
@@ -353,3 +377,54 @@ Look at the example below to see how the important alert affects the alert modal
|
||||
</div>
|
||||
```
|
||||
|
||||
```html
|
||||
<div class="alert alert-important alert-success alert-dismissible" role="alert">
|
||||
<div class="d-flex">
|
||||
<div>
|
||||
<!-- SVG icon from http://tabler-icons.io/i/check -->
|
||||
<svg>...</svg>
|
||||
</div>
|
||||
<div>
|
||||
Your account has been saved!
|
||||
</div>
|
||||
</div>
|
||||
<a class="btn-close btn-close-white" data-bs-dismiss="alert" aria-label="close"></a>
|
||||
</div>
|
||||
<div class="alert alert-important alert-info alert-dismissible" role="alert">
|
||||
<div class="d-flex">
|
||||
<div>
|
||||
<!-- SVG icon from http://tabler-icons.io/i/info-circle -->
|
||||
<svg>...</svg>
|
||||
</div>
|
||||
<div>
|
||||
Here is something that you might like to know.
|
||||
</div>
|
||||
</div>
|
||||
<a class="btn-close btn-close-white" data-bs-dismiss="alert" aria-label="close"></a>
|
||||
</div>
|
||||
<div class="alert alert-important alert-warning alert-dismissible" role="alert">
|
||||
<div class="d-flex">
|
||||
<div>
|
||||
<!-- SVG icon from http://tabler-icons.io/i/alert-triangle -->
|
||||
<svg>...</svg>
|
||||
</div>
|
||||
<div>
|
||||
Sorry! There was a problem with your request.
|
||||
</div>
|
||||
</div>
|
||||
<a class="btn-close btn-close-white" data-bs-dismiss="alert" aria-label="close"></a>
|
||||
</div>
|
||||
<div class="alert alert-important alert-danger alert-dismissible" role="alert">
|
||||
<div class="d-flex">
|
||||
<div>
|
||||
<!-- SVG icon from http://tabler-icons.io/i/alert-circle -->
|
||||
<svg>...</svg>
|
||||
</div>
|
||||
<div>
|
||||
Your account has been deleted and can't be restored.
|
||||
</div>
|
||||
</div>
|
||||
<a class="btn-close btn-close-white" data-bs-dismiss="alert" aria-label="close"></a>
|
||||
</div>
|
||||
```
|
||||
|
||||
16
docs/components/autosize.mdx
Normal file
16
docs/components/autosize.mdx
Normal file
@@ -0,0 +1,16 @@
|
||||
---
|
||||
title: Autosize
|
||||
description: The autosize element will automatically adjust the textarea height and make it easier for users to follow as they type.
|
||||
libs: autosize
|
||||
---
|
||||
|
||||
To be able to use the autosize in your application you will need to install the autosize dependency with `npm install autosize`.
|
||||
|
||||
## Default markup
|
||||
|
||||
Add the autosize element to your input to make it automatically adjust to the length of a text as a user types it.
|
||||
|
||||
```html code example centered columns={1} scrollable
|
||||
<label class="form-label">Autosize example</label>
|
||||
<textarea class="form-control" data-bs-toggle="autosize" placeholder="Type something…"></textarea>
|
||||
```
|
||||
@@ -1,7 +1,6 @@
|
||||
---
|
||||
title: Avatars
|
||||
summary: Avatars help customise various elements of a user interface and make the product experience more personalised. They are often used in communication apps, collaboration tools and social media.
|
||||
description: Personalize UI with user avatars.
|
||||
description: Avatars help customise various elements of a user interface and make the product experience more personalised. They are often used in communication apps, collaboration tools and social media.
|
||||
---
|
||||
|
||||
## Default markup
|
||||
@@ -67,14 +66,14 @@ Apart from pictures and initials, you can also use icons to make the avatars mor
|
||||
|
||||
```html
|
||||
<span class="avatar">
|
||||
<!-- SVG icon from http://tabler.io/icons/icon/user -->
|
||||
<!-- SVG icon from http://tabler-icons.io/i/user -->
|
||||
<svg>...</svg>
|
||||
</span>
|
||||
```
|
||||
|
||||
## Avatar initials color
|
||||
|
||||
Customize the color of the avatars' background. You can click [here](/docs/ui/base/colors) to see the list of available colors.
|
||||
Customize the color of the avatars' background. You can click [here](colors) to see the list of available colors.
|
||||
|
||||
```html example centered separated code
|
||||
<span class="avatar bg-green-lt">AB</span>
|
||||
@@ -109,9 +108,7 @@ Add a status indicator to your avatar to show, for instance, if a users is onlin
|
||||
<span class="avatar" style="background-image: url(/samples/avatars/022m.jpg)">
|
||||
<span class="badge bg-success"></span>
|
||||
</span>
|
||||
<span class="avatar">
|
||||
<span class="badge bg-warning"></span>SA
|
||||
</span>
|
||||
<span class="avatar"><span class="badge bg-warning"></span>SA</span>
|
||||
<span class="avatar" style="background-image: url(/samples/avatars/022m.jpg)">
|
||||
<span class="badge bg-info"></span>
|
||||
</span>
|
||||
127
docs/components/badges.mdx
Normal file
127
docs/components/badges.mdx
Normal file
@@ -0,0 +1,127 @@
|
||||
---
|
||||
title: Badges
|
||||
description: Badges are small count and labeling components, which are used to add extra information to an interface element. You can use them to draw users' attention to a new element, notify about unread messages or provide any kind of additional info.
|
||||
bootstrapLink: components/badge/
|
||||
---
|
||||
|
||||
## Default markup
|
||||
|
||||
The default badges are square and come in the basic set of colors.
|
||||
|
||||
```html code example vertical centered separated scrollable height="15rem"
|
||||
<span class="badge bg-blue">Blue</span>
|
||||
<span class="badge bg-azure">Azure</span>
|
||||
<span class="badge bg-indigo">Indigo</span>
|
||||
<span class="badge bg-purple">Purple</span>
|
||||
<span class="badge bg-pink">Pink</span>
|
||||
<span class="badge bg-red">Red</span>
|
||||
<span class="badge bg-orange">Orange</span>
|
||||
<span class="badge bg-yellow">Yellow</span>
|
||||
<span class="badge bg-lime">Lime</span>
|
||||
<span class="badge bg-green">Green</span>
|
||||
<span class="badge bg-teal">Teal</span>
|
||||
<span class="badge bg-cyan">Cyan</span>
|
||||
```
|
||||
|
||||
## Headings
|
||||
|
||||
```html code example height="240px"
|
||||
<h1>Example heading <span class="badge bg-secondary">New</span></h1>
|
||||
<h2>Example heading <span class="badge bg-secondary">New</span></h2>
|
||||
<h3>Example heading <span class="badge bg-secondary">New</span></h3>
|
||||
<h4>Example heading <span class="badge bg-secondary">New</span></h4>
|
||||
<h5>Example heading <span class="badge bg-secondary">New</span></h5>
|
||||
<h6>Example heading <span class="badge bg-secondary">New</span></h6>
|
||||
```
|
||||
|
||||
## Outline badges
|
||||
|
||||
```html code example vertical centered separated scrollable height="15rem"
|
||||
<span class="badge badge-outline text-blue">blue</span>
|
||||
<span class="badge badge-outline text-azure">azure</span>
|
||||
<span class="badge badge-outline text-indigo">indigo</span>
|
||||
<span class="badge badge-outline text-purple">purple</span>
|
||||
<span class="badge badge-outline text-pink">pink</span>
|
||||
<span class="badge badge-outline text-red">red</span>
|
||||
<span class="badge badge-outline text-orange">orange</span>
|
||||
<span class="badge badge-outline text-yellow">yellow</span>
|
||||
<span class="badge badge-outline text-lime">lime</span>
|
||||
<span class="badge badge-outline text-green">green</span>
|
||||
<span class="badge badge-outline text-teal">teal</span>
|
||||
<span class="badge badge-outline text-cyan">cyan</span>
|
||||
```
|
||||
|
||||
## Pill badges
|
||||
|
||||
Use the `.badge-pill` class if you want to create a badge with rounded corners. Its width will adjust to the label text.
|
||||
|
||||
```html code example centered separated height="7rem"
|
||||
<span class="badge badge-pill bg-blue">1</span>
|
||||
<span class="badge badge-pill bg-azure">2</span>
|
||||
<span class="badge badge-pill bg-indigo">3</span>
|
||||
<span class="badge badge-pill bg-purple">4</span>
|
||||
<span class="badge badge-pill bg-pink">5</span>
|
||||
<span class="badge badge-pill bg-red">6</span>
|
||||
<span class="badge badge-pill bg-orange">7</span>
|
||||
<span class="badge badge-pill bg-yellow">8</span>
|
||||
<span class="badge badge-pill bg-lime">9</span>
|
||||
<span class="badge badge-pill bg-green">10</span>
|
||||
<span class="badge badge-pill bg-teal">11</span>
|
||||
<span class="badge badge-pill bg-cyan">12</span>
|
||||
```
|
||||
|
||||
## Soft color badges
|
||||
|
||||
You can create a soft colour variant of a corresponding contextual badge variation, to make it look more subtle. Click [here](colors) to see the list of available colors and choose ones that best suit your design.
|
||||
|
||||
```html code example vertical centered separated scrollable height="15rem"
|
||||
<span class="badge bg-blue-lt">Blue</span>
|
||||
<span class="badge bg-azure-lt">Azure</span>
|
||||
<span class="badge bg-indigo-lt">Indigo</span>
|
||||
<span class="badge bg-purple-lt">Purple</span>
|
||||
<span class="badge bg-pink-lt">Pink</span>
|
||||
<span class="badge bg-red-lt">Red</span>
|
||||
<span class="badge bg-orange-lt">Orange</span>
|
||||
<span class="badge bg-yellow-lt">Yellow</span>
|
||||
<span class="badge bg-lime-lt">Lime</span>
|
||||
<span class="badge bg-green-lt">Green</span>
|
||||
<span class="badge bg-teal-lt">Teal</span>
|
||||
<span class="badge bg-cyan-lt">Cyan</span>
|
||||
```
|
||||
|
||||
## Links
|
||||
|
||||
Place the badge within an `<a>` element if you want it to perform the function of a link and make it clickable.
|
||||
|
||||
```html code example vertical centered separated scrollable height="15rem"
|
||||
<a href="#" class="badge bg-blue">Blue</a>
|
||||
<a href="#" class="badge bg-azure">Azure</a>
|
||||
<a href="#" class="badge bg-indigo">Indigo</a>
|
||||
<a href="#" class="badge bg-purple">Purple</a>
|
||||
<a href="#" class="badge bg-pink">Pink</a>
|
||||
<a href="#" class="badge bg-red">Red</a>
|
||||
<a href="#" class="badge bg-orange">Orange</a>
|
||||
<a href="#" class="badge bg-yellow">Yellow</a>
|
||||
<a href="#" class="badge bg-lime">Lime</a>
|
||||
<a href="#" class="badge bg-green">Green</a>
|
||||
<a href="#" class="badge bg-teal">Teal</a>
|
||||
<a href="#" class="badge bg-cyan">Cyan</a>
|
||||
```
|
||||
|
||||
## Button with badge
|
||||
|
||||
Badges can be used as part of links or buttons to provide a counter.
|
||||
|
||||
```html example centered separated height="7rem"
|
||||
<button type="button" class="btn">Notifications <span class="badge bg-red ms-2">4</span></button>
|
||||
<button type="button" class="btn">Notifications <span class="badge bg-green ms-2">4</span></button>
|
||||
```
|
||||
|
||||
```html
|
||||
<button type="button" class="btn">
|
||||
Notifications <span class="badge bg-red ms-2">4</span>
|
||||
</button>
|
||||
<button type="button" class="btn">
|
||||
Notifications <span class="badge bg-green ms-2">4</span>
|
||||
</button>
|
||||
```
|
||||
107
docs/components/breadcrumb.mdx
Normal file
107
docs/components/breadcrumb.mdx
Normal file
@@ -0,0 +1,107 @@
|
||||
---
|
||||
title: Breadcrumb
|
||||
description: Breadcrumbs are used to show the current website or app location and reduce the number of actions users have to take. Thanks to breadcrumbs, they can easily navigate within the website hierarchy and better understand its structure.
|
||||
bootstrapLink: components/breadcrumb/
|
||||
---
|
||||
|
||||
## Default markup
|
||||
|
||||
Add the `:before` pseudo-element in `li` tags to use the default separators. The `active` modifier in a `li` tag will help you indicate the current page location and facilitate navigation within your website or app.
|
||||
|
||||
```html code example centered
|
||||
<ol class="breadcrumb" aria-label="breadcrumbs">
|
||||
<li class="breadcrumb-item"><a href="#">Home</a></li>
|
||||
<li class="breadcrumb-item"><a href="#">Library</a></li>
|
||||
<li class="breadcrumb-item active" aria-current="page"><a href="#">Data</a></li>
|
||||
</ol>
|
||||
```
|
||||
|
||||
## Breadcrumb variations
|
||||
|
||||
If you wish to use different separators, modify the `$breadcrumb-variants` variable in the Tabler config. Depending on the aesthetics of your design, you can choose dots, bullets or arrows.
|
||||
|
||||
```html code example centered
|
||||
<ol class="breadcrumb breadcrumb-dots" aria-label="breadcrumbs">
|
||||
<li class="breadcrumb-item"><a href="#">Home</a></li>
|
||||
<li class="breadcrumb-item"><a href="#">Library</a></li>
|
||||
<li class="breadcrumb-item active" aria-current="page"><a href="#">Data</a></li>
|
||||
</ol>
|
||||
```
|
||||
|
||||
```html code example centered
|
||||
<ol class="breadcrumb breadcrumb-arrows" aria-label="breadcrumbs">
|
||||
<li class="breadcrumb-item"><a href="#">Home</a></li>
|
||||
<li class="breadcrumb-item"><a href="#">Library</a></li>
|
||||
<li class="breadcrumb-item active" aria-current="page"><a href="#">Data</a></li>
|
||||
</ol>
|
||||
```
|
||||
|
||||
```html code example centered
|
||||
<ol class="breadcrumb breadcrumb-bullets" aria-label="breadcrumbs">
|
||||
<li class="breadcrumb-item"><a href="#">Home</a></li>
|
||||
<li class="breadcrumb-item"><a href="#">Library</a></li>
|
||||
<li class="breadcrumb-item active" aria-current="page"><a href="#">Data</a></li>
|
||||
</ol>
|
||||
```
|
||||
|
||||
## Breadcrumb in headers
|
||||
|
||||
If you wish to use breadcrumbs in headers, place them above the headers.
|
||||
|
||||
```html example vertical centered columns={3}
|
||||
<div class="page-header">
|
||||
<div class="row align-items-center mw-100">
|
||||
<div class="col">
|
||||
<div class="mb-1">
|
||||
<ol class="breadcrumb" aria-label="breadcrumbs">
|
||||
<li class="breadcrumb-item"><a href="#">Home</a></li>
|
||||
<li class="breadcrumb-item"><a href="#">Library</a></li>
|
||||
<li class="breadcrumb-item active" aria-current="page"><a href="#">Articles</a></li>
|
||||
</ol>
|
||||
</div>
|
||||
<h2 class="page-title">
|
||||
<span class="text-truncate">Knights of Ni, we are but simple travelers who seek the enchanter who lives beyond these woods.</span>
|
||||
</h2>
|
||||
</div>
|
||||
<div class="col-auto">
|
||||
<div class="btn-list">
|
||||
<a href="#" class="btn d-none d-md-inline-flex"><svg xmlns="http://www.w3.org/2000/svg" class="icon" width="24" height="24" viewBox="0 0 24 24" stroke-width="2" stroke="currentColor" fill="none" stroke-linecap="round" stroke-linejoin="round">
|
||||
<path stroke="none" d="M0 0h24v24H0z" fill="none" />
|
||||
<path d="M7 7h-1a2 2 0 0 0 -2 2v9a2 2 0 0 0 2 2h9a2 2 0 0 0 2 -2v-1" />
|
||||
<path d="M20.385 6.585a2.1 2.1 0 0 0 -2.97 -2.97l-8.415 8.385v3h3l8.385 -8.415z" />
|
||||
<path d="M16 5l3 3" />
|
||||
</svg> Edit</a>
|
||||
<a href="#" class="btn btn-primary">Publish</a>
|
||||
</div>
|
||||
</div>
|
||||
</div>
|
||||
</div>
|
||||
```
|
||||
|
||||
```html
|
||||
<div class="page-header">
|
||||
<div class="row align-items-center mw-100">
|
||||
<div class="col">
|
||||
<div class="mb-1">
|
||||
<ol class="breadcrumb" aria-label="breadcrumbs">
|
||||
<li class="breadcrumb-item"><a href="#">Home</a></li>
|
||||
<li class="breadcrumb-item"><a href="#">Library</a></li>
|
||||
<li class="breadcrumb-item active" aria-current="page"><a href="#">Articles</a></li>
|
||||
</ol>
|
||||
</div>
|
||||
<h2 class="page-title">
|
||||
<span class="text-truncate">Knights of Ni, we are but simple travelers who seek the enchanter who lives beyond these woods.</span>
|
||||
</h2>
|
||||
</div>
|
||||
<div class="col-auto">
|
||||
<div class="btn-list">
|
||||
<a href="#" class="btn d-none d-md-inline-flex">
|
||||
<!-- SVG icon from http://tabler-icons.io/i/edit -->
|
||||
<svg>...</svg> Edit
|
||||
</a>
|
||||
<a href="#" class="btn btn-primary">Publish</a>
|
||||
</div>
|
||||
</div>
|
||||
</div>
|
||||
</div>
|
||||
```
|
||||
@@ -1,15 +1,14 @@
|
||||
---
|
||||
title: Buttons
|
||||
summary: Use button styles that best suit your designs and encourage users to take the desired actions. You can customize the button's properties to improve the user experience of your website or system, changing the size, shape, color and many more.
|
||||
description: Use button styles that best suit your designs and encourage users to take the desired actions. You can customize the button's properties to improve the user experience of your website or system, changing the size, shape, color and many more.
|
||||
bootstrapLink: components/buttons/
|
||||
description: Customizable buttons for user actions.
|
||||
---
|
||||
|
||||
## Button tag
|
||||
|
||||
As one of the most common elements of UI design, buttons have a very important function of engaging users with your website or app and guiding them in their actions. Use the `.btn` classes with the `<button>` element and add additional styling that will make your buttons serve their purpose and draw users' attention.
|
||||
|
||||
```html example centered separated height="7rem"
|
||||
```html example code centered separated height="7rem"
|
||||
<a href="#" class="btn" role="button">Link</a>
|
||||
<button class="btn">Button</button>
|
||||
<input type="button" class="btn" value="Input" />
|
||||
@@ -21,7 +20,7 @@ As one of the most common elements of UI design, buttons have a very important f
|
||||
|
||||
The standard button creates a white background and subtle hover animation. It's meant to look and behave as an interactive element of your page.
|
||||
|
||||
```html example centered separated height="7rem"
|
||||
```html example code centered separated height="7rem"
|
||||
<a href="#" class="btn" role="button">Link</a>
|
||||
```
|
||||
|
||||
@@ -29,7 +28,7 @@ The standard button creates a white background and subtle hover animation. It's
|
||||
|
||||
Use the button classes that correspond to the function of your button. The big range of available colors will help you show your buttons' purpose and make them easy to spot.
|
||||
|
||||
```html example vertical centered separated scrollable height="15rem"
|
||||
```html code example vertical centered separated scrollable height="15rem"
|
||||
<a href="#" class="btn btn-primary">Primary</a>
|
||||
<a href="#" class="btn btn-secondary">Secondary</a>
|
||||
<a href="#" class="btn btn-success">Success</a>
|
||||
@@ -44,7 +43,7 @@ Use the button classes that correspond to the function of your button. The big r
|
||||
|
||||
Make buttons look inactive to show that an action is possible once the user meets certain criteria, such as completing the required fields to submit a form.
|
||||
|
||||
```html example vertical centered separated scrollable height="15rem"
|
||||
```html code example vertical centered separated scrollable height="15rem"
|
||||
<a href="#" class="btn btn-primary disabled">Primary</a>
|
||||
<a href="#" class="btn btn-secondary disabled">Secondary</a>
|
||||
<a href="#" class="btn btn-success disabled">Success</a>
|
||||
@@ -59,7 +58,7 @@ Make buttons look inactive to show that an action is possible once the user meet
|
||||
|
||||
Choose the right color for your button to make it go well with your design and draw users' attention. Button colors can have a big influence on users' decisions, which is why it's important to choose them based on the intended purpose.
|
||||
|
||||
```html example vertical centered separated scrollable height="15rem"
|
||||
```html code example vertical centered separated scrollable height="15rem"
|
||||
<a href="#" class="btn btn-blue">Blue</a>
|
||||
<a href="#" class="btn btn-azure">Azure</a>
|
||||
<a href="#" class="btn btn-indigo">Indigo</a>
|
||||
@@ -86,9 +85,7 @@ Use the `.btn-ghost-*` class to make your button look simple yet aesthetically a
|
||||
<a href="#" class="btn btn-ghost-danger">Danger</a>
|
||||
<a href="#" class="btn btn-ghost-info">Info</a>
|
||||
<a href="#" class="btn btn-ghost-dark">Dark</a>
|
||||
<div class="p-2 bg-dark">
|
||||
<a href="#" class="btn btn-ghost-light">Light</a>
|
||||
</div>
|
||||
<div class="p-2 bg-dark"><a href="#" class="btn btn-ghost-light">Light</a></div>
|
||||
```
|
||||
|
||||
```html
|
||||
@@ -176,12 +173,12 @@ Replace the default modifier class with the `.btn-outline-*` class, if you want
|
||||
|
||||
Add `.btn-lg` or `.btn-sm` to change the size of your button and differentiate those which should have primary focus from those of secondary importance. Adapt the button size to your design and encourage users to take actions.
|
||||
|
||||
```html example centered separated height="8rem"
|
||||
```html code example centered separated height="8rem"
|
||||
<button type="button" class="btn btn-primary btn-lg">Large button</button>
|
||||
<button type="button" class="btn btn-lg">Large button</button>
|
||||
```
|
||||
|
||||
```html example centered separated height="7rem"
|
||||
```html code example centered separated height="7rem"
|
||||
<button type="button" class="btn btn-primary btn-sm">Small button</button>
|
||||
<button type="button" class="btn btn-sm">Small button</button>
|
||||
```
|
||||
@@ -193,49 +190,37 @@ Label your button with text and add an icon to communiacate the action and make
|
||||
Icons can be found [**here**](/docs/components/icons)
|
||||
|
||||
```html example centered separated height="7rem"
|
||||
<button type="button" class="btn">
|
||||
<svg xmlns="http://www.w3.org/2000/svg" class="icon" width="24" height="24" viewBox="0 0 24 24" stroke-width="2" stroke="currentColor" fill="none" stroke-linecap="round" stroke-linejoin="round">
|
||||
<button type="button" class="btn"><svg xmlns="http://www.w3.org/2000/svg" class="icon" width="24" height="24" viewBox="0 0 24 24" stroke-width="2" stroke="currentColor" fill="none" stroke-linecap="round" stroke-linejoin="round">
|
||||
<path stroke="none" d="M0 0h24v24H0z" fill="none" />
|
||||
<path d="M4 17v2a2 2 0 0 0 2 2h12a2 2 0 0 0 2 -2v-2" />
|
||||
<polyline points="7 9 12 4 17 9" />
|
||||
<line x1="12" y1="4" x2="12" y2="16" />
|
||||
</svg> Upload
|
||||
</button>
|
||||
<button type="button" class="btn btn-warning">
|
||||
<svg xmlns="http://www.w3.org/2000/svg" class="icon" width="24" height="24" viewBox="0 0 24 24" stroke-width="2" stroke="currentColor" fill="none" stroke-linecap="round" stroke-linejoin="round">
|
||||
</svg> Upload</button>
|
||||
<button type="button" class="btn btn-warning"><svg xmlns="http://www.w3.org/2000/svg" class="icon" width="24" height="24" viewBox="0 0 24 24" stroke-width="2" stroke="currentColor" fill="none" stroke-linecap="round" stroke-linejoin="round">
|
||||
<path stroke="none" d="M0 0h24v24H0z" fill="none" />
|
||||
<path d="M19.5 12.572l-7.5 7.428l-7.5 -7.428m0 0a5 5 0 1 1 7.5 -6.566a5 5 0 1 1 7.5 6.572" />
|
||||
</svg> I like
|
||||
</button>
|
||||
<button type="button" class="btn btn-success">
|
||||
<svg xmlns="http://www.w3.org/2000/svg" class="icon" width="24" height="24" viewBox="0 0 24 24" stroke-width="2" stroke="currentColor" fill="none" stroke-linecap="round" stroke-linejoin="round">
|
||||
</svg> I like</button>
|
||||
<button type="button" class="btn btn-success"><svg xmlns="http://www.w3.org/2000/svg" class="icon" width="24" height="24" viewBox="0 0 24 24" stroke-width="2" stroke="currentColor" fill="none" stroke-linecap="round" stroke-linejoin="round">
|
||||
<path stroke="none" d="M0 0h24v24H0z" fill="none" />
|
||||
<path d="M5 12l5 5l10 -10" />
|
||||
</svg> I agree
|
||||
</button>
|
||||
<button type="button" class="btn btn-primary">
|
||||
<svg xmlns="http://www.w3.org/2000/svg" class="icon" width="24" height="24" viewBox="0 0 24 24" stroke-width="2" stroke="currentColor" fill="none" stroke-linecap="round" stroke-linejoin="round">
|
||||
</svg> I agree</button>
|
||||
<button type="button" class="btn btn-primary"><svg xmlns="http://www.w3.org/2000/svg" class="icon" width="24" height="24" viewBox="0 0 24 24" stroke-width="2" stroke="currentColor" fill="none" stroke-linecap="round" stroke-linejoin="round">
|
||||
<path stroke="none" d="M0 0h24v24H0z" fill="none" />
|
||||
<line x1="12" y1="5" x2="12" y2="19" />
|
||||
<line x1="5" y1="12" x2="19" y2="12" />
|
||||
</svg> More
|
||||
</button>
|
||||
<button type="button" class="btn btn-danger">
|
||||
<svg xmlns="http://www.w3.org/2000/svg" class="icon" width="24" height="24" viewBox="0 0 24 24" stroke-width="2" stroke="currentColor" fill="none" stroke-linecap="round" stroke-linejoin="round">
|
||||
</svg> More</button>
|
||||
<button type="button" class="btn btn-danger"><svg xmlns="http://www.w3.org/2000/svg" class="icon" width="24" height="24" viewBox="0 0 24 24" stroke-width="2" stroke="currentColor" fill="none" stroke-linecap="round" stroke-linejoin="round">
|
||||
<path stroke="none" d="M0 0h24v24H0z" fill="none" />
|
||||
<path d="M10 14a3.5 3.5 0 0 0 5 0l4 -4a3.5 3.5 0 0 0 -5 -5l-.5 .5" />
|
||||
<path d="M14 10a3.5 3.5 0 0 0 -5 0l-4 4a3.5 3.5 0 0 0 5 5l.5 -.5" />
|
||||
</svg> Link
|
||||
</button>
|
||||
<button type="button" class="btn btn-info">
|
||||
<svg xmlns="http://www.w3.org/2000/svg" class="icon" width="24" height="24" viewBox="0 0 24 24" stroke-width="2" stroke="currentColor" fill="none" stroke-linecap="round" stroke-linejoin="round">
|
||||
</svg> Link</button>
|
||||
<button type="button" class="btn btn-info"><svg xmlns="http://www.w3.org/2000/svg" class="icon" width="24" height="24" viewBox="0 0 24 24" stroke-width="2" stroke="currentColor" fill="none" stroke-linecap="round" stroke-linejoin="round">
|
||||
<path stroke="none" d="M0 0h24v24H0z" fill="none" />
|
||||
<path d="M3 20l1.3 -3.9a9 8 0 1 1 3.4 2.9l-4.7 1" />
|
||||
<line x1="12" y1="12" x2="12" y2="12.01" />
|
||||
<line x1="8" y1="12" x2="8" y2="12.01" />
|
||||
<line x1="16" y1="12" x2="16" y2="12.01" />
|
||||
</svg> Comment
|
||||
</button>
|
||||
</svg> Comment</button>
|
||||
```
|
||||
|
||||
```html
|
||||
@@ -276,114 +261,86 @@ Icons can be found [**here**](/docs/components/icons)
|
||||
You can use the icons of popular social networking sites, which users are familiar with. Thanks to buttons with social media icons users can share content or follow a website with just one click, without leaving the website.
|
||||
|
||||
```html example vertical centered separated scrollable height="15rem"
|
||||
<a href="#" class="btn btn-facebook">
|
||||
<svg xmlns="http://www.w3.org/2000/svg" class="icon" width="24" height="24" viewBox="0 0 24 24" stroke-width="2" stroke="currentColor" fill="none" stroke-linecap="round" stroke-linejoin="round">
|
||||
<a href="#" class="btn btn-facebook"><svg xmlns="http://www.w3.org/2000/svg" class="icon" width="24" height="24" viewBox="0 0 24 24" stroke-width="2" stroke="currentColor" fill="none" stroke-linecap="round" stroke-linejoin="round">
|
||||
<path stroke="none" d="M0 0h24v24H0z" fill="none" />
|
||||
<path d="M7 10v4h3v7h4v-7h3l1 -4h-4v-2a1 1 0 0 1 1 -1h3v-4h-3a5 5 0 0 0 -5 5v2h-3" />
|
||||
</svg> Facebook
|
||||
</a>
|
||||
<a href="#" class="btn btn-twitter">
|
||||
<svg xmlns="http://www.w3.org/2000/svg" class="icon" width="24" height="24" viewBox="0 0 24 24" stroke-width="2" stroke="currentColor" fill="none" stroke-linecap="round" stroke-linejoin="round">
|
||||
</svg> Facebook</a>
|
||||
<a href="#" class="btn btn-twitter"><svg xmlns="http://www.w3.org/2000/svg" class="icon" width="24" height="24" viewBox="0 0 24 24" stroke-width="2" stroke="currentColor" fill="none" stroke-linecap="round" stroke-linejoin="round">
|
||||
<path stroke="none" d="M0 0h24v24H0z" fill="none" />
|
||||
<path d="M22 4.01c-1 .49 -1.98 .689 -3 .99c-1.121 -1.265 -2.783 -1.335 -4.38 -.737s-2.643 2.06 -2.62 3.737v1c-3.245 .083 -6.135 -1.395 -8 -4c0 0 -4.182 7.433 4 11c-1.872 1.247 -3.739 2.088 -6 2c3.308 1.803 6.913 2.423 10.034 1.517c3.58 -1.04 6.522 -3.723 7.651 -7.742a13.84 13.84 0 0 0 .497 -3.753c-.002 -.249 1.51 -2.772 1.818 -4.013z" />
|
||||
</svg> Twitter
|
||||
</a>
|
||||
<a href="#" class="btn btn-google">
|
||||
<svg xmlns="http://www.w3.org/2000/svg" class="icon" width="24" height="24" viewBox="0 0 24 24" stroke-width="2" stroke="currentColor" fill="none" stroke-linecap="round" stroke-linejoin="round">
|
||||
</svg> Twitter</a>
|
||||
<a href="#" class="btn btn-google"><svg xmlns="http://www.w3.org/2000/svg" class="icon" width="24" height="24" viewBox="0 0 24 24" stroke-width="2" stroke="currentColor" fill="none" stroke-linecap="round" stroke-linejoin="round">
|
||||
<path stroke="none" d="M0 0h24v24H0z" fill="none" />
|
||||
<path d="M17.788 5.108a9 9 0 1 0 3.212 6.892h-8" />
|
||||
</svg> Google
|
||||
</a>
|
||||
<a href="#" class="btn btn-youtube">
|
||||
<svg xmlns="http://www.w3.org/2000/svg" class="icon" width="24" height="24" viewBox="0 0 24 24" stroke-width="2" stroke="currentColor" fill="none" stroke-linecap="round" stroke-linejoin="round">
|
||||
</svg> Google</a>
|
||||
<a href="#" class="btn btn-youtube"><svg xmlns="http://www.w3.org/2000/svg" class="icon" width="24" height="24" viewBox="0 0 24 24" stroke-width="2" stroke="currentColor" fill="none" stroke-linecap="round" stroke-linejoin="round">
|
||||
<path stroke="none" d="M0 0h24v24H0z" fill="none" />
|
||||
<rect x="3" y="5" width="18" height="14" rx="4" />
|
||||
<path d="M10 9l5 3l-5 3z" />
|
||||
</svg> Youtube
|
||||
</a>
|
||||
<a href="#" class="btn btn-vimeo">
|
||||
<svg xmlns="http://www.w3.org/2000/svg" class="icon" width="24" height="24" viewBox="0 0 24 24" stroke-width="2" stroke="currentColor" fill="none" stroke-linecap="round" stroke-linejoin="round">
|
||||
</svg> Youtube</a>
|
||||
<a href="#" class="btn btn-vimeo"><svg xmlns="http://www.w3.org/2000/svg" class="icon" width="24" height="24" viewBox="0 0 24 24" stroke-width="2" stroke="currentColor" fill="none" stroke-linecap="round" stroke-linejoin="round">
|
||||
<path stroke="none" d="M0 0h24v24H0z" fill="none" />
|
||||
<path d="M3 8.5l1 1s1.5 -1.102 2 -.5c.509 .609 1.863 7.65 2.5 9c.556 1.184 1.978 2.89 4 1.5c2 -1.5 7.5 -5.5 8.5 -11.5c.444 -2.661 -1 -4 -2.5 -4c-2 0 -4.047 1.202 -4.5 4c2.05 -1.254 2.551 1.003 1.5 3c-1.052 2.005 -2 3 -2.5 3c-.49 0 -.924 -1.165 -1.5 -3.5c-.59 -2.42 -.5 -6.5 -3 -6.5s-5.5 4.5 -5.5 4.5z" />
|
||||
</svg> Vimeo
|
||||
</a>
|
||||
<a href="#" class="btn btn-dribbble">
|
||||
<svg xmlns="http://www.w3.org/2000/svg" class="icon" width="24" height="24" viewBox="0 0 24 24" stroke-width="2" stroke="currentColor" fill="none" stroke-linecap="round" stroke-linejoin="round">
|
||||
</svg> Vimeo</a>
|
||||
<a href="#" class="btn btn-dribbble"><svg xmlns="http://www.w3.org/2000/svg" class="icon" width="24" height="24" viewBox="0 0 24 24" stroke-width="2" stroke="currentColor" fill="none" stroke-linecap="round" stroke-linejoin="round">
|
||||
<path stroke="none" d="M0 0h24v24H0z" fill="none" />
|
||||
<circle cx="12" cy="12" r="9" />
|
||||
<path d="M9 3.6c5 6 7 10.5 7.5 16.2" />
|
||||
<path d="M6.4 19c3.5 -3.5 6 -6.5 14.5 -6.4" />
|
||||
<path d="M3.1 10.75c5 0 9.814 -.38 15.314 -5" />
|
||||
</svg> Dribbble
|
||||
</a>
|
||||
<a href="#" class="btn btn-github">
|
||||
<svg xmlns="http://www.w3.org/2000/svg" class="icon" width="24" height="24" viewBox="0 0 24 24" stroke-width="2" stroke="currentColor" fill="none" stroke-linecap="round" stroke-linejoin="round">
|
||||
</svg> Dribbble</a>
|
||||
<a href="#" class="btn btn-github"><svg xmlns="http://www.w3.org/2000/svg" class="icon" width="24" height="24" viewBox="0 0 24 24" stroke-width="2" stroke="currentColor" fill="none" stroke-linecap="round" stroke-linejoin="round">
|
||||
<path stroke="none" d="M0 0h24v24H0z" fill="none" />
|
||||
<path d="M9 19c-4.3 1.4 -4.3 -2.5 -6 -3m12 5v-3.5c0 -1 .1 -1.4 -.5 -2c2.8 -.3 5.5 -1.4 5.5 -6a4.6 4.6 0 0 0 -1.3 -3.2a4.2 4.2 0 0 0 -.1 -3.2s-1.1 -.3 -3.5 1.3a12.3 12.3 0 0 0 -6.2 0c-2.4 -1.6 -3.5 -1.3 -3.5 -1.3a4.2 4.2 0 0 0 -.1 3.2a4.6 4.6 0 0 0 -1.3 3.2c0 4.6 2.7 5.7 5.5 6c-.6 .6 -.6 1.2 -.5 2v3.5" />
|
||||
</svg> Github
|
||||
</a>
|
||||
<a href="#" class="btn btn-instagram">
|
||||
<svg xmlns="http://www.w3.org/2000/svg" class="icon" width="24" height="24" viewBox="0 0 24 24" stroke-width="2" stroke="currentColor" fill="none" stroke-linecap="round" stroke-linejoin="round">
|
||||
</svg> Github</a>
|
||||
<a href="#" class="btn btn-instagram"><svg xmlns="http://www.w3.org/2000/svg" class="icon" width="24" height="24" viewBox="0 0 24 24" stroke-width="2" stroke="currentColor" fill="none" stroke-linecap="round" stroke-linejoin="round">
|
||||
<path stroke="none" d="M0 0h24v24H0z" fill="none" />
|
||||
<rect x="4" y="4" width="16" height="16" rx="4" />
|
||||
<circle cx="12" cy="12" r="3" />
|
||||
<line x1="16.5" y1="7.5" x2="16.5" y2="7.501" />
|
||||
</svg> Instagram
|
||||
</a>
|
||||
<a href="#" class="btn btn-pinterest">
|
||||
<svg xmlns="http://www.w3.org/2000/svg" class="icon" width="24" height="24" viewBox="0 0 24 24" stroke-width="2" stroke="currentColor" fill="none" stroke-linecap="round" stroke-linejoin="round">
|
||||
</svg> Instagram</a>
|
||||
<a href="#" class="btn btn-pinterest"><svg xmlns="http://www.w3.org/2000/svg" class="icon" width="24" height="24" viewBox="0 0 24 24" stroke-width="2" stroke="currentColor" fill="none" stroke-linecap="round" stroke-linejoin="round">
|
||||
<path stroke="none" d="M0 0h24v24H0z" fill="none" />
|
||||
<line x1="8" y1="20" x2="12" y2="11" />
|
||||
<path d="M10.7 14c.437 1.263 1.43 2 2.55 2c2.071 0 3.75 -1.554 3.75 -4a5 5 0 1 0 -9.7 1.7" />
|
||||
<circle cx="12" cy="12" r="9" />
|
||||
</svg> Pinterest
|
||||
</a>
|
||||
<a href="#" class="btn btn-vk">
|
||||
<svg xmlns="http://www.w3.org/2000/svg" class="icon" width="24" height="24" viewBox="0 0 24 24" stroke-width="2" stroke="currentColor" fill="none" stroke-linecap="round" stroke-linejoin="round">
|
||||
</svg> Pinterest</a>
|
||||
<a href="#" class="btn btn-vk"><svg xmlns="http://www.w3.org/2000/svg" class="icon" width="24" height="24" viewBox="0 0 24 24" stroke-width="2" stroke="currentColor" fill="none" stroke-linecap="round" stroke-linejoin="round">
|
||||
<path stroke="none" d="M0 0h24v24H0z" fill="none" />
|
||||
<path d="M14 19h-4a8 8 0 0 1 -8 -8v-5h4v5a4 4 0 0 0 4 4h0v-9h4v4.5l.03 -.004a4.531 4.531 0 0 0 3.97 -4.496h4l-.342 1.711a6.858 6.858 0 0 1 -3.658 4.789h0a5.34 5.34 0 0 1 3.566 4.111l.434 2.389h0h-4a4.531 4.531 0 0 0 -3.97 -4.496v4.5z" />
|
||||
</svg> VK
|
||||
</a>
|
||||
<a href="#" class="btn btn-rss">
|
||||
<svg xmlns="http://www.w3.org/2000/svg" class="icon" width="24" height="24" viewBox="0 0 24 24" stroke-width="2" stroke="currentColor" fill="none" stroke-linecap="round" stroke-linejoin="round">
|
||||
</svg> VK</a>
|
||||
<a href="#" class="btn btn-rss"><svg xmlns="http://www.w3.org/2000/svg" class="icon" width="24" height="24" viewBox="0 0 24 24" stroke-width="2" stroke="currentColor" fill="none" stroke-linecap="round" stroke-linejoin="round">
|
||||
<path stroke="none" d="M0 0h24v24H0z" fill="none" />
|
||||
<circle cx="5" cy="19" r="1" />
|
||||
<path d="M4 4a16 16 0 0 1 16 16" />
|
||||
<path d="M4 11a9 9 0 0 1 9 9" />
|
||||
</svg> RSS
|
||||
</a>
|
||||
<a href="#" class="btn btn-flickr">
|
||||
<svg xmlns="http://www.w3.org/2000/svg" class="icon" width="24" height="24" viewBox="0 0 24 24" stroke-width="2" stroke="currentColor" fill="none" stroke-linecap="round" stroke-linejoin="round">
|
||||
</svg> RSS</a>
|
||||
<a href="#" class="btn btn-flickr"><svg xmlns="http://www.w3.org/2000/svg" class="icon" width="24" height="24" viewBox="0 0 24 24" stroke-width="2" stroke="currentColor" fill="none" stroke-linecap="round" stroke-linejoin="round">
|
||||
<path stroke="none" d="M0 0h24v24H0z" fill="none" />
|
||||
<circle cx="7" cy="12" r="3" />
|
||||
<circle cx="17" cy="12" r="3" />
|
||||
</svg> Flickr
|
||||
</a>
|
||||
<a href="#" class="btn btn-bitbucket">
|
||||
<svg xmlns="http://www.w3.org/2000/svg" class="icon" width="24" height="24" viewBox="0 0 24 24" stroke-width="2" stroke="currentColor" fill="none" stroke-linecap="round" stroke-linejoin="round">
|
||||
</svg> Flickr</a>
|
||||
<a href="#" class="btn btn-bitbucket"><svg xmlns="http://www.w3.org/2000/svg" class="icon" width="24" height="24" viewBox="0 0 24 24" stroke-width="2" stroke="currentColor" fill="none" stroke-linecap="round" stroke-linejoin="round">
|
||||
<path stroke="none" d="M0 0h24v24H0z" fill="none" />
|
||||
<path d="M3.648 4a0.64 .64 0 0 0 -.64 .744l3.14 14.528c.07 .417 .43 .724 .852 .728h10a0.644 .644 0 0 0 .642 -.539l3.35 -14.71a0.641 .641 0 0 0 -.64 -.744l-16.704 -.007z" />
|
||||
<path d="M14 15h-4l-1 -6h6z" />
|
||||
</svg> Bitbucket
|
||||
</a>
|
||||
<a href="#" class="btn btn-tabler">
|
||||
<svg xmlns="http://www.w3.org/2000/svg" class="icon" width="24" height="24" viewBox="0 0 24 24" stroke-width="2" stroke="currentColor" fill="none" stroke-linecap="round" stroke-linejoin="round">
|
||||
</svg> Bitbucket</a>
|
||||
<a href="#" class="btn btn-tabler"><svg xmlns="http://www.w3.org/2000/svg" class="icon" width="24" height="24" viewBox="0 0 24 24" stroke-width="2" stroke="currentColor" fill="none" stroke-linecap="round" stroke-linejoin="round">
|
||||
<path stroke="none" d="M0 0h24v24H0z" fill="none" />
|
||||
<path d="M8 9l3 3l-3 3" />
|
||||
<line x1="13" y1="15" x2="16" y2="15" />
|
||||
<rect x="4" y="4" width="16" height="16" rx="4" />
|
||||
</svg> Tabler
|
||||
</a>
|
||||
</svg> Tabler</a>
|
||||
```
|
||||
|
||||
```html
|
||||
<a href="#" class="btn btn-facebook">
|
||||
<!-- SVG icon from http://tabler.io/icons/icon/brand-facebook -->
|
||||
<!-- SVG icon from http://tabler-icons.io/i/brand-facebook -->
|
||||
<svg>...</svg>
|
||||
Facebook
|
||||
</a>
|
||||
<a href="#" class="btn btn-twitter">
|
||||
<!-- SVG icon from http://tabler.io/icons/icon/brand-twitter -->
|
||||
<!-- SVG icon from http://tabler-icons.io/i/brand-twitter -->
|
||||
<svg>...</svg>
|
||||
Twitter
|
||||
</a>
|
||||
@@ -554,59 +511,59 @@ You can also add an icon without the name of a social networking site, if you wa
|
||||
|
||||
```html
|
||||
<a href="#" class="btn btn-facebook btn-icon" aria-label="Button">
|
||||
<!-- SVG icon from http://tabler.io/icons/icon/brand-facebook -->
|
||||
<!-- SVG icon from http://tabler-icons.io/i/brand-facebook -->
|
||||
<svg>...</svg>
|
||||
</a>
|
||||
<a href="#" class="btn btn-twitter btn-icon" aria-label="Button">
|
||||
<!-- SVG icon from http://tabler.io/icons/icon/brand-twitter -->
|
||||
<!-- SVG icon from http://tabler-icons.io/i/brand-twitter -->
|
||||
<svg>...</svg>
|
||||
</a>
|
||||
<a href="#" class="btn btn-google btn-icon" aria-label="Button">
|
||||
<!-- SVG icon from http://tabler.io/icons/icon/brand-google -->
|
||||
<!-- SVG icon from http://tabler-icons.io/i/brand-google -->
|
||||
<svg>...</svg>
|
||||
</a>
|
||||
<a href="#" class="btn btn-youtube btn-icon" aria-label="Button">
|
||||
<!-- SVG icon from http://tabler.io/icons/icon/brand-youtube -->
|
||||
<!-- SVG icon from http://tabler-icons.io/i/brand-youtube -->
|
||||
<svg>...</svg>
|
||||
</a>
|
||||
<a href="#" class="btn btn-vimeo btn-icon" aria-label="Button">
|
||||
<!-- SVG icon from http://tabler.io/icons/icon/brand-vimeo -->
|
||||
<!-- SVG icon from http://tabler-icons.io/i/brand-vimeo -->
|
||||
<svg>...</svg>
|
||||
</a>
|
||||
<a href="#" class="btn btn-dribbble btn-icon" aria-label="Button">
|
||||
<!-- SVG icon from http://tabler.io/icons/icon/brand-dribbble -->
|
||||
<!-- SVG icon from http://tabler-icons.io/i/brand-dribbble -->
|
||||
<svg>...</svg>
|
||||
</a>
|
||||
<a href="#" class="btn btn-github btn-icon" aria-label="Button">
|
||||
<!-- SVG icon from http://tabler.io/icons/icon/brand-github -->
|
||||
<!-- SVG icon from http://tabler-icons.io/i/brand-github -->
|
||||
<svg>...</svg>
|
||||
</a>
|
||||
<a href="#" class="btn btn-instagram btn-icon" aria-label="Button">
|
||||
<!-- SVG icon from http://tabler.io/icons/icon/brand-instagram -->
|
||||
<!-- SVG icon from http://tabler-icons.io/i/brand-instagram -->
|
||||
<svg>...</svg>
|
||||
</a>
|
||||
<a href="#" class="btn btn-pinterest btn-icon" aria-label="Button">
|
||||
<!-- SVG icon from http://tabler.io/icons/icon/brand-pinterest -->
|
||||
<!-- SVG icon from http://tabler-icons.io/i/brand-pinterest -->
|
||||
<svg>...</svg>
|
||||
</a>
|
||||
<a href="#" class="btn btn-vk btn-icon" aria-label="Button">
|
||||
<!-- SVG icon from http://tabler.io/icons/icon/brand-vk -->
|
||||
<!-- SVG icon from http://tabler-icons.io/i/brand-vk -->
|
||||
<svg>...</svg>
|
||||
</a>
|
||||
<a href="#" class="btn btn-rss btn-icon" aria-label="Button">
|
||||
<!-- SVG icon from http://tabler.io/icons/icon/rss -->
|
||||
<!-- SVG icon from http://tabler-icons.io/i/rss -->
|
||||
<svg>...</svg>
|
||||
</a>
|
||||
<a href="#" class="btn btn-flickr btn-icon" aria-label="Button">
|
||||
<!-- SVG icon from http://tabler.io/icons/icon/brand-flickr -->
|
||||
<!-- SVG icon from http://tabler-icons.io/i/brand-flickr -->
|
||||
<svg>...</svg>
|
||||
</a>
|
||||
<a href="#" class="btn btn-bitbucket btn-icon" aria-label="Button">
|
||||
<!-- SVG icon from http://tabler.io/icons/icon/brand-bitbucket -->
|
||||
<!-- SVG icon from http://tabler-icons.io/i/brand-bitbucket -->
|
||||
<svg>...</svg>
|
||||
</a>
|
||||
<a href="#" class="btn btn-tabler btn-icon" aria-label="Button">
|
||||
<!-- SVG icon from http://tabler.io/icons/icon/brand-tabler -->
|
||||
<!-- SVG icon from http://tabler-icons.io/i/brand-tabler -->
|
||||
<svg>...</svg>
|
||||
</a>
|
||||
```
|
||||
@@ -674,31 +631,31 @@ Add the `.btn-icon` class to remove unnecessary padding from your button and use
|
||||
|
||||
```html
|
||||
<a href="#" class="btn btn-primary btn-icon" aria-label="Button">
|
||||
<!-- SVG icon from http://tabler.io/icons/icon/activity -->
|
||||
<!-- SVG icon from http://tabler-icons.io/i/activity -->
|
||||
<svg>...</svg>
|
||||
</a>
|
||||
<a href="#" class="btn btn-github btn-icon" aria-label="Button">
|
||||
<!-- SVG icon from http://tabler.io/icons/icon/brand-github -->
|
||||
<!-- SVG icon from http://tabler-icons.io/i/brand-github -->
|
||||
<svg>...</svg>
|
||||
</a>
|
||||
<a href="#" class="btn btn-success btn-icon" aria-label="Button">
|
||||
<!-- SVG icon from http://tabler.io/icons/icon/bell -->
|
||||
<!-- SVG icon from http://tabler-icons.io/i/bell -->
|
||||
<svg>...</svg>
|
||||
</a>
|
||||
<a href="#" class="btn btn-warning btn-icon" aria-label="Button">
|
||||
<!-- SVG icon from http://tabler.io/icons/icon/star -->
|
||||
<!-- SVG icon from http://tabler-icons.io/i/star -->
|
||||
<svg>...</svg>
|
||||
</a>
|
||||
<a href="#" class="btn btn-danger btn-icon" aria-label="Button">
|
||||
<!-- SVG icon from http://tabler.io/icons/icon/trash -->
|
||||
<!-- SVG icon from http://tabler-icons.io/i/trash -->
|
||||
<svg>...</svg>
|
||||
</a>
|
||||
<a href="#" class="btn btn-purple btn-icon" aria-label="Button">
|
||||
<!-- SVG icon from http://tabler.io/icons/icon/chart-bar -->
|
||||
<!-- SVG icon from http://tabler-icons.io/i/chart-bar -->
|
||||
<svg>...</svg>
|
||||
</a>
|
||||
<a href="#" class="btn btn-icon" aria-label="Button">
|
||||
<!-- SVG icon from http://tabler.io/icons/icon/git-merge -->
|
||||
<!-- SVG icon from http://tabler-icons.io/i/git-merge -->
|
||||
<svg>...</svg>
|
||||
</a>
|
||||
```
|
||||
@@ -709,8 +666,7 @@ Create a dropdown button that will encourage users to click for more options. Yo
|
||||
|
||||
```html example centered separated height="7rem"
|
||||
<div class="dropdown">
|
||||
<button type="button" class="btn dropdown-toggle" data-bs-toggle="dropdown">
|
||||
<svg xmlns="http://www.w3.org/2000/svg" class="icon" width="24" height="24" viewBox="0 0 24 24" stroke-width="2" stroke="currentColor" fill="none" stroke-linecap="round" stroke-linejoin="round">
|
||||
<button type="button" class="btn dropdown-toggle" data-bs-toggle="dropdown"><svg xmlns="http://www.w3.org/2000/svg" class="icon" width="24" height="24" viewBox="0 0 24 24" stroke-width="2" stroke="currentColor" fill="none" stroke-linecap="round" stroke-linejoin="round">
|
||||
<path stroke="none" d="M0 0h24v24H0z" fill="none" />
|
||||
<rect x="4" y="5" width="16" height="16" rx="2" />
|
||||
<line x1="16" y1="3" x2="16" y2="7" />
|
||||
@@ -718,16 +674,14 @@ Create a dropdown button that will encourage users to click for more options. Yo
|
||||
<line x1="4" y1="11" x2="20" y2="11" />
|
||||
<line x1="11" y1="15" x2="12" y2="15" />
|
||||
<line x1="12" y1="15" x2="12" y2="18" />
|
||||
</svg>
|
||||
</button>
|
||||
</svg></button>
|
||||
<div class="dropdown-menu">
|
||||
<a class="dropdown-item" href="#">Action</a>
|
||||
<a class="dropdown-item" href="#">Another action</a>
|
||||
</div>
|
||||
</div>
|
||||
<div class="dropdown">
|
||||
<button type="button" class="btn dropdown-toggle" data-bs-toggle="dropdown">
|
||||
<svg xmlns="http://www.w3.org/2000/svg" class="icon" width="24" height="24" viewBox="0 0 24 24" stroke-width="2" stroke="currentColor" fill="none" stroke-linecap="round" stroke-linejoin="round">
|
||||
<button type="button" class="btn dropdown-toggle" data-bs-toggle="dropdown"><svg xmlns="http://www.w3.org/2000/svg" class="icon" width="24" height="24" viewBox="0 0 24 24" stroke-width="2" stroke="currentColor" fill="none" stroke-linecap="round" stroke-linejoin="round">
|
||||
<path stroke="none" d="M0 0h24v24H0z" fill="none" />
|
||||
<rect x="4" y="5" width="16" height="16" rx="2" />
|
||||
<line x1="16" y1="3" x2="16" y2="7" />
|
||||
@@ -735,8 +689,7 @@ Create a dropdown button that will encourage users to click for more options. Yo
|
||||
<line x1="4" y1="11" x2="20" y2="11" />
|
||||
<line x1="11" y1="15" x2="12" y2="15" />
|
||||
<line x1="12" y1="15" x2="12" y2="18" />
|
||||
</svg> Show calendar
|
||||
</button>
|
||||
</svg> Show calendar</button>
|
||||
<div class="dropdown-menu">
|
||||
<a class="dropdown-item" href="#">Action</a>
|
||||
<a class="dropdown-item" href="#">Another action</a>
|
||||
@@ -754,7 +707,7 @@ Create a dropdown button that will encourage users to click for more options. Yo
|
||||
```html
|
||||
<div class="dropdown">
|
||||
<button type="button" class="btn dropdown-toggle" data-bs-toggle="dropdown">
|
||||
<!-- SVG icon from http://tabler.io/icons/icon/calendar -->
|
||||
<!-- SVG icon from http://tabler-icons.io/i/calendar -->
|
||||
<svg>...</svg>
|
||||
</button>
|
||||
<div class="dropdown-menu">
|
||||
@@ -768,7 +721,7 @@ Create a dropdown button that will encourage users to click for more options. Yo
|
||||
</div>
|
||||
<div class="dropdown">
|
||||
<button type="button" class="btn dropdown-toggle" data-bs-toggle="dropdown">
|
||||
<!-- SVG icon from http://tabler.io/icons/icon/calendar -->
|
||||
<!-- SVG icon from http://tabler-icons.io/i/calendar -->
|
||||
<svg>...</svg>
|
||||
Show calendar
|
||||
</button>
|
||||
@@ -815,9 +768,7 @@ Add the `.btn-loading` class to show a button's loading state, which can be usef
|
||||
```
|
||||
|
||||
```html example centered height="7rem"
|
||||
<a href="#" class="btn btn-primary">
|
||||
<span class="spinner-border spinner-border-sm me-2" role="status"></span> Button
|
||||
</a>
|
||||
<a href="#" class="btn btn-primary"><span class="spinner-border spinner-border-sm me-2" role="status"></span> Button</a>
|
||||
```
|
||||
|
||||
```html
|
||||
@@ -831,7 +782,7 @@ Add the `.btn-loading` class to show a button's loading state, which can be usef
|
||||
|
||||
Create a list of buttons using the `.btn-list` container to display different actions a user can take. If you add aditional styling, such as colours, you will be able to focus users' attention on a particular action or suggest the result.
|
||||
|
||||
```html example vertical centered columns={3} height="7rem"
|
||||
```html code example vertical centered columns={3} height="7rem"
|
||||
<div class="btn-list">
|
||||
<a href="#" class="btn btn-success">Save changes</a>
|
||||
<a href="#" class="btn">Save and continue</a>
|
||||
@@ -841,7 +792,7 @@ Create a list of buttons using the `.btn-list` container to display different ac
|
||||
|
||||
If the list is long, it will be wrapped and some buttons will be moved to the next line, keeping them all evenly spaced.
|
||||
|
||||
```html example centered
|
||||
```html code example centered
|
||||
<div class="btn-list">
|
||||
<a href="#" class="btn">One</a>
|
||||
<a href="#" class="btn">Two</a>
|
||||
@@ -867,21 +818,21 @@ If the list is long, it will be wrapped and some buttons will be moved to the ne
|
||||
|
||||
Use the `.text-center` or the `.text-end` modifiers to change the buttons' alignment and place them where they suit best.
|
||||
|
||||
```html example vertical centered columns={3} height="7rem"
|
||||
```html code example vertical centered columns={3} height="7rem"
|
||||
<div class="btn-list justify-content-center">
|
||||
<a href="#" class="btn">Save and continue</a>
|
||||
<a href="#" class="btn btn-primary">Save changes</a>
|
||||
</div>
|
||||
```
|
||||
|
||||
```html example vertical centered columns={3} height="7rem"
|
||||
```html code example vertical centered columns={3} height="7rem"
|
||||
<div class="btn-list justify-content-end">
|
||||
<a href="#" class="btn">Save and continue</a>
|
||||
<a href="#" class="btn btn-primary">Save changes</a>
|
||||
</div>
|
||||
```
|
||||
|
||||
```html example vertical centered columns={3} height="7rem"
|
||||
```html code example vertical centered columns={3} height="7rem"
|
||||
<div class="btn-list">
|
||||
<a href="#" class="btn btn-outline-danger me-auto">Delete</a>
|
||||
<a href="#" class="btn">Save and continue</a>
|
||||
@@ -894,15 +845,9 @@ Use the `.text-center` or the `.text-end` modifiers to change the buttons' align
|
||||
Use buttons with avatars to simplify the process of interaction and make your design more personalized. Buttons can contain avatars and labels or only avatars, if displayed on a smaller space.
|
||||
|
||||
```html example centered separated height="7rem"
|
||||
<a href="#" class="btn">
|
||||
<span class="avatar" style={{ backgroundImage: 'url(https://images.unsplash.com/photo-1542534759-05f6c34a9e63?q=80&fm=jpg&crop=faces&fit=crop&h=100&w=100)'}}></span> Avatar
|
||||
</a>
|
||||
<a href="#" class="btn">
|
||||
<span class="avatar" style={{ backgroundImage: 'url(https://images.unsplash.com/photo-1546539782-6fc531453083?q=80&fm=jpg&crop=faces&fit=crop&h=100&w=100)'}}></span> Avatar
|
||||
</a>
|
||||
<a href="#" class="btn">
|
||||
<span class="avatar" style={{ backgroundImage: 'url(https://images.unsplash.com/photo-1541585452861-0375331f10bf?q=80&fm=jpg&crop=faces&fit=crop&h=100&w=100)'}}></span> Avatar
|
||||
</a>
|
||||
<a href="#" class="btn"><span class="avatar" style={{ backgroundImage: 'url(https://images.unsplash.com/photo-1542534759-05f6c34a9e63?q=80&fm=jpg&crop=faces&fit=crop&h=100&w=100)'}}></span> Avatar</a>
|
||||
<a href="#" class="btn"><span class="avatar" style={{ backgroundImage: 'url(https://images.unsplash.com/photo-1546539782-6fc531453083?q=80&fm=jpg&crop=faces&fit=crop&h=100&w=100)'}}></span> Avatar</a>
|
||||
<a href="#" class="btn"><span class="avatar" style={{ backgroundImage: 'url(https://images.unsplash.com/photo-1541585452861-0375331f10bf?q=80&fm=jpg&crop=faces&fit=crop&h=100&w=100)'}}></span> Avatar</a>
|
||||
```
|
||||
|
||||
```html
|
||||
@@ -1,15 +1,14 @@
|
||||
---
|
||||
title: Cards
|
||||
summary: Cards are flexible user interface elements, which help organize content into meaningful sections and make it easier to display on different screen sizes. Cards contain various smaller components, such as images, text, links and buttons and may act as an entry to more detailed information, helping users scan the page quickly and find the most relevant content.
|
||||
description: Cards are flexible user interface elements, which help organize content into meaningful sections and make it easier to display on different screen sizes. Cards contain various smaller components, such as images, text, links and buttons and may act as an entry to more detailed information, helping users scan the page quickly and find the most relevant content.
|
||||
bootstrapLink: components/card/
|
||||
description: Organize content with flexible cards.
|
||||
---
|
||||
|
||||
## Default card
|
||||
|
||||
Use the `.card` and `.card-body` classes to create a card and use it as the basis for a more advanced card design. A card is a perfect way to organize content and make it look neat and tidy.
|
||||
|
||||
```html example centered columns={1} background="base"
|
||||
```html example code centered columns={1}
|
||||
<div class="card">
|
||||
<div class="card-body">
|
||||
<p>This is some text within a card body.</p>
|
||||
@@ -23,7 +22,7 @@ You can change the padding of a newly created card. To do it, use the `.card-sm`
|
||||
|
||||
Cards with the `.card-sm` class are well suited for small items such as widgets, etc., while the `.card-lg` class can be used for large blocks of text. Padding will be automatically reduced on small devices, to fit the screen size.
|
||||
|
||||
```html example vertical centered separated height={500} background="base"
|
||||
```html example vertical centered separated height={500}
|
||||
<div class="card card-sm">
|
||||
<div class="card-body">
|
||||
This is some text within a card body.
|
||||
@@ -57,7 +56,7 @@ Cards with the `.card-sm` class are well suited for small items such as widgets,
|
||||
|
||||
Add a title to your card by including the `.card-title` class within `.card-body`. You can also place the title inside the `.card-header` element to separate the title from the content with a horizontal line.
|
||||
|
||||
```html example vertical centered separated height={400} background="base"
|
||||
```html code example vertical centered separated height={400}
|
||||
<div class="card">
|
||||
<div class="card-body">
|
||||
<h3 class="card-title">Card title</h3>
|
||||
@@ -78,7 +77,7 @@ Add a title to your card by including the `.card-title` class within `.card-body
|
||||
|
||||
To create a more visually appealing card, add a title and an image. Thanks to that, the card will go well with your interface design and draw users' attention.
|
||||
|
||||
```html example centered columns={1} height={500} background="base"
|
||||
```html example centered columns={1} height={500} code
|
||||
<div class="card">
|
||||
<!-- Photo -->
|
||||
<div class="img-responsive img-responsive-21x9 card-img-top" style="background-image: url(/samples/photos/cup-of-coffee-and-an-open-book.jpg)"></div>
|
||||
@@ -94,15 +93,13 @@ To create a more visually appealing card, add a title and an image. Thanks to th
|
||||
|
||||
Add an image to your blog post card to make it eye-catching. You can do it by adding the image in the `.card-img-top` class. Thanks to the `.d-flex` and `.flex-column` classes within `.card-body`, the author details will be displayed at the bottom of the card.
|
||||
|
||||
```html example centered columns={1} height={600} background="base"
|
||||
```html example centered columns={1} height={600} code
|
||||
<div class="card d-flex flex-column">
|
||||
<a href="#">
|
||||
<img class="card-img-top" src="/samples/photos/book-on-the-grass.jpg" alt="" />
|
||||
</a>
|
||||
<div class="card-body d-flex flex-column">
|
||||
<h3 class="card-title">
|
||||
<a href="#">How do you know she is a witch?</a>
|
||||
</h3>
|
||||
<h3 class="card-title"><a href="#">How do you know she is a witch?</a></h3>
|
||||
<div class="text-secondary">Are you suggesting that coconuts migrate? No, no, no! Yes, yes. A bit. But she's got a wart. You ...</div>
|
||||
<div class="d-flex align-items-center pt-4 mt-auto">
|
||||
<span class="avatar" style="background-image: url(/samples/avatars/023m.jpg)"></span>
|
||||
@@ -126,7 +123,7 @@ Add an image to your blog post card to make it eye-catching. You can do it by ad
|
||||
|
||||
Add the `.row-deck` class to `.row`, if you want to display several cards next to one another. Thanks to that, they will all have the same height.
|
||||
|
||||
```html example centered height="220px" background="base"
|
||||
```html code example centered height="220px"
|
||||
<div class="row row-deck">
|
||||
<div class="col-md-4">
|
||||
<div class="card">
|
||||
@@ -150,7 +147,7 @@ Add the `.row-deck` class to `.row`, if you want to display several cards next t
|
||||
|
||||
You can also add an image on the left side of the card. To do it, add the `.card-aside` class to the element with the `.card` class. Then add the image in the `.card-aside-column` element and it will be automatically centered and scaled to the right size.
|
||||
|
||||
```html example columns={2} centered height={400} background="base"
|
||||
```html example columns={2} centered height={400} code
|
||||
<div class="card d-flex flex-column">
|
||||
<div class="row row-0 flex-fill">
|
||||
<div class="col-md-3">
|
||||
@@ -160,9 +157,7 @@ You can also add an image on the left side of the card. To do it, add the `.card
|
||||
</div>
|
||||
<div class="col">
|
||||
<div class="card-body">
|
||||
<h3 class="card-title">
|
||||
<a href="#">Shut up!</a>
|
||||
</h3>
|
||||
<h3 class="card-title"><a href="#">Shut up!</a></h3>
|
||||
<div class="text-secondary">Burn her! How do you know she is a witch? You don't frighten us, English pig-dogs! Go and boil yo...</div>
|
||||
<div class="d-flex align-items-center pt-4 mt-auto">
|
||||
<span class="avatar" style="background-image: url(/samples/avatars/029m.jpg)"></span>
|
||||
@@ -188,7 +183,7 @@ You can also add an image on the left side of the card. To do it, add the `.card
|
||||
|
||||
Add a status color to your card, either at the top or on the side of the card, to customise it and make it more eye-catching.
|
||||
|
||||
```html example columns={2} centered height={400} background="base"
|
||||
```html example columns={2} centered height={400}
|
||||
<div class="row row-deck">
|
||||
<div class="col-md-6">
|
||||
<div class="card">
|
||||
@@ -217,17 +212,17 @@ Add a status color to your card, either at the top or on the side of the card, t
|
||||
<div class="card">
|
||||
<div class="card-status-top bg-danger"></div>
|
||||
<div class="card-body">
|
||||
<h3 class="card-title">Card with top status</h3>
|
||||
<p class="text-secondary">Lorem ipsum dolor sit amet, consectetur adipisicing elit. Aperiam deleniti fugit incidunt, iste, itaque minima
|
||||
neque pariatur perferendis sed suscipit velit vitae voluptatem.</p>
|
||||
<h3 class="card-title">Card with top status</h3>
|
||||
<p class="text-secondary">Lorem ipsum dolor sit amet, consectetur adipisicing elit. Aperiam deleniti fugit incidunt, iste, itaque minima
|
||||
neque pariatur perferendis sed suscipit velit vitae voluptatem.</p>
|
||||
</div>
|
||||
</div>
|
||||
<div class="card">
|
||||
<div class="card-status-start bg-green"></div>
|
||||
<div class="card-body">
|
||||
<h3 class="card-title">Card with side status</h3>
|
||||
<p class="text-secondary">Lorem ipsum dolor sit amet, consectetur adipisicing elit. Aperiam deleniti fugit incidunt, iste, itaque minima
|
||||
neque pariatur perferendis sed suscipit velit vitae voluptatem.</p>
|
||||
<h3 class="card-title">Card with side status</h3>
|
||||
<p class="text-secondary">Lorem ipsum dolor sit amet, consectetur adipisicing elit. Aperiam deleniti fugit incidunt, iste, itaque minima
|
||||
neque pariatur perferendis sed suscipit velit vitae voluptatem.</p>
|
||||
</div>
|
||||
</div>
|
||||
```
|
||||
@@ -236,7 +231,7 @@ Add a status color to your card, either at the top or on the side of the card, t
|
||||
|
||||
Use the `card-stacked` class to stack up multiple cards, if you want to save screen space or create a visually appealing effect.
|
||||
|
||||
```html example columns={1} centered height={300} background="base"
|
||||
```html code example columns={1} centered height={300}
|
||||
<div class="card card-stacked">
|
||||
<div class="card-body">
|
||||
<h3 class="card-title">Stacked card</h3>
|
||||
@@ -250,21 +245,13 @@ Use the `card-stacked` class to stack up multiple cards, if you want to save scr
|
||||
|
||||
Organize multiple cards into tabs to be able to display more content in a well-organized way and allow users to alternate between them easily.
|
||||
|
||||
```html example columns={2} centered height={400} background="base"
|
||||
```html example columns={2} centered height={400}
|
||||
<div class="card-tabs">
|
||||
<ul class="nav nav-tabs">
|
||||
<li class="nav-item">
|
||||
<a href="#tab-top-1" class="nav-link active" data-bs-toggle="tab">Tab 1</a>
|
||||
</li>
|
||||
<li class="nav-item">
|
||||
<a href="#tab-top-2" class="nav-link" data-bs-toggle="tab">Tab 2</a>
|
||||
</li>
|
||||
<li class="nav-item">
|
||||
<a href="#tab-top-3" class="nav-link" data-bs-toggle="tab">Tab 3</a>
|
||||
</li>
|
||||
<li class="nav-item">
|
||||
<a href="#tab-top-4" class="nav-link" data-bs-toggle="tab">Tab 4</a>
|
||||
</li>
|
||||
<li class="nav-item"><a href="#tab-top-1" class="nav-link active" data-bs-toggle="tab">Tab 1</a></li>
|
||||
<li class="nav-item"><a href="#tab-top-2" class="nav-link" data-bs-toggle="tab">Tab 2</a></li>
|
||||
<li class="nav-item"><a href="#tab-top-3" class="nav-link" data-bs-toggle="tab">Tab 3</a></li>
|
||||
<li class="nav-item"><a href="#tab-top-4" class="nav-link" data-bs-toggle="tab">Tab 4</a></li>
|
||||
</ul>
|
||||
<div class="tab-content">
|
||||
<div id="tab-top-1" class="card tab-pane active show">
|
||||
@@ -308,18 +295,10 @@ Organize multiple cards into tabs to be able to display more content in a well-o
|
||||
<div class="card-tabs">
|
||||
<!-- Cards navigation -->
|
||||
<ul class="nav nav-tabs">
|
||||
<li class="nav-item">
|
||||
<a href="#tab-top-1" class="nav-link active" data-bs-toggle="tab">Tab 1</a>
|
||||
</li>
|
||||
<li class="nav-item">
|
||||
<a href="#tab-top-2" class="nav-link" data-bs-toggle="tab">Tab 2</a>
|
||||
</li>
|
||||
<li class="nav-item">
|
||||
<a href="#tab-top-3" class="nav-link" data-bs-toggle="tab">Tab 3</a>
|
||||
</li>
|
||||
<li class="nav-item">
|
||||
<a href="#tab-top-4" class="nav-link" data-bs-toggle="tab">Tab 4</a>
|
||||
</li>
|
||||
<li class="nav-item"><a href="#tab-top-1" class="nav-link active" data-bs-toggle="tab">Tab 1</a></li>
|
||||
<li class="nav-item"><a href="#tab-top-2" class="nav-link" data-bs-toggle="tab">Tab 2</a></li>
|
||||
<li class="nav-item"><a href="#tab-top-3" class="nav-link" data-bs-toggle="tab">Tab 3</a></li>
|
||||
<li class="nav-item"><a href="#tab-top-4" class="nav-link" data-bs-toggle="tab">Tab 4</a></li>
|
||||
</ul>
|
||||
<div class="tab-content">
|
||||
<!-- Content of card #1 -->
|
||||
@@ -1,15 +1,14 @@
|
||||
---
|
||||
title: Carousel
|
||||
summary: A carousel is used to display multiple pieces of visual content without taking up too much space. Carousels eliminate the need to scroll down the page to see all content and are a popular method of displaying marketing information.
|
||||
description: A carousel is used to display multiple pieces of visual content without taking up too much space. Carousels eliminate the need to scroll down the page to see all content and are a popular method of displaying marketing information.
|
||||
bootstrapLink: components/carousel/
|
||||
description: Display visual content with carousels.
|
||||
---
|
||||
|
||||
## Default markup
|
||||
|
||||
Use a carousel to make your website design more visually appealing for users. In the default carousel design, respective elements slide automatically and users can go to the next slide by clicking an arrow.
|
||||
|
||||
```html example centered columns={2} height="35rem"
|
||||
```html code example centered columns={2} height="35rem"
|
||||
<div id="carousel-sample" class="carousel slide" data-bs-ride="carousel">
|
||||
<div class="carousel-indicators">
|
||||
<button type="button" data-bs-target="#carousel-sample" data-bs-slide-to="0" class="active"></button>
|
||||
@@ -50,7 +49,7 @@ Use a carousel to make your website design more visually appealing for users. In
|
||||
|
||||
You can replace the standard indicators with dots. Just add the `carousel-indicators-dot` class to your carousel:
|
||||
|
||||
```html example centered columns={2} height="35rem"
|
||||
```html code example centered columns={2} height="35rem"
|
||||
<div id="carousel-indicators-dot" class="carousel slide carousel-fade" data-bs-ride="carousel">
|
||||
<div class="carousel-indicators carousel-indicators-dot">
|
||||
<button type="button" data-bs-target="#carousel-indicators-dot" data-bs-slide-to="0" class="active"></button>
|
||||
@@ -83,7 +82,7 @@ You can replace the standard indicators with dots. Just add the `carousel-indica
|
||||
|
||||
The syntax is similar with thumbnails. Add class `carousel-indicators-thumb` and add `background-image` to element `[data-bs-target]`. Default thumbnails have an aspect ratio of 1:1. To change this use `ratio` utils.
|
||||
|
||||
```html example centered columns={2} height="35rem"
|
||||
```html example code centered columns={2} height="35rem"
|
||||
<div id="carousel-indicators-thumb" class="carousel slide carousel-fade" data-bs-ride="carousel">
|
||||
<div class="carousel-indicators carousel-indicators-thumb">
|
||||
<button type="button" data-bs-target="#carousel-indicators-thumb" data-bs-slide-to="0" class="ratio ratio-4x3 active" style="background-image: url(/samples/photos/group-of-people-sightseeing-in-the-city.jpg)"></button>
|
||||
@@ -116,7 +115,7 @@ The syntax is similar with thumbnails. Add class `carousel-indicators-thumb` and
|
||||
|
||||
To make the indicators go to the right side, add the `carousel-indicators-vertical` class. You can combine it with other classes that are responsible for dots or thumbnails.
|
||||
|
||||
```html example centered columns={2} height="35rem"
|
||||
```html code example centered columns={2} height="35rem"
|
||||
<div id="carousel-indicators-dot-vertical" class="carousel slide carousel-fade" data-bs-ride="carousel">
|
||||
<div class="carousel-indicators carousel-indicators-vertical carousel-indicators-dot">
|
||||
<button type="button" data-bs-target="#carousel-indicators-dot-vertical" data-bs-slide-to="0" class="active"></button>
|
||||
@@ -147,7 +146,7 @@ To make the indicators go to the right side, add the `carousel-indicators-vertic
|
||||
|
||||
Likewise, you can add thumbnails on the right side:
|
||||
|
||||
```html example centered columns={2} height="35rem"
|
||||
```html code example centered columns={2} height="35rem"
|
||||
<div id="carousel-indicators-thumb-vertical" class="carousel slide carousel-fade" data-bs-ride="carousel">
|
||||
<div class="carousel-indicators carousel-indicators-vertical carousel-indicators-thumb">
|
||||
<button type="button" data-bs-target="#carousel-indicators-thumb-vertical" data-bs-slide-to="0" class="ratio ratio-4x3 active" style="background-image: url(/samples/photos/finances-us-dollars-and-bitcoins-currency-money.jpg)"></button>
|
||||
@@ -180,7 +179,7 @@ Likewise, you can add thumbnails on the right side:
|
||||
|
||||
Add captions to your slides easily with the `.carousel-caption` element within any `.carousel-item`. To make the text more readable on the image you can add `carousel-caption-background` which will add a black overlay over the image.
|
||||
|
||||
```html example centered columns={2} height="35rem"
|
||||
```html code example centered columns={2} height="35rem"
|
||||
<div id="carousel-captions" class="carousel slide" data-bs-ride="carousel">
|
||||
<div class="carousel-inner">
|
||||
<div class="carousel-item active">
|
||||
@@ -1,8 +1,7 @@
|
||||
---
|
||||
title: Charts
|
||||
libs: apexcharts
|
||||
summary: Tabler uses ApexCharts - a free and open-source modern charting library that helps developers to create beautiful and interactive visualizations for web pages.
|
||||
description: Interactive data visualizations with ApexCharts.
|
||||
description: Tabler uses ApexCharts - a free and open-source modern charting library that helps developers to create beautiful and interactive visualizations for web pages.
|
||||
---
|
||||
|
||||
To be able to use the charts in your application you will need to install the apexcharts dependency with `npm install apexcharts`.
|
||||
@@ -11,14 +10,16 @@ See also the [ApexCharts](https://apexcharts.com/) documentation.
|
||||
|
||||
## Line Chart
|
||||
|
||||
Line charts are an essential tool for visualizing data trends over time. They are particularly useful for representing continuous data, such as stock prices, website traffic, or user activity. Below is an example of a line chart showcasing session duration, page views, and total visits:
|
||||
Line charts are a typical pictorial representation that depicts trends and behaviors over time.
|
||||
|
||||
```html example centered columns={2} height="25rem" background="surface" libs="apexcharts"
|
||||
```html example code centered columns={2} height="25rem"
|
||||
<div class="card">
|
||||
<div class="card-body">
|
||||
<div id="chart-demo-line" class="chart-lg"></div>
|
||||
</div>
|
||||
</div>
|
||||
|
||||
<script src="$TABLER_CDN/dist/libs/apexcharts/dist/apexcharts.min.js" defer></script>
|
||||
<script>
|
||||
document.addEventListener("DOMContentLoaded", function() {
|
||||
window.ApexCharts && (new ApexCharts(document.getElementById('chart-demo-line'), {
|
||||
@@ -103,14 +104,16 @@ Line charts are an essential tool for visualizing data trends over time. They ar
|
||||
|
||||
## Area Chart
|
||||
|
||||
Area charts are ideal for representing cumulative data over time. They add visual emphasis to trends by filling the space under the line, making it easier to compare values. Here's an example of an area chart with smooth transitions and data from two series:
|
||||
Area charts are used to represent quantitative variations.
|
||||
|
||||
```html example centered columns={2} height="25rem" background="surface" libs="apexcharts"
|
||||
```html example code centered columns={2} height="25rem"
|
||||
<div class="card">
|
||||
<div class="card-body">
|
||||
<div id="chart-demo-area" class="chart-lg"></div>
|
||||
</div>
|
||||
</div>
|
||||
|
||||
<script src="$TABLER_CDN/dist/libs/apexcharts/dist/apexcharts.min.js" defer></script>
|
||||
<script>
|
||||
document.addEventListener("DOMContentLoaded", function() {
|
||||
window.ApexCharts && (new ApexCharts(document.getElementById('chart-demo-area'), {
|
||||
@@ -199,14 +202,16 @@ Area charts are ideal for representing cumulative data over time. They add visua
|
||||
|
||||
## Bar Chart
|
||||
|
||||
Bar charts are highly effective for comparing data across different categories. They provide a clear and concise way to visualize differences in values, making them perfect for analyzing categorical data. Here's an example of a bar chart with stacked bars for enhanced readability:
|
||||
A bar chart is the best tool for displaying comparisons between categories of data.
|
||||
|
||||
```html example centered columns={2} height="25rem" background="surface" libs="apexcharts"
|
||||
```html example code centered columns={2} height="25rem"
|
||||
<div class="card">
|
||||
<div class="card-body">
|
||||
<div id="chart-demo-bar" class="chart-lg"></div>
|
||||
</div>
|
||||
</div>
|
||||
|
||||
<script src="$TABLER_CDN/dist/libs/apexcharts/dist/apexcharts.min.js" defer></script>
|
||||
<script>
|
||||
document.addEventListener("DOMContentLoaded", function() {
|
||||
window.ApexCharts && (new ApexCharts(document.getElementById('chart-demo-bar'), {
|
||||
@@ -305,14 +310,16 @@ Bar charts are highly effective for comparing data across different categories.
|
||||
|
||||
## Pie Chart
|
||||
|
||||
Pie charts are a simple and effective way to visualize proportions and ratios. They are commonly used to represent data as percentages of a whole, making them ideal for displaying parts of a dataset. Below is an example of a pie chart showcasing distribution across categories:
|
||||
Pie charts are an instrumental visualization tool useful in expressing data and information in terms of percentages, ratio.
|
||||
|
||||
```html example centered columns={2} height="25rem" background="surface" libs="apexcharts"
|
||||
```html example code centered columns={2} height="25rem"
|
||||
<div class="card">
|
||||
<div class="card-body">
|
||||
<div id="chart-demo-pie" class="chart-lg"></div>
|
||||
</div>
|
||||
</div>
|
||||
|
||||
<script src="$TABLER_CDN/dist/libs/apexcharts/dist/apexcharts.min.js" defer></script>
|
||||
<script>
|
||||
document.addEventListener("DOMContentLoaded", function() {
|
||||
window.ApexCharts && (new ApexCharts(document.getElementById('chart-demo-pie'), {
|
||||
@@ -363,14 +370,16 @@ Pie charts are a simple and effective way to visualize proportions and ratios. T
|
||||
|
||||
## Heatmap Chart
|
||||
|
||||
Heatmaps provide a graphical representation of data where individual values are represented by color intensity. They are particularly useful for identifying patterns or anomalies within large datasets. Here's an example of a heatmap chart to visualize data distributions:
|
||||
Heatmap is a visualization tool that employs color the way a bar chart employs height and width in representing data.
|
||||
|
||||
```html example centered columns={2} height="25rem" background="surface" libs="apexcharts"
|
||||
```html example code centered columns={2} height="25rem"
|
||||
<div class="card">
|
||||
<div class="card-body">
|
||||
<div id="chart-demo-pie" class="chart-lg"></div>
|
||||
</div>
|
||||
</div>
|
||||
|
||||
<script src="$TABLER_CDN/dist/libs/apexcharts/dist/apexcharts.min.js" defer></script>
|
||||
<script>
|
||||
document.addEventListener("DOMContentLoaded", function() {
|
||||
window.ApexCharts && (new ApexCharts(document.getElementById('chart-demo-pie'), {
|
||||
@@ -421,14 +430,14 @@ Heatmaps provide a graphical representation of data where individual values are
|
||||
|
||||
## Advanced example
|
||||
|
||||
For more complex data visualizations, you can create advanced charts with multiple series and custom configurations. Below is an example of a social media referrals chart combining data from Facebook, Twitter, and Dribbble:
|
||||
|
||||
```html example centered columns={2} height="25rem" background="surface" libs="apexcharts"
|
||||
```html example code centered columns={2} height="25rem"
|
||||
<div class="card">
|
||||
<div class="card-body">
|
||||
<div id="chart-social-referrals" class="chart-lg"></div>
|
||||
</div>
|
||||
</div>
|
||||
|
||||
<script src="$TABLER_CDN/dist/libs/apexcharts/dist/apexcharts.min.js" defer></script>
|
||||
<script>
|
||||
document.addEventListener("DOMContentLoaded", function() {
|
||||
window.ApexCharts && (new ApexCharts(document.getElementById('chart-social-referrals'), {
|
||||
136
docs/components/countup.mdx
Normal file
136
docs/components/countup.mdx
Normal file
@@ -0,0 +1,136 @@
|
||||
---
|
||||
title: Countup
|
||||
description: A countup element is used to display numerical data in an interesting way and make the interface more interactive.
|
||||
libs: countup
|
||||
---
|
||||
|
||||
To be able to use the countup in your application you will need to install the countup.js dependency with `npm install countup.js`.
|
||||
|
||||
## Default countup
|
||||
|
||||
To create a countup, add `data-countup` to any HTML text tag and specify the number which is to be reached. The animation will be triggered as soon as the number enters the viewport.
|
||||
|
||||
```html code example
|
||||
<script src="$TABLER_CDN/dist/libs/countup.js/dist/countUp.js"></script>
|
||||
|
||||
<h1 data-countup>30000</h1>
|
||||
```
|
||||
|
||||
## Duration
|
||||
|
||||
Set the `duration` to determine how long the animation should take. By default, the duration is set to 2 seconds, but you can modify it as you wish.
|
||||
|
||||
```html code example
|
||||
<script src="$TABLER_CDN/dist/libs/countup.js/dist/countUp.js"></script>
|
||||
|
||||
<h1 data-countup>30000</h1>
|
||||
<h1 data-countup='{"duration":4}'>30000</h1>
|
||||
<h1 data-countup='{"duration":6}'>30000</h1>
|
||||
```
|
||||
|
||||
## Starting value
|
||||
|
||||
By default the countup will start from zero. If you want to set a different start value use `startVal`.
|
||||
You can also set the start value to be greater than the final value, so that it counts down instead of up.
|
||||
|
||||
```html code example
|
||||
<script src="$TABLER_CDN/dist/libs/countup.js/dist/countUp.js"></script>
|
||||
|
||||
<h1 data-countup='{"startVal":12345}'>30000</h1>
|
||||
<h1 data-countup='{"startVal":47655}'>30000</h1>
|
||||
```
|
||||
|
||||
## Decimal places
|
||||
|
||||
Set how many decimal numbers should be displayed using `decimalPlaces`.
|
||||
|
||||
```html code example
|
||||
<script src="$TABLER_CDN/dist/libs/countup.js/dist/countUp.js"></script>
|
||||
|
||||
<h1 data-countup>3.123</h1>
|
||||
<h1 data-countup='{"decimalPlaces":1}'>3.123</h1>
|
||||
<h1 data-countup='{"decimalPlaces":2}'>3.123</h1>
|
||||
<h1 data-countup='{"decimalPlaces":3}'>3.123</h1>
|
||||
```
|
||||
|
||||
## Easing
|
||||
|
||||
Disable easing using `"useEasing": false`. Easing is set to `true` by default, so that the animation speed changes over the course of its duration.
|
||||
|
||||
```html code example
|
||||
<script src="$TABLER_CDN/dist/libs/countup.js/dist/countUp.js"></script>
|
||||
|
||||
<h1 data-countup>30000</h1>
|
||||
<h1 data-countup='{"useEasing": false}'>30000</h1>
|
||||
```
|
||||
|
||||
## Use grouping
|
||||
|
||||
Disable grouping using `"useGrouping": false`. Grouping is set to `true` by default and the default group separator is a comma.
|
||||
|
||||
```html code example
|
||||
<script src="$TABLER_CDN/dist/libs/countup.js/dist/countUp.js"></script>
|
||||
|
||||
<h1 data-countup>30000</h1>
|
||||
<h1 data-countup='{"useGrouping": false}'>30000</h1>
|
||||
```
|
||||
|
||||
## Separator
|
||||
|
||||
You can change the default comma group separator using `separator` and specifying the one you wish to use.
|
||||
|
||||
```html code example
|
||||
<script src="$TABLER_CDN/dist/libs/countup.js/dist/countUp.js"></script>
|
||||
|
||||
<h1 data-countup>3000000</h1>
|
||||
<h1 data-countup='{"separator":" "}'>3000000</h1>
|
||||
<h1 data-countup='{"separator":"-"}'>3000000</h1>
|
||||
<h1 data-countup='{"separator":":"}'>3000000</h1>
|
||||
```
|
||||
|
||||
## Decimal separator
|
||||
|
||||
You can also change the decimal separator which is set to a full stop by default. To do it, use `decimal` and specify the decimal separator of your choice.
|
||||
|
||||
```html code example
|
||||
<script src="$TABLER_CDN/dist/libs/countup.js/dist/countUp.js"></script>
|
||||
|
||||
<h1 data-countup='{"decimalPlaces":2}'>3.12</h1>
|
||||
<h1 data-countup='{"decimalPlaces":2,"decimal":".."}'>3.12</h1>
|
||||
<h1 data-countup='{"decimalPlaces":2,"decimal":"^"}'>3.12</h1>
|
||||
<h1 data-countup='{"decimalPlaces":2,"decimal":":"}'>3.12</h1>
|
||||
```
|
||||
|
||||
## Prefix
|
||||
|
||||
Set the countup prefix using `prefix` and specifying the prefix you want to add, for instance a currency symbol.
|
||||
|
||||
```html code example
|
||||
<script src="$TABLER_CDN/dist/libs/countup.js/dist/countUp.js"></script>
|
||||
|
||||
<h1 data-countup='{"prefix":"$"}'>30000</h1>
|
||||
<h1 data-countup='{"prefix":"€"}'>30000</h1>
|
||||
<h1 data-countup='{"prefix":"£"}'>30000</h1>
|
||||
```
|
||||
|
||||
## Suffix
|
||||
|
||||
Set the countup suffix using `suffix`.
|
||||
|
||||
```html code example
|
||||
<script src="$TABLER_CDN/dist/libs/countup.js/dist/countUp.js"></script>
|
||||
|
||||
<h1 data-countup='{"suffix":"%"}'>30</h1>
|
||||
<h1 data-countup='{"suffix":"‰"}'>30</h1>
|
||||
<h1 data-countup='{"suffix":"k"}'>30</h1>
|
||||
```
|
||||
|
||||
Of course you can mix all of these:
|
||||
|
||||
```html code example
|
||||
<script src="$TABLER_CDN/dist/libs/countup.js/dist/countUp.js"></script>
|
||||
|
||||
<h1 data-countup='{"duration":6,"startVal":12345,"decimalPlaces":2,"separator":" ","prefix":"$"}'>64547834.76</h1>
|
||||
```
|
||||
|
||||
For more advanced features of countups, click [**here**](https://inorganik.github.io/countUp.js/) and see what more you can do.
|
||||
@@ -1,10 +1,9 @@
|
||||
---
|
||||
title: Data grid
|
||||
summary: Use the data grid component to display detailed information about your product. The data is displayed as a column of items consisting of a title and content.
|
||||
description: Detailed product information in grids.
|
||||
description: Use the data grid component to display detailed information about your product. The data is displayed as a column of items consisting of a title and content.
|
||||
---
|
||||
|
||||
```html example vcentered height="460px"
|
||||
```html example code vcentered height="460px"
|
||||
<div class="datagrid">
|
||||
<div class="datagrid-item">
|
||||
<div class="datagrid-title">Registrar</div>
|
||||
@@ -89,10 +88,3 @@ description: Detailed product information in grids.
|
||||
</div>
|
||||
</div>
|
||||
```
|
||||
|
||||
You can adjust the datagrid to your needs setting the values of variables:
|
||||
|
||||
| Variable | Description | Default |
|
||||
|----------|-------------|---------|
|
||||
| `--tblr-datagrid-item-width` | Width of the datagrid item | `15rem` |
|
||||
| `--tblr-datagrid-padding` | Gap between the datagrid items | `1.5rem` |
|
||||
@@ -1,14 +1,14 @@
|
||||
---
|
||||
title: Divider
|
||||
summary: Dividers help organize content and make the interface layout clear and uncluttered. Greater clarity adds up to better user experience and enhanced interaction with a website or app.
|
||||
description: Separate content with clear dividers.
|
||||
description: Dividers help organize content and make the interface layout clear and uncluttered. Greater clarity adds up to better user experience and enhanced interaction with a website or app.
|
||||
bootstrapLink: components/dropdowns/#dividers
|
||||
---
|
||||
|
||||
## Default markup
|
||||
|
||||
Use dividers to visually separate content into parts. You can use a line only or add text that will be centered by default.
|
||||
|
||||
```html example
|
||||
```html code example
|
||||
<p>
|
||||
Lorem ipsum dolor sit amet, consectetur adipisicing elit. Alias, dolore dolores doloribus est ex.
|
||||
</p>
|
||||
@@ -22,11 +22,11 @@ Use dividers to visually separate content into parts. You can use a line only or
|
||||
|
||||
You can modify the position of the text which is to be included in a separator and make it left- or right-aligned. Otherwise, the text will remain centered.
|
||||
|
||||
```html example height="380px"
|
||||
```html code example height="380px"
|
||||
<p>
|
||||
Lorem ipsum dolor sit amet, consectetur adipisicing elit. Alias, dolore dolores doloribus est ex.
|
||||
</p>
|
||||
<div class="hr-text hr-text-start">Start divider</div>
|
||||
<div class="hr-text hr-text-left">Left divider</div>
|
||||
<p>
|
||||
Dicta error hic illo iure necessitatibus nihil officiis omnis perferendis, praesentium repellendus rerum, saepe sed, sit!
|
||||
</p>
|
||||
@@ -34,7 +34,7 @@ You can modify the position of the text which is to be included in a separator a
|
||||
<p>
|
||||
Lorem ipsum dolor sit amet, consectetur adipisicing elit. Alias, dolore dolores doloribus est ex.
|
||||
</p>
|
||||
<div class="hr-text hr-text-end">End divider</div>
|
||||
<div class="hr-text hr-text-right">Right divider</div>
|
||||
<p>
|
||||
Dicta error hic illo iure necessitatibus nihil officiis omnis perferendis, praesentium repellendus rerum, saepe sed, sit!
|
||||
</p>
|
||||
@@ -42,9 +42,9 @@ You can modify the position of the text which is to be included in a separator a
|
||||
|
||||
## Divider color
|
||||
|
||||
Customize the color of dividers to make them go well with your design. Click [here](/docs/ui/base/colors) to see the list of available colors.
|
||||
Customize the color of dividers to make them go well with your design. Click [here](colors) to see the list of available colors.
|
||||
|
||||
```html example height="380px"
|
||||
```html code example height="380px"
|
||||
<p>
|
||||
Lorem ipsum dolor sit amet, consectetur adipisicing elit. Alias, dolore dolores doloribus est ex.
|
||||
</p>
|
||||
@@ -1,15 +1,14 @@
|
||||
---
|
||||
title: Dropdowns
|
||||
summary: Use dropdowns to display lists of options or include more positions in a menu without overwhelming users with too many buttons and long lists. Dropdowns facilitate users' interaction with your website or software and make your design look clear.
|
||||
description: Use dropdowns to display lists of options or include more positions in a menu without overwhelming users with too many buttons and long lists. Dropdowns facilitate users' interaction with your website or software and make your design look clear.
|
||||
bootstrapLink: components/dropdowns
|
||||
description: Organize options with dropdown menus.
|
||||
---
|
||||
|
||||
## Default dropdown
|
||||
|
||||
With small markup changes, you can turn any `.btn` into a dropdown toggle and use it to display more options for users to choose from. Start with the default dropdown and then use additional classes to make your dropdown more user-friendly.
|
||||
|
||||
```html example height="16rem"
|
||||
```html example code height="16rem"
|
||||
<div class="dropdown">
|
||||
<a href="#" class="btn dropdown-toggle" data-bs-toggle="dropdown">Open dropdown</a>
|
||||
<div class="dropdown-menu">
|
||||
@@ -24,7 +23,7 @@ With small markup changes, you can turn any `.btn` into a dropdown toggle and us
|
||||
|
||||
Use dropdown dividers to separate groups of dropdown items for greater clarity.
|
||||
|
||||
```html example height="16rem"
|
||||
```html example code height="16rem"
|
||||
<div class="dropdown">
|
||||
<a href="#" class="btn dropdown-toggle" data-bs-toggle="dropdown">Open dropdown</a>
|
||||
<div class="dropdown-menu">
|
||||
@@ -44,7 +43,7 @@ Use dropdown dividers to separate groups of dropdown items for greater clarity.
|
||||
|
||||
Make a dropdown item look active, so that it highlights when a user hovers over a given option.
|
||||
|
||||
```html example height="16rem"
|
||||
```html example code height="16rem"
|
||||
<div class="dropdown">
|
||||
<a href="#" class="btn dropdown-toggle" data-bs-toggle="dropdown">Open dropdown</a>
|
||||
<div class="dropdown-menu">
|
||||
@@ -63,7 +62,7 @@ Make a dropdown item look active, so that it highlights when a user hovers over
|
||||
|
||||
Make a dropdown item look disabled to display options which are currently not available but can activate once certain conditions are met.
|
||||
|
||||
```html example height="16rem"
|
||||
```html code example height="16rem"
|
||||
<div class="dropdown">
|
||||
<a href="#" class="btn dropdown-toggle" data-bs-toggle="dropdown">Open dropdown</a>
|
||||
<div class="dropdown-menu">
|
||||
@@ -82,7 +81,7 @@ Make a dropdown item look disabled to display options which are currently not av
|
||||
|
||||
Add a dropdown header to group dropdown items into sections and name them accordingly.
|
||||
|
||||
```html example height="16rem"
|
||||
```html code example height="16rem"
|
||||
<div class="dropdown">
|
||||
<a href="#" class="btn dropdown-toggle" data-bs-toggle="dropdown">Open dropdown</a>
|
||||
<div class="dropdown-menu">
|
||||
@@ -101,7 +100,7 @@ Add a dropdown header to group dropdown items into sections and name them accord
|
||||
|
||||
Use icons in your dropdowns to add more visual content and make the options easy to identify for users.
|
||||
|
||||
```html example height="16rem"
|
||||
```html code example height="16rem"
|
||||
<div class="dropdown">
|
||||
<a href="#" class="btn dropdown-toggle" data-bs-toggle="dropdown">Open dropdown</a>
|
||||
<div class="dropdown-menu">
|
||||
@@ -130,7 +129,7 @@ Use icons in your dropdowns to add more visual content and make the options easy
|
||||
|
||||
Add an arrow that points at the dropdown button.
|
||||
|
||||
```html example height="16rem"
|
||||
```html code example height="16rem"
|
||||
<div class="dropdown">
|
||||
<a href="#" class="btn dropdown-toggle" data-bs-toggle="dropdown">Open dropdown</a>
|
||||
<div class="dropdown-menu dropdown-menu-arrow">
|
||||
@@ -148,7 +147,7 @@ Add an arrow that points at the dropdown button.
|
||||
|
||||
Add a badge to your dropdown items to show additional information related to an item or distinguish it from other elements.
|
||||
|
||||
```html example height="16rem"
|
||||
```html code example height="16rem"
|
||||
<div class="dropdown">
|
||||
<a href="#" class="btn dropdown-toggle" data-bs-toggle="dropdown">Open dropdown</a>
|
||||
<div class="dropdown-menu">
|
||||
@@ -168,19 +167,13 @@ Add a badge to your dropdown items to show additional information related to an
|
||||
|
||||
Use dropdowns with checkboxes to allow users to select options from a predefined list. Dropdowns with checkboxes are particularly useful for filtering.
|
||||
|
||||
```html example height="16rem"
|
||||
```html code example height="16rem"
|
||||
<div class="dropdown">
|
||||
<a href="#" class="btn dropdown-toggle" data-bs-toggle="dropdown">Open dropdown</a>
|
||||
<div class="dropdown-menu">
|
||||
<label class="dropdown-item">
|
||||
<input class="form-check-input m-0 me-2" type="radio" /> Option 1
|
||||
</label>
|
||||
<label class="dropdown-item">
|
||||
<input class="form-check-input m-0 me-2" type="radio" /> Option 2
|
||||
</label>
|
||||
<label class="dropdown-item">
|
||||
<input class="form-check-input m-0 me-2" type="radio" /> Option 3
|
||||
</label>
|
||||
<label class="dropdown-item"><input class="form-check-input m-0 me-2" type="radio" /> Option 1</label>
|
||||
<label class="dropdown-item"><input class="form-check-input m-0 me-2" type="radio" /> Option 2</label>
|
||||
<label class="dropdown-item"><input class="form-check-input m-0 me-2" type="radio" /> Option 3</label>
|
||||
</div>
|
||||
</div>
|
||||
```
|
||||
@@ -189,7 +182,7 @@ Use dropdowns with checkboxes to allow users to select options from a predefined
|
||||
|
||||
Make your dropdown suit the dark mode of your website or software.
|
||||
|
||||
```html example height="16rem"
|
||||
```html code example height="16rem"
|
||||
<div class="dropdown">
|
||||
<a href="#" class="btn dropdown-toggle" data-bs-toggle="dropdown">Open dropdown</a>
|
||||
<div class="dropdown-menu dropdown-menu-arrow bg-dark text-white">
|
||||
@@ -228,9 +221,7 @@ Use a dropdown with card content to make it easy for users to get more informati
|
||||
<img class="card-img-top" src="/samples/photos/friends-at-a-restaurant-drinking-wine.jpg" alt="How do you know she is a witch?" />
|
||||
</a>
|
||||
<div class="card-body d-flex flex-column">
|
||||
<h3 class="card-title">
|
||||
<a href="#">How do you know she is a witch?</a>
|
||||
</h3>
|
||||
<h3 class="card-title"><a href="#">How do you know she is a witch?</a></h3>
|
||||
<div class="text-secondary">Are you suggesting that coconuts migrate? No, no, no! Yes, yes. A bit. But she's got a wart. You ...</div>
|
||||
<div class="d-flex align-items-center pt-4 mt-auto">
|
||||
<span class="avatar" style="background-image: url(/samples/avatars/013m.jpg)"></span>
|
||||
63
docs/components/dropzone.mdx
Normal file
63
docs/components/dropzone.mdx
Normal file
@@ -0,0 +1,63 @@
|
||||
---
|
||||
title: Dropzone
|
||||
libs: dropzone
|
||||
description: Dropzone is a simple JavaScript library that helps you add file drag and drop functionality to your web forms. It is one of the most popular drag and drop library on the web and is used by millions of people.
|
||||
---
|
||||
|
||||
## Default Dropzone
|
||||
|
||||
```html example code vendors height="240px"
|
||||
<form class="dropzone" id="dropzone-default" action="." autocomplete="off" novalidate>
|
||||
<div class="fallback">
|
||||
<input name="file" type="file" />
|
||||
</div>
|
||||
</form>
|
||||
|
||||
<link href="$TABLER_CDN/dist/libs/dropzone/dist/dropzone.css" rel="stylesheet" />
|
||||
<script src="$TABLER_CDN/dist/libs/dropzone/dist/dropzone-min.js"></script>
|
||||
<script>
|
||||
document.addEventListener("DOMContentLoaded", function() {
|
||||
new Dropzone("#dropzone-default")
|
||||
})
|
||||
</script>
|
||||
```
|
||||
|
||||
## Add multiple files
|
||||
|
||||
```html example code vendors height="240px"
|
||||
<form class="dropzone" id="dropzone-mulitple" action="." autocomplete="off" novalidate>
|
||||
<div class="fallback">
|
||||
<input name="file" type="file" multiple />
|
||||
</div>
|
||||
</form>
|
||||
|
||||
<link href="$TABLER_CDN/dist/libs/dropzone/dist/dropzone.css" rel="stylesheet" />
|
||||
<script src="$TABLER_CDN/dist/libs/dropzone/dist/dropzone-min.js"></script>
|
||||
<script>
|
||||
document.addEventListener("DOMContentLoaded", function() {
|
||||
new Dropzone("#dropzone-mulitple")
|
||||
})
|
||||
</script>
|
||||
```
|
||||
|
||||
## Custom Dropzone
|
||||
|
||||
```html example code vendors height="240px"
|
||||
<form class="dropzone" id="dropzone-custom" action="." autocomplete="off" novalidate>
|
||||
<div class="fallback">
|
||||
<input name="file" type="file" />
|
||||
</div>
|
||||
<div class="dz-message">
|
||||
<h3 class="dropzone-msg-title">Your text here</h3>
|
||||
<span class="dropzone-msg-desc">Your custom description here</span>
|
||||
</div>
|
||||
</form>
|
||||
|
||||
<link href="$TABLER_CDN/dist/libs/dropzone/dist/dropzone.css" rel="stylesheet" />
|
||||
<script src="$TABLER_CDN/dist/libs/dropzone/dist/dropzone-min.js"></script>
|
||||
<script>
|
||||
document.addEventListener("DOMContentLoaded", function() {
|
||||
new Dropzone("#dropzone-custom")
|
||||
})
|
||||
</script>
|
||||
```
|
||||
@@ -1,14 +1,13 @@
|
||||
---
|
||||
title: Empty states
|
||||
summary: Empty states or blank pages are commonly used as placeholders for first-use, empty data or error screens. Their aim is to engage users when there is no content to display and that is why their design is extremely important from the point of view of the user experience of your website or app.
|
||||
description: Engage users in empty or error screens.
|
||||
description: Empty states or blank pages are commonly used as placeholders for first-use, empty data or error screens. Their aim is to engage users when there is no content to display and that is why their design is extremely important from the point of view of the user experience of your website or app.
|
||||
---
|
||||
|
||||
## Default markup
|
||||
|
||||
Use the default empty state to engage users in the critical moments of their experience with your website or app. A good empty state screen should let users know what is happening and what they should do next as well as encourage them to take action.
|
||||
|
||||
```html example height="300px"
|
||||
```html code example height="300px"
|
||||
<div class="empty">
|
||||
<div class="empty-icon">
|
||||
<svg xmlns="http://www.w3.org/2000/svg" class="icon" width="24" height="24" viewBox="0 0 24 24" stroke-width="2" stroke="currentColor" fill="none" stroke-linecap="round" stroke-linejoin="round">
|
||||
@@ -40,10 +39,9 @@ Use the default empty state to engage users in the critical moments of their exp
|
||||
|
||||
Make your empty state screen more attractive and engaging by adding an illustration. Thanks to a more personalized design, you will improve your brand image and make your website or app more user friendly.
|
||||
|
||||
```html example height="300px"
|
||||
```html code example height="300px"
|
||||
<div class="empty">
|
||||
<div class="empty-img">
|
||||
<img src="..." height="128" alt="" />
|
||||
<div class="empty-img"><img src="..." height="128" alt="" />
|
||||
</div>
|
||||
<p class="empty-title">Invoices are managed from here</p>
|
||||
<p class="empty-subtitle text-secondary">
|
||||
@@ -96,7 +94,7 @@ Instead of adding an icon or illustration you can simply give the text:
|
||||
</p>
|
||||
<div class="empty-action">
|
||||
<a href="#" class="btn btn-primary">
|
||||
<!-- SVG icon from http://tabler.io/icons/icon/arrow-left -->
|
||||
<!-- SVG icon from http://tabler-icons.io/i/arrow-left -->
|
||||
<svg>...</svg>
|
||||
Take me home
|
||||
</a>
|
||||
@@ -1,26 +1,12 @@
|
||||
---
|
||||
title: Icons
|
||||
summary: Use one of over 5000 icons created specifically for Tabler and make your dashboard look even more attractive. All icons are under MIT license, so you can use them without any problem both in private and commercial projects.
|
||||
description: Use one of over 3000 icons created specifically for Tabler and make your dashboard look even more attractive. All icons are under MIT license, so you can use them without any problem both in private and commercial projects.
|
||||
banner: icons
|
||||
description: Enhance dashboards with custom icons.
|
||||
---
|
||||
|
||||
If you need to add icons to your website, you can use the Tabler Icons library. It contains over 5000 icons that you can use in your projects. All icons are under the MIT license, so you can use them without any problem both in private and commercial projects. You can find the Tabler Icons library [here](https://tabler-icons.io/).
|
||||
|
||||
## Base icon
|
||||
|
||||
To add icon to your code copy the SVG code from the Tabler Icons website and paste it into your HTML file.
|
||||
|
||||
```html
|
||||
<svg xmlns="http://www.w3.org/2000/svg" class="icon icon-tabler icon-tabler-heart" width="24" height="24" viewBox="0 0 24 24" stroke-width="2" stroke="currentColor" fill="none" stroke-linecap="round" stroke-linejoin="round">
|
||||
<path stroke="none" d="M0 0h24v24H0z" fill="none"></path>
|
||||
<path d="M19.5 12.572l-7.5 7.428l-7.5 -7.428a5 5 0 1 1 7.5 -6.566a5 5 0 1 1 7.5 6.572"></path>
|
||||
</svg>
|
||||
```
|
||||
|
||||
Results can be seen in the example below.
|
||||
|
||||
```html example centered separated
|
||||
```html code example centered separated
|
||||
<svg xmlns="http://www.w3.org/2000/svg" class="icon icon-tabler icon-tabler-heart" width="24" height="24" viewBox="0 0 24 24" stroke-width="2" stroke="currentColor" fill="none" stroke-linecap="round" stroke-linejoin="round">
|
||||
<path stroke="none" d="M0 0h24v24H0z" fill="none"></path>
|
||||
<path d="M19.5 12.572l-7.5 7.428l-7.5 -7.428a5 5 0 1 1 7.5 -6.566a5 5 0 1 1 7.5 6.572"></path>
|
||||
@@ -53,18 +39,7 @@ Results can be seen in the example below.
|
||||
|
||||
## Filled icons
|
||||
|
||||
To use filled icons, you need to copy the SVG code from the Tabler Icons website and paste it into your HTML file.
|
||||
|
||||
```html
|
||||
<svg xmlns="http://www.w3.org/2000/svg" class="icon icon-tabler icon-tabler-heart-filled" width="24" height="24" viewBox="0 0 24 24" stroke-width="2" stroke="currentColor" fill="none" stroke-linecap="round" stroke-linejoin="round">
|
||||
<path stroke="none" d="M0 0h24v24H0z" fill="none"></path>
|
||||
<path d="M6.979 3.074a6 6 0 0 1 4.988 1.425l.037 .033l.034 -.03a6 6 0 0 1 4.733 -1.44l.246 .036a6 6 0 0 1 3.364 10.008l-.18 .185l-.048 .041l-7.45 7.379a1 1 0 0 1 -1.313 .082l-.094 -.082l-7.493 -7.422a6 6 0 0 1 3.176 -10.215z" stroke-width="0" fill="currentColor"></path>
|
||||
</svg>
|
||||
```
|
||||
|
||||
Look at the example below to see the filled icons.
|
||||
|
||||
```html example centered separated
|
||||
```html code example centered separated
|
||||
<svg xmlns="http://www.w3.org/2000/svg" class="icon icon-tabler icon-tabler-heart-filled" width="24" height="24" viewBox="0 0 24 24" stroke-width="2" stroke="currentColor" fill="none" stroke-linecap="round" stroke-linejoin="round">
|
||||
<path stroke="none" d="M0 0h24v24H0z" fill="none"></path>
|
||||
<path d="M6.979 3.074a6 6 0 0 1 4.988 1.425l.037 .033l.034 -.03a6 6 0 0 1 4.733 -1.44l.246 .036a6 6 0 0 1 3.364 10.008l-.18 .185l-.048 .041l-7.45 7.379a1 1 0 0 1 -1.313 .082l-.094 -.082l-7.493 -7.422a6 6 0 0 1 3.176 -10.215z" stroke-width="0" fill="currentColor"></path>
|
||||
@@ -88,18 +63,7 @@ Look at the example below to see the filled icons.
|
||||
|
||||
## Icon colors
|
||||
|
||||
To change the color of the icon, you need to add the `text-` class to the parent element of the icon. Full list of available colors can be found [here](/docs/ui/colors). Color classes can be used with any HTML element.
|
||||
|
||||
```html
|
||||
<span class="text-red">
|
||||
<!-- SVG icon from http://tabler.io/icons/icon/heart -->
|
||||
<svg>...</svg>
|
||||
</span>
|
||||
```
|
||||
|
||||
Look at the example below to see how the color of the icon changes.
|
||||
|
||||
```html example centered separated
|
||||
```html example code centered separated
|
||||
<span class="text-red">
|
||||
<svg xmlns="http://www.w3.org/2000/svg" class="icon icon-tabler icon-tabler-heart-filled" width="24" height="24" viewBox="0 0 24 24" stroke-width="2" stroke="currentColor" fill="none" stroke-linecap="round" stroke-linejoin="round">
|
||||
<path stroke="none" d="M0 0h24v24H0z" fill="none"></path>
|
||||
@@ -128,19 +92,6 @@ Look at the example below to see how the color of the icon changes.
|
||||
|
||||
## Icon animations
|
||||
|
||||
To add an animation to the icon, you need to add the `icon-pulse`, `icon-tada`, or `icon-rotate` class to the SVG element.
|
||||
|
||||
```html
|
||||
<!-- SVG icon from http://tabler.io/icons/icon/heart -->
|
||||
<svg class="icon-pulse" ...>...</svg>
|
||||
<!-- SVG icon from http://tabler.io/icons/icon/bell -->
|
||||
<svg class="icon-tada" ...>...</svg>
|
||||
<!-- SVG icon from http://tabler.io/icons/icon/rotate-clockwise -->
|
||||
<svg class="icon-rotate" ...>...</svg>
|
||||
```
|
||||
|
||||
Look at the example below to see the animated icons.
|
||||
|
||||
```html example centered separated
|
||||
<svg xmlns="http://www.w3.org/2000/svg" class="icon icon-pulse" width="24" height="24" viewBox="0 0 24 24" stroke-width="2" stroke="currentColor" fill="none" stroke-linecap="round" stroke-linejoin="round">
|
||||
<path stroke="none" d="M0 0h24v24H0z" fill="none" />
|
||||
@@ -157,3 +108,13 @@ Look at the example below to see the animated icons.
|
||||
</svg>
|
||||
```
|
||||
|
||||
```html
|
||||
<!-- SVG icon from http://tabler-icons.io/i/heart -->
|
||||
<svg class="icon-pulse" ...>...</svg>
|
||||
|
||||
<!-- SVG icon from http://tabler-icons.io/i/bell -->
|
||||
<svg class="icon-tada" ...>...</svg>
|
||||
|
||||
<!-- SVG icon from http://tabler-icons.io/i/rotate-clockwise -->
|
||||
<svg class="icon-rotate" ...>...</svg>
|
||||
```
|
||||
31
docs/components/inline-player.mdx
Normal file
31
docs/components/inline-player.mdx
Normal file
@@ -0,0 +1,31 @@
|
||||
---
|
||||
title: Inline player
|
||||
libs: plyr
|
||||
description: A simple, lightweight, accessible and customizable HTML5, YouTube and Vimeo media player that supports modern browsers.
|
||||
---
|
||||
|
||||
## Sample demo
|
||||
|
||||
```html example code vendors height="500px"
|
||||
<div id="player-youtube" data-plyr-provider="youtube" data-plyr-embed-id="dQw4w9WgXcQ"></div>
|
||||
|
||||
<script src="$TABLER_CDN/dist/libs/plyr/dist/plyr.min.js"></script>
|
||||
<script>
|
||||
document.addEventListener("DOMContentLoaded", function() {
|
||||
window.Plyr && (new Plyr('#player-youtube'));
|
||||
});
|
||||
</script>
|
||||
```
|
||||
|
||||
## Vimeo file
|
||||
|
||||
```html example code vendors height="500px"
|
||||
<div id="player-vimeo" data-plyr-provider="vimeo" data-plyr-embed-id="515937365"></div>
|
||||
|
||||
<script src="$TABLER_CDN/dist/libs/plyr/dist/plyr.min.js"></script>
|
||||
<script>
|
||||
document.addEventListener("DOMContentLoaded", function() {
|
||||
window.Plyr && (new Plyr('#player-vimeo'));
|
||||
});
|
||||
</script>
|
||||
```
|
||||
@@ -1,39 +1,15 @@
|
||||
---
|
||||
title: Modals
|
||||
summary: Use Bootstrap’s JavaScript modal plugin to add dialogs to your site for lightboxes, user notifications, or completely custom content.
|
||||
description: Dialogs for notifications and content.
|
||||
description: Use Bootstrap’s JavaScript modal plugin to add dialogs to your site for lightboxes, user notifications, or completely custom content.
|
||||
---
|
||||
|
||||
Modals are built with HTML, CSS, and JavaScript. They’re positioned over everything else in the document and remove scroll from the `<body>` so that modal content scrolls instead.
|
||||
|
||||
## Default markup
|
||||
|
||||
To create a modal, you need to add a `.modal` element to the document. Inside the `.modal`, you need to add a `.modal-dialog` element, which contains a `.modal-content` element. The `.modal-content` element contains the modal’s header, body, and footer.
|
||||
|
||||
```html
|
||||
<div class="modal" tabindex="-1">
|
||||
<div class="modal-dialog" role="document">
|
||||
<div class="modal-content">
|
||||
<div class="modal-header">
|
||||
...
|
||||
</div>
|
||||
<div class="modal-body">
|
||||
...
|
||||
</div>
|
||||
<div class="modal-footer">
|
||||
...
|
||||
</div>
|
||||
</div>
|
||||
</div>
|
||||
</div>
|
||||
```
|
||||
|
||||
Look at the example below to see how the modal looks.
|
||||
|
||||
```html example centered height="30rem"
|
||||
```html example code centered height="30rem"
|
||||
<button type="button" class="btn btn-primary" data-bs-toggle="modal" data-bs-target="#exampleModal">
|
||||
Launch demo modal
|
||||
</button>
|
||||
|
||||
<div class="modal" id="exampleModal" tabindex="-1">
|
||||
<div class="modal-dialog" role="document">
|
||||
<div class="modal-content">
|
||||
@@ -55,9 +31,11 @@ Look at the example below to see how the modal looks.
|
||||
|
||||
## Prompt and alert
|
||||
|
||||
You can use the modal to create a prompt or alert. Look at the example below to see how the prompt and alert look.
|
||||
```html example code centered height="30rem"
|
||||
<button type="button" class="btn btn-primary" data-bs-toggle="modal" data-bs-target="#exampleModal">
|
||||
Launch alert modal
|
||||
</button>
|
||||
|
||||
```html example centered height="30rem"
|
||||
<div class="modal" id="exampleModal" tabindex="-1">
|
||||
<div class="modal-dialog modal-sm" role="document">
|
||||
<div class="modal-content">
|
||||
@@ -75,31 +53,25 @@ You can use the modal to create a prompt or alert. Look at the example below to
|
||||
<div class="modal-footer">
|
||||
<div class="w-100">
|
||||
<div class="row">
|
||||
<div class="col">
|
||||
<a href="#" class="btn w-100" data-bs-dismiss="modal">
|
||||
<div class="col"><a href="#" class="btn w-100" data-bs-dismiss="modal">
|
||||
Cancel
|
||||
</a>
|
||||
</div>
|
||||
<div class="col">
|
||||
<a href="#" class="btn btn-danger w-100" data-bs-dismiss="modal">
|
||||
</a></div>
|
||||
<div class="col"><a href="#" class="btn btn-danger w-100" data-bs-dismiss="modal">
|
||||
Delete 84 items
|
||||
</a>
|
||||
</div>
|
||||
</a></div>
|
||||
</div>
|
||||
</div>
|
||||
</div>
|
||||
</div>
|
||||
</div>
|
||||
</div>
|
||||
<script>
|
||||
document.addEventListener("DOMContentLoaded", function() {
|
||||
var myModal = new bootstrap.Modal(document.getElementById('exampleModal'))
|
||||
myModal.show()
|
||||
})
|
||||
</script>
|
||||
```
|
||||
|
||||
```html example centered height="30rem"
|
||||
```html example code centered height="30rem"
|
||||
<button type="button" class="btn btn-primary" data-bs-toggle="modal" data-bs-target="#exampleModal">
|
||||
Launch demo modal
|
||||
</button>
|
||||
|
||||
<div class="modal" id="exampleModal" tabindex="-1">
|
||||
<div class="modal-dialog modal-sm" role="document">
|
||||
<div class="modal-content">
|
||||
@@ -133,22 +105,15 @@ You can use the modal to create a prompt or alert. Look at the example below to
|
||||
</div>
|
||||
</div>
|
||||
</div>
|
||||
<script>
|
||||
document.addEventListener("DOMContentLoaded", function() {
|
||||
var myModal = new bootstrap.Modal(document.getElementById('exampleModal'))
|
||||
myModal.show()
|
||||
})
|
||||
</script>
|
||||
```
|
||||
|
||||
## Modal with form
|
||||
|
||||
You can use the modal to create a form. Look at the example below to see how the form looks.
|
||||
|
||||
```html example centered height="30rem"
|
||||
```html example code centered height="30rem"
|
||||
<button type="button" class="btn btn-primary" data-bs-toggle="modal" data-bs-target="#exampleModal">
|
||||
Launch modal with form
|
||||
</button>
|
||||
|
||||
<div class="modal" id="exampleModal" tabindex="-1">
|
||||
<div class="modal-dialog modal-lg" role="document">
|
||||
<div class="modal-content">
|
||||
@@ -1,14 +1,13 @@
|
||||
---
|
||||
title: Placeholder
|
||||
summary: Placeholder is used to reserve space for content that soon will appear in a layout.
|
||||
description: Reserve space for upcoming content.
|
||||
description: Placeholder is used to reserve space for content that soon will appear in a layout.
|
||||
---
|
||||
|
||||
## Placeholder line
|
||||
|
||||
Placeholder lines can contain have lines of text. Their length is different and depends on the `col-` class.
|
||||
|
||||
```html example columns={1}
|
||||
```html code example columns={1}
|
||||
<div class="placeholder col-9"></div>
|
||||
<div class="placeholder col-11"></div>
|
||||
<div class="placeholder col-10"></div>
|
||||
@@ -17,7 +16,7 @@ Placeholder lines can contain have lines of text. Their length is different and
|
||||
|
||||
However, it may be useful, however, to specify the full width in order to fit the content more effectively.
|
||||
|
||||
```html example columns={1}
|
||||
```html code example columns={1}
|
||||
<div class="placeholder col-12"></div>
|
||||
<div class="placeholder col-12"></div>
|
||||
<div class="placeholder col-12"></div>
|
||||
@@ -26,7 +25,7 @@ However, it may be useful, however, to specify the full width in order to fit th
|
||||
|
||||
You can also move the lines to right or to center:
|
||||
|
||||
```html example columns={1}
|
||||
```html code example columns={1}
|
||||
<div class="text-end">
|
||||
<div class="placeholder col-11"></div>
|
||||
<div class="placeholder col-10"></div>
|
||||
@@ -43,7 +42,7 @@ You can also move the lines to right or to center:
|
||||
|
||||
A placeholder can contain also a header element looks like header:
|
||||
|
||||
```html example columns={1}
|
||||
```html code example columns={1}
|
||||
<div class="placeholder col-9 mb-3"></div>
|
||||
<div class="placeholder placeholder-xs col-10"></div>
|
||||
<div class="placeholder placeholder-xs col-11"></div>
|
||||
@@ -51,15 +50,9 @@ A placeholder can contain also a header element looks like header:
|
||||
|
||||
## Placeholder avatar
|
||||
|
||||
You can use a placeholder, which will look like an avatar. You can use the `avatar` component, and get the image in the right proportions.
|
||||
You can make your placeholder item look like an avatar.
|
||||
|
||||
```html
|
||||
<div class="avatar placeholder"></div>
|
||||
```
|
||||
|
||||
Look at the example below to see how the avatar placeholder looks like.
|
||||
|
||||
```html example columns={1} centered
|
||||
```html code example columns={1}
|
||||
<div class="row">
|
||||
<div class="col-auto">
|
||||
<div class="avatar placeholder"></div>
|
||||
@@ -71,9 +64,9 @@ Look at the example below to see how the avatar placeholder looks like.
|
||||
</div>
|
||||
```
|
||||
|
||||
You can also use the `avatar` component with different sizes. Look at the example below to see how the avatar placeholder looks like.
|
||||
The size of avatars is exactly the same as a regular avatar.
|
||||
|
||||
```html example centered separated
|
||||
```html code example centered separated
|
||||
<div class="avatar avatar-xl placeholder"></div>
|
||||
<div class="avatar avatar-lg placeholder"></div>
|
||||
<div class="avatar avatar-md placeholder"></div>
|
||||
@@ -88,7 +81,7 @@ You can use a placeholder, which will look like a picture. You can use the `rati
|
||||
|
||||
You can also use the `ratio` component, and get the image in the right proportions.
|
||||
|
||||
```html example columns={1} height={500} scrollable separated vertical
|
||||
```html code example columns={1} height={500} scrollable
|
||||
<div class="ratio ratio-1x1 placeholder">
|
||||
<div class="placeholder-image"></div>
|
||||
</div>
|
||||
@@ -105,13 +98,7 @@ You can also use the `ratio` component, and get the image in the right proportio
|
||||
|
||||
## Placeholder color
|
||||
|
||||
By default, the `placeholder` uses `currentColor`. This can be overridden with a custom color or utility class. Full color classes are available for background colors.
|
||||
|
||||
```html
|
||||
<span class="placeholder col-12 bg-dark"></span>
|
||||
```
|
||||
|
||||
Look at the example below to see how the color affects the placeholder.
|
||||
By default, the `placeholder` uses `currentColor`. This can be overridden with a custom color or utility class.
|
||||
|
||||
```html example columns={1} height={240}
|
||||
<span class="placeholder col-12"></span>
|
||||
@@ -125,11 +112,24 @@ Look at the example below to see how the color affects the placeholder.
|
||||
<span class="placeholder col-12 bg-dark"></span>
|
||||
```
|
||||
|
||||
```html
|
||||
<span class="placeholder col-12"></span>
|
||||
|
||||
<span class="placeholder col-12 bg-primary"></span>
|
||||
<span class="placeholder col-12 bg-secondary"></span>
|
||||
<span class="placeholder col-12 bg-success"></span>
|
||||
<span class="placeholder col-12 bg-danger"></span>
|
||||
<span class="placeholder col-12 bg-warning"></span>
|
||||
<span class="placeholder col-12 bg-info"></span>
|
||||
<span class="placeholder col-12 bg-light"></span>
|
||||
<span class="placeholder col-12 bg-dark"></span>
|
||||
```
|
||||
|
||||
## Placeholder sizing
|
||||
|
||||
The size of `.placeholders` are based on the typographic style of the parent element. Customize them with sizing modifiers: `.placeholder-lg`, `.placeholder-sm`, or `.placeholder-xs`.
|
||||
|
||||
```html example columns={1}
|
||||
```html code example columns={1}
|
||||
<span class="placeholder col-12 placeholder-lg"></span>
|
||||
<span class="placeholder col-12"></span>
|
||||
<span class="placeholder col-12 placeholder-sm"></span>
|
||||
@@ -140,7 +140,7 @@ The size of `.placeholders` are based on the typographic style of the parent ele
|
||||
|
||||
Animate placeholders with `.placeholder-glow` or `.placeholder-wave` to better convey the perception of something being actively loaded.
|
||||
|
||||
```html example columns={1}
|
||||
```html code example columns={1}
|
||||
<p class="placeholder-glow">
|
||||
<span class="placeholder col-12"></span>
|
||||
</p>
|
||||
@@ -153,7 +153,7 @@ Animate placeholders with `.placeholder-glow` or `.placeholder-wave` to better c
|
||||
|
||||
See in the following examples how else you can use the placeholder component
|
||||
|
||||
```html example columns={1} height={1000} separated vertical scrollable background="surface"
|
||||
```html code example columns={1} height={1000} separated vertical scrollable
|
||||
<div class="card placeholder-glow">
|
||||
<div class="ratio ratio-21x9 card-img-top placeholder"></div>
|
||||
<div class="card-body">
|
||||
@@ -1,15 +1,14 @@
|
||||
---
|
||||
title: Popovers
|
||||
summary: Popovers are used to provide additional information on elements where a simple tooltip is not sufficient.
|
||||
description: Popovers are used to provide additional information on elements where a simple tooltip is not sufficient.
|
||||
bootstrapLink: components/popovers
|
||||
description: Provide extra information with popovers.
|
||||
---
|
||||
|
||||
## Default markup
|
||||
|
||||
To create a default popover use:
|
||||
|
||||
```html example centered
|
||||
```html code example centered
|
||||
<button type="button" class="btn" data-bs-toggle="popover" title="Popover title" data-bs-content="And here's some amazing content. It's very engaging. Right?">Click to toggle popover</button>
|
||||
```
|
||||
|
||||
@@ -26,16 +25,16 @@ Four options are available: `top`, `right`, `bottom`, and `left` aligned. Direct
|
||||
|
||||
```html
|
||||
<button type="button" class="btn" data-bs-container="body" data-bs-toggle="popover" data-bs-placement="top" data-bs-content="Top popover">
|
||||
Popover on top
|
||||
Popover on top
|
||||
</button>
|
||||
<button type="button" class="btn" data-bs-container="body" data-bs-toggle="popover" data-bs-placement="right" data-bs-content="Right popover">
|
||||
Popover on right
|
||||
Popover on right
|
||||
</button>
|
||||
<button type="button" class="btn" data-bs-container="body" data-bs-toggle="popover" data-bs-placement="bottom" data-bs-content="Bottom popover">
|
||||
Popover on bottom
|
||||
Popover on bottom
|
||||
</button>
|
||||
<button type="button" class="btn" data-bs-container="body" data-bs-toggle="popover" data-bs-placement="left" data-bs-content="Left popover">
|
||||
Popover on left
|
||||
Popover on left
|
||||
</button>
|
||||
```
|
||||
|
||||
@@ -48,7 +47,9 @@ Popover can be triggered `manual`, with a `click` and on `focus` and on `hover`.
|
||||
```
|
||||
|
||||
```html
|
||||
<button type="button" class="btn btn-primary" data-bs-trigger="hover" data-bs-toggle="popover" title="Popover title" data-bs-content="And here's some amazing content. It's very engaging. Right?">
|
||||
<button type="button" class="btn btn-primary" data-bs-trigger="hover" data-bs-toggle="popover"
|
||||
title="Popover title" data-bs-content="And here's some amazing content. It's very engaging. Right?"
|
||||
>
|
||||
Hover to toggle popover
|
||||
</button>
|
||||
```
|
||||
92
docs/components/progress.mdx
Normal file
92
docs/components/progress.mdx
Normal file
@@ -0,0 +1,92 @@
|
||||
---
|
||||
title: Progress bars
|
||||
description: Progress bars are used to provide feedback on an action status and inform users of the current progress. Although seemingly small interface elements, they are extremely hepful in managing users' expectations and preventing them from abandoning a process they have initiated.
|
||||
bootstrapLink: components/progress
|
||||
---
|
||||
|
||||
## Default markup
|
||||
|
||||
To create a default progress bar, add a `.progress` class to a `<div>` element. Thanks to that, you will be able to notify users how long they have to wait for a process to complete.
|
||||
|
||||
```html example columns={1} centered
|
||||
<div class="progress">
|
||||
<div class="progress-bar" style="width: 38%"></div>
|
||||
</div>
|
||||
```
|
||||
|
||||
```html
|
||||
<div class="progress">
|
||||
<div class="progress-bar" style="width: 38%" role="progressbar" aria-valuenow="38" aria-valuemin="0" aria-valuemax="100" aria-label="38% Complete">
|
||||
<span class="visually-hidden">38% Complete</span>
|
||||
</div>
|
||||
</div>
|
||||
```
|
||||
|
||||
## Progress size
|
||||
|
||||
Using Bootstrap’s typical naming structure, you can create a standard progress bar or scale it up or down to different sizes based on what’s needed.
|
||||
|
||||
```html code example columns={1} centered
|
||||
<div class="progress progress-sm">
|
||||
<div class="progress-bar" style="width: 57%" role="progressbar" aria-valuenow="57" aria-valuemin="0" aria-valuemax="100" aria-label="57% Complete">
|
||||
<span class="visually-hidden">57% Complete</span>
|
||||
</div>
|
||||
</div>
|
||||
```
|
||||
|
||||
## Progress without value
|
||||
|
||||
Remove the displayed value by adding the `.visually-hidden` class.
|
||||
|
||||
```html code example columns={1} centered
|
||||
<div class="progress">
|
||||
<div class="progress-bar" style="width: 75%" role="progressbar" aria-valuenow="75" aria-valuemin="0" aria-valuemax="100" aria-label="75% Complete">
|
||||
<span class="visually-hidden">75% Complete</span>
|
||||
</div>
|
||||
</div>
|
||||
```
|
||||
|
||||
## Indeterminate progress
|
||||
|
||||
You can create a progress bar which shows indeterminate progress by adding `.progress-bar-indeterminate` to the `.progress-bar` element.
|
||||
|
||||
```html code example columns={1} centered
|
||||
<div class="progress progress-sm">
|
||||
<div class="progress-bar progress-bar-indeterminate"></div>
|
||||
</div>
|
||||
```
|
||||
|
||||
## Native progress element
|
||||
|
||||
You can also use native HTML5 `<progress>` element.
|
||||
|
||||
```html code example columns={1} centered
|
||||
<progress class="progress progress-sm" value="15" max="100" />
|
||||
```
|
||||
|
||||
## Progress color
|
||||
|
||||
Customize the color of the progress bar to suit your design. Click [here](colors) to see the list of available colors.
|
||||
|
||||
```html code example columns={1} centered separated
|
||||
<div class="progress">
|
||||
<div class="progress-bar bg-red" style="width: 24%" role="progressbar" aria-valuenow="24" aria-valuemin="0" aria-valuemax="100" aria-label="24% Complete">
|
||||
<span class="visually-hidden">24% Complete</span>
|
||||
</div>
|
||||
</div>
|
||||
<div class="progress">
|
||||
<div class="progress-bar bg-green" style="width: 45%" role="progressbar" aria-valuenow="45" aria-valuemin="0" aria-valuemax="100" aria-label="45% Complete">
|
||||
<span class="visually-hidden">45% Complete</span>
|
||||
</div>
|
||||
</div>
|
||||
<div class="progress">
|
||||
<div class="progress-bar bg-purple" style="width: 64%" role="progressbar" aria-valuenow="64" aria-valuemin="0" aria-valuemax="100" aria-label="64% Complete">
|
||||
<span class="visually-hidden">64% Complete</span>
|
||||
</div>
|
||||
</div>
|
||||
<div class="progress">
|
||||
<div class="progress-bar bg-blue" style="width: 38%" role="progressbar" aria-valuenow="38" aria-valuemin="0" aria-valuemax="100" aria-label="38% Complete">
|
||||
<span class="visually-hidden">38% Complete</span>
|
||||
</div>
|
||||
</div>
|
||||
```
|
||||
16
docs/components/progressbg.mdx
Normal file
16
docs/components/progressbg.mdx
Normal file
@@ -0,0 +1,16 @@
|
||||
---
|
||||
title: Progress background
|
||||
description: By using a progress bar component as a background element, designers can create a dynamic and engaging visual experience for users. For example, the progress bar could be used to represent the completion of a long-term goal or project, such as a fundraising campaign or construction project. As users interact with the page, the progress bar could gradually fill up, creating a sense of momentum and progress.
|
||||
---
|
||||
|
||||
```html code example vertical centered columns={1}
|
||||
<div class="progressbg">
|
||||
<div class="progress progressbg-progress">
|
||||
<div class="progress-bar bg-primary-lt" style="width: 35%" role="progressbar" aria-valuenow="35" aria-valuemin="0" aria-valuemax="100" aria-label="35% Complete">
|
||||
<span class="visually-hidden">35% Complete</span>
|
||||
</div>
|
||||
</div>
|
||||
<div class="progressbg-text">Lorem ipsum dolor sit amet, consectetur adipisicing elit. Ea eos ullam ut. Doloribus est in laborum, ratione recusandae reprehenderit tenetur. Accusantium consectetur ea enim facere ipsam praesentium quas soluta tenetur?</div>
|
||||
<div class="progressbg-value">35%</div>
|
||||
</div>
|
||||
```
|
||||
17
docs/components/range-slider.mdx
Normal file
17
docs/components/range-slider.mdx
Normal file
@@ -0,0 +1,17 @@
|
||||
---
|
||||
title: Range slider
|
||||
libs: nouislider
|
||||
---
|
||||
|
||||
To be able to use the range slider in your application you will need to install the nouislider dependency with `npm install nouislider`.
|
||||
|
||||
All options and features can be found [**here**](https://refreshless.com/nouislider/).
|
||||
|
||||
## Basic range slider
|
||||
|
||||
```html code example centered
|
||||
<div data-slider='{"js-name": "slider0","start": 50,"range": {"min": 0,"max": 100}}'></div>
|
||||
<p demo-slider="slider0"></p>
|
||||
```
|
||||
|
||||
That's only the basic features and options of range slider. More possibilities can be found [**here**](https://refreshless.com/nouislider/).
|
||||
@@ -1,14 +1,13 @@
|
||||
---
|
||||
title: Ribbons
|
||||
summary: Ribbons are graphical elements which attract users' attention to a given element of an interface and make it stand out.
|
||||
description: Highlight elements with graphical ribbons.
|
||||
description: Ribbons are graphical elements which attract users' attention to a given element of an interface and make it stand out.
|
||||
---
|
||||
|
||||
## Default markup
|
||||
|
||||
Use the `ribbon` class to add the default ribbon to any section of your interface.
|
||||
|
||||
```html example columns={1} centered background="base"
|
||||
```html example columns={1} centered
|
||||
<div class="card">
|
||||
<div class="card-body" style="height: 5rem">
|
||||
</div>
|
||||
@@ -26,7 +25,7 @@ Use the `ribbon` class to add the default ribbon to any section of your interfac
|
||||
<div class="card-body">
|
||||
</div>
|
||||
<div class="ribbon">
|
||||
<!-- SVG icon from http://tabler.io/icons/icon/star -->
|
||||
<!-- SVG icon from http://tabler-icons.io/i/star -->
|
||||
<svg>...</svg>
|
||||
</div>
|
||||
</div>
|
||||
@@ -43,7 +42,7 @@ You can change the position of a ribbon by adding one of the following classes t
|
||||
|
||||
Using multiple classes at once will give you more position options. For example, the following class: `.ribbon.ribbon-top.ribbon-left` will move the ribbon to the top left corner.
|
||||
|
||||
```html example columns={1} centered background="base"
|
||||
```html example columns={1} centered
|
||||
<div class="card">
|
||||
<div class="card-body" style="height: 5rem">
|
||||
</div>
|
||||
@@ -61,7 +60,7 @@ Using multiple classes at once will give you more position options. For example,
|
||||
<div class="card-body">
|
||||
</div>
|
||||
<div class="ribbon ribbon-top ribbon-start">
|
||||
<!-- SVG icon from http://tabler.io/icons/icon/star -->
|
||||
<!-- SVG icon from http://tabler-icons.io/i/star -->
|
||||
<svg>...</svg>
|
||||
</div>
|
||||
</div>
|
||||
@@ -69,9 +68,9 @@ Using multiple classes at once will give you more position options. For example,
|
||||
|
||||
## Ribbon color
|
||||
|
||||
Customize the ribbon's background color. You can click [here](/docs/ui/base/colors) to see the list of available colors.
|
||||
Customize the ribbon's background color. You can click [here](colors) to see the list of available colors.
|
||||
|
||||
```html example columns={1} centered background="base"
|
||||
```html example columns={1} centered
|
||||
<div class="card">
|
||||
<div class="card-body" style="height: 5rem">
|
||||
</div>
|
||||
@@ -89,7 +88,7 @@ Customize the ribbon's background color. You can click [here](/docs/ui/base/colo
|
||||
<div class="card-body">
|
||||
</div>
|
||||
<div class="ribbon bg-red">
|
||||
<!-- SVG icon from http://tabler.io/icons/icon/star -->
|
||||
<!-- SVG icon from http://tabler-icons.io/i/star -->
|
||||
<svg>...</svg>
|
||||
</div>
|
||||
</div>
|
||||
@@ -99,7 +98,7 @@ Customize the ribbon's background color. You can click [here](/docs/ui/base/colo
|
||||
|
||||
Add your own text to a ribbon to display any additional information and make it easy to spot for users.
|
||||
|
||||
```html example columns={1} centered background="base"
|
||||
```html example columns={1} centered
|
||||
<div class="card">
|
||||
<div class="card-body" style="height: 5rem">
|
||||
</div>
|
||||
@@ -117,7 +116,7 @@ Add your own text to a ribbon to display any additional information and make it
|
||||
<div class="card-body">
|
||||
</div>
|
||||
<div class="ribbon bg-green">
|
||||
<!-- SVG icon from http://tabler.io/icons/icon/star -->
|
||||
<!-- SVG icon from http://tabler-icons.io/i/star -->
|
||||
<svg>...</svg>
|
||||
</div>
|
||||
</div>
|
||||
@@ -127,7 +126,7 @@ Add your own text to a ribbon to display any additional information and make it
|
||||
|
||||
Change the style of a ribbon to make it go well with your interface design.
|
||||
|
||||
```html example columns={1} centered background="base"
|
||||
```html example columns={1} centered
|
||||
<div class="card w-100">
|
||||
<div class="card-body" style="height: 5rem">
|
||||
</div>
|
||||
@@ -145,7 +144,7 @@ Change the style of a ribbon to make it go well with your interface design.
|
||||
<div class="card-body">
|
||||
</div>
|
||||
<div class="ribbon ribbon-bookmark bg-orange">
|
||||
<!-- SVG icon from http://tabler.io/icons/icon/star -->
|
||||
<!-- SVG icon from http://tabler-icons.io/i/star -->
|
||||
<svg>...</svg>
|
||||
</div>
|
||||
</div>
|
||||
@@ -1,27 +1,20 @@
|
||||
---
|
||||
title: Spinners
|
||||
summary: Spinners are used to show the loading state of a component or page. They provide feedback for an action a user has taken, when it takes a bit longer to complete.
|
||||
description: Spinners are used to show the loading state of a component or page. They provide feedback for an action a user has taken, when it takes a bit longer to complete.
|
||||
bootstrapLink: components/spinners/
|
||||
description: Indicate loading state with spinners.
|
||||
---
|
||||
|
||||
## Default markup
|
||||
|
||||
Use the default spinner to notify users that an action they have taken is in progress, helping them avoid confusion.
|
||||
|
||||
```html
|
||||
<div class="spinner-border"></div>
|
||||
```
|
||||
|
||||
Look at the example below to see how the spinner works:
|
||||
|
||||
```html example centered
|
||||
```html example code centered
|
||||
<div class="spinner-border"></div>
|
||||
```
|
||||
|
||||
## Colors
|
||||
|
||||
Choose one of the available colors to customize the spinner and make it suit your design. Full list of available colors can be found in the [Colors](/docs/ui/base/colors) section.
|
||||
Choose one of the available colors to customize the spinner and make it suit your design.
|
||||
|
||||
```html example centered separated
|
||||
<div class="spinner-border text-blue" role="status"></div>
|
||||
@@ -47,7 +40,7 @@ Choose one of the available colors to customize the spinner and make it suit you
|
||||
|
||||
Choose the size of your spinner. You can use the default size or use the `spinner-border-sm` class to display a smaller spinner.
|
||||
|
||||
```html example centered separated
|
||||
```html example code centered separated
|
||||
<div class="spinner-border" role="status"></div>
|
||||
<div class="spinner-border spinner-border-sm" role="status"></div>
|
||||
```
|
||||
@@ -56,7 +49,7 @@ Choose the size of your spinner. You can use the default size or use the `spinne
|
||||
|
||||
Use the growing spinner, if you are looking for a more original design than a border spinner. The spinner grows to show the loading state.
|
||||
|
||||
```html example centered
|
||||
```html example code centered
|
||||
<div class="spinner-grow" role="status"></div>
|
||||
```
|
||||
|
||||
@@ -82,20 +75,11 @@ Growing spinners also come in a variety of colors to choose from.
|
||||
<div class="spinner-grow text-azure" role="status"></div>
|
||||
```
|
||||
|
||||
## Button with spinner
|
||||
### Button with spinner
|
||||
|
||||
Use buttons with spinners to notify users that an action they have taken by clicking the button is in progress and prevent them from clicking multiple times or giving up.
|
||||
|
||||
```html
|
||||
<a href="#" class="btn btn-primary">
|
||||
<span class="spinner-border spinner-border-sm me-2" role="status"></span>
|
||||
Button
|
||||
</a>
|
||||
```
|
||||
|
||||
Look at the example below to see how the button with a spinner works:
|
||||
|
||||
```html example centered separated code background="bg-light"
|
||||
```html example centered separated code
|
||||
<a href="#" class="btn btn-primary">
|
||||
<span class="spinner-border spinner-border-sm me-2" role="status"></span>
|
||||
Button
|
||||
@@ -120,16 +104,11 @@ Look at the example below to see how the button with a spinner works:
|
||||
|
||||
## Animated dots
|
||||
|
||||
Use animated dots to show the loading state of a component. They provide feedback for an action a user has taken, when it takes a bit longer to complete. To do it you need to use the `.animated-dots` class on `span` element.
|
||||
|
||||
```html example centered code background="bg-light"
|
||||
<h1>Loading<span class="animated-dots"></span>
|
||||
</h1>
|
||||
```html example centered code
|
||||
<h1>Loading<span class="animated-dots"></span></h1>
|
||||
```
|
||||
|
||||
Use buttons with animated dots to notify users that an action they have taken by clicking the button is in progress and prevent them from clicking multiple times or giving up.
|
||||
|
||||
```html example centered separated background="bg-light"
|
||||
```html example centered code separated
|
||||
<a href="#" class="btn btn-primary">
|
||||
Loading<span class="animated-dots"></span>
|
||||
</a>
|
||||
@@ -1,22 +1,11 @@
|
||||
---
|
||||
title: Statuses
|
||||
summary: Status dots are particularly useful if you want to make an interface element more noticeable regardless of limited space.
|
||||
description: Highlight interface elements with status dots.
|
||||
description: Status dots are particularly useful if you want to make an interface element more noticeable regardless of limited space.
|
||||
---
|
||||
|
||||
## Default markup
|
||||
|
||||
Use the default status to notify users about the status of a component or page, helping them avoid confusion. Full list of available colors can be found in the [Colors](/docs/ui/base/colors) section.
|
||||
|
||||
```html
|
||||
<span class="status status-blue">Blue</span>
|
||||
<span class="status status-azure">Azure</span>
|
||||
...
|
||||
```
|
||||
|
||||
Look at the example below to see how the status works:
|
||||
|
||||
```html example centered separated columns={2}
|
||||
```html example vertical height="7rem"
|
||||
<span class="status status-blue">Blue</span>
|
||||
<span class="status status-azure">Azure</span>
|
||||
<span class="status status-indigo">Indigo</span>
|
||||
@@ -31,21 +20,15 @@ Look at the example below to see how the status works:
|
||||
<span class="status status-cyan">Cyan</span>
|
||||
```
|
||||
|
||||
```html
|
||||
<span class="status status-blue">Blue</span>
|
||||
<span class="status status-azure">Azure</span>
|
||||
...
|
||||
```
|
||||
|
||||
## Status with dot
|
||||
|
||||
You can add a dot to the status to make it more noticeable. To do this, use the `.status-dot` element inside the `.status` element.
|
||||
|
||||
```html
|
||||
<span class="status status-blue">
|
||||
<span class="status-dot"></span>
|
||||
Blue
|
||||
</span>
|
||||
```
|
||||
|
||||
Look at the example below to see how the status with a dot works:
|
||||
|
||||
```html example centered separated columns={2}
|
||||
```html example code vertical height="7rem"
|
||||
<span class="status status-blue">
|
||||
<span class="status-dot"></span>
|
||||
Blue
|
||||
@@ -98,9 +81,7 @@ Look at the example below to see how the status with a dot works:
|
||||
|
||||
### Animated dot
|
||||
|
||||
You can also animate the dot to make it more noticeable. To do this, use the `.status-dot-animated` class inside the `.status-dot` element.
|
||||
|
||||
```html example centered separated columns={2}
|
||||
```html example code vertical height="7rem"
|
||||
<span class="status status-blue">
|
||||
<span class="status-dot status-dot-animated"></span>
|
||||
Blue
|
||||
@@ -153,9 +134,7 @@ You can also animate the dot to make it more noticeable. To do this, use the `.s
|
||||
|
||||
## Lite status
|
||||
|
||||
Use the lite status to make the status less noticeable. To do this, use the `.status-lite` class inside the `.status` element.
|
||||
|
||||
```html example centered separated columns={2}
|
||||
```html example code vertical height="7rem"
|
||||
<span class="status status-blue status-lite">
|
||||
<span class="status-dot"></span>
|
||||
Blue
|
||||
@@ -208,15 +187,7 @@ Use the lite status to make the status less noticeable. To do this, use the `.st
|
||||
|
||||
## Status dots
|
||||
|
||||
If you need only dot status, you can use the `.status-dot` class.
|
||||
|
||||
```html
|
||||
<span class="status-dot status-blue"></span>
|
||||
```
|
||||
|
||||
Look at the example below to see how the status dots work:
|
||||
|
||||
```html example centered separated
|
||||
```html code example centered separated height="7rem"
|
||||
<span class="status-dot status-blue"></span>
|
||||
<span class="status-dot status-azure"></span>
|
||||
<span class="status-dot status-indigo"></span>
|
||||
@@ -231,15 +202,9 @@ Look at the example below to see how the status dots work:
|
||||
<span class="status-dot status-cyan"></span>
|
||||
```
|
||||
|
||||
The dots can also be animated. To do this, use the `.status-dot-animated` class.
|
||||
### Animated dots
|
||||
|
||||
```html
|
||||
<span class="status-dot status-dot-animated status-blue"></span>
|
||||
```
|
||||
|
||||
The animated status dots can be used in the same way as the regular status dots.
|
||||
|
||||
```html example centered separated
|
||||
```html code example centered separated height="7rem"
|
||||
<span class="status-dot status-dot-animated status-blue"></span>
|
||||
<span class="status-dot status-dot-animated status-azure"></span>
|
||||
<span class="status-dot status-dot-animated status-indigo"></span>
|
||||
@@ -256,9 +221,7 @@ The animated status dots can be used in the same way as the regular status dots.
|
||||
|
||||
## Status indicator
|
||||
|
||||
Use the status indicator to show the status of a component or page. The status indicator can be animated. To do this, use the `.status-indicator-animated` class.
|
||||
|
||||
```html example centered separated columns={1}
|
||||
```html code example vertical centered height="7rem"
|
||||
<span class="status-indicator status-blue status-indicator-animated">
|
||||
<span class="status-indicator-circle"></span>
|
||||
<span class="status-indicator-circle"></span>
|
||||
111
docs/components/steps.mdx
Normal file
111
docs/components/steps.mdx
Normal file
@@ -0,0 +1,111 @@
|
||||
---
|
||||
title: Steps
|
||||
description: Steps are used to guide users through complex processes, making them easier and more intuitive. Breaking a multi-step process into smaller parts and tracking progress along the way helps users complete it successfully.
|
||||
new: true
|
||||
---
|
||||
|
||||
## Default markup
|
||||
|
||||
Steps show users where they are within a process, what steps they have already completed and what they are expected to complete. Making multi-step processes more user-friendly facilitates users' interaction with your interface.
|
||||
|
||||
Use the `steps` class to create the default progress tracker and name the steps accordingly.
|
||||
|
||||
```html code example
|
||||
<div class="steps">
|
||||
<a href="#" class="step-item">
|
||||
Step 1
|
||||
</a>
|
||||
<a href="#" class="step-item">
|
||||
Step 2
|
||||
</a>
|
||||
<a href="#" class="step-item active">
|
||||
Step 3
|
||||
</a>
|
||||
<span href="#" class="step-item">
|
||||
Step 4
|
||||
</span>
|
||||
</div>
|
||||
```
|
||||
|
||||
## Tooltips
|
||||
|
||||
Add tooltips, if you want to provide users with additional information about the steps they are expected to complete. Tooltips are displayed when a user hovers over a given step and help clarify what might not be clear from the interface.
|
||||
|
||||
```html code example
|
||||
<div class="steps">
|
||||
<a href="#" class="step-item" data-bs-toggle="tooltip" title="Step 1 description">
|
||||
Step 1
|
||||
</a>
|
||||
<a href="#" class="step-item" data-bs-toggle="tooltip" title="Step 2 description">
|
||||
Step 2
|
||||
</a>
|
||||
<a href="#" class="step-item active" data-bs-toggle="tooltip" title="Step 3 description">
|
||||
Step 3
|
||||
</a>
|
||||
<span href="#" class="step-item" data-bs-toggle="tooltip" title="Step 4 description">
|
||||
Step 4
|
||||
</span>
|
||||
</div>
|
||||
```
|
||||
|
||||
## Color
|
||||
|
||||
You can customize the default progress indicator by changing the color to one that better suits your design. Click [here](colors) to see the range of available colors.
|
||||
|
||||
```html code example
|
||||
<div class="steps steps-green">
|
||||
<a href="#" class="step-item">
|
||||
Step 1
|
||||
</a>
|
||||
<a href="#" class="step-item">
|
||||
Step 2
|
||||
</a>
|
||||
<a href="#" class="step-item active">
|
||||
Step 3
|
||||
</a>
|
||||
<span href="#" class="step-item">
|
||||
Step 4
|
||||
</span>
|
||||
</div>
|
||||
<div class="steps steps-red">
|
||||
<a href="#" class="step-item">
|
||||
Step 1
|
||||
</a>
|
||||
<a href="#" class="step-item">
|
||||
Step 2
|
||||
</a>
|
||||
<a href="#" class="step-item active">
|
||||
Step 3
|
||||
</a>
|
||||
<span href="#" class="step-item">
|
||||
Step 4
|
||||
</span>
|
||||
</div>
|
||||
```
|
||||
|
||||
## Steps without title
|
||||
|
||||
For designs with limited space, use progress indicators without titles and add tooltips to provide the necessary details.
|
||||
|
||||
```html code example
|
||||
<div class="steps">
|
||||
<a href="#" class="step-item" data-bs-toggle="tooltip" title="Step 1 description"></a>
|
||||
<a href="#" class="step-item" data-bs-toggle="tooltip" title="Step 2 description"></a>
|
||||
<a href="#" class="step-item active" data-bs-toggle="tooltip" title="Step 3 description"></a>
|
||||
<span href="#" class="step-item" data-bs-toggle="tooltip" title="Step 4 description"></span>
|
||||
</div>
|
||||
```
|
||||
|
||||
## Steps with numbers
|
||||
|
||||
Use the `steps-counter` class to create a progress tracker with numbers instead of titles and change the color to customize it.
|
||||
|
||||
```html code example
|
||||
<div class="steps steps-counter steps-lime">
|
||||
<a href="#" class="step-item"></a>
|
||||
<a href="#" class="step-item active"></a>
|
||||
<span href="#" class="step-item"></span>
|
||||
<span href="#" class="step-item"></span>
|
||||
<span href="#" class="step-item"></span>
|
||||
</div>
|
||||
```
|
||||
@@ -1,15 +1,14 @@
|
||||
---
|
||||
title: Switch icon
|
||||
summary: The Switch Icon component is used to create a transition between two icons. You can use any icon, both line and filled version.
|
||||
description: The Switch Icon component is used to create a transition between two icons. You can use any icon, both line and filled version.
|
||||
banner: icons
|
||||
description: Transition between two icons smoothly.
|
||||
---
|
||||
|
||||
## Default markup
|
||||
|
||||
To replace the icons, all should add `active` class to the `switch-icon` component.
|
||||
|
||||
```html example centered
|
||||
```html code example centered
|
||||
<button class="switch-icon" data-bs-toggle="switch-icon">
|
||||
<span class="switch-icon-a text-secondary">
|
||||
<svg xmlns="http://www.w3.org/2000/svg" class="icon icon-tabler icon-tabler-heart" width="24" height="24" viewBox="0 0 24 24" stroke-width="2" stroke="currentColor" fill="none" stroke-linecap="round" stroke-linejoin="round">
|
||||
@@ -30,7 +29,7 @@ To replace the icons, all should add `active` class to the `switch-icon` compone
|
||||
|
||||
You can also add a fancy animation to add variety to your button. See demo below:
|
||||
|
||||
```html example centered separated
|
||||
```html example code centered separated
|
||||
<button class="switch-icon" data-bs-toggle="switch-icon">
|
||||
<span class="switch-icon-a text-secondary">
|
||||
<svg xmlns="http://www.w3.org/2000/svg" class="icon icon-tabler icon-tabler-circle" width="24" height="24" viewBox="0 0 24 24" stroke-width="2" stroke="currentColor" fill="none" stroke-linecap="round" stroke-linejoin="round">
|
||||
@@ -1,8 +1,7 @@
|
||||
---
|
||||
title: Tables
|
||||
summary: Tables are a useful interface element that allows to visualise data and arrange it in a clear way. Thanks to that, users can browse a lot of information at once and a good table design will help you take care of its clarity.
|
||||
description: Tables are a useful interface element that allows to visualise data and arrange it in a clear way. Thanks to that, users can browse a lot of information at once and a good table design will help you take care of its clarity.
|
||||
bootstrapLink: content/tables/
|
||||
description: Visualize data clearly with tables.
|
||||
---
|
||||
|
||||
## Basic Table
|
||||
@@ -11,7 +10,7 @@ The basic table design has light padding and the presented data is separated wih
|
||||
|
||||
The `.table` class adds basic styling to a table:
|
||||
|
||||
```html example height="360px" scrollable
|
||||
```html code example height="360px" scrollable
|
||||
<div class="table-responsive">
|
||||
<table class="table table-vcenter">
|
||||
<thead>
|
||||
@@ -29,9 +28,7 @@ The `.table` class adds basic styling to a table:
|
||||
<td class="text-secondary">
|
||||
UI Designer, Training
|
||||
</td>
|
||||
<td class="text-secondary">
|
||||
<a href="#" class="text-reset">paweluna@howstuffworks.com</a>
|
||||
</td>
|
||||
<td class="text-secondary"><a href="#" class="text-reset">paweluna@howstuffworks.com</a></td>
|
||||
<td class="text-secondary">
|
||||
User
|
||||
</td>
|
||||
@@ -44,9 +41,7 @@ The `.table` class adds basic styling to a table:
|
||||
<td class="text-secondary">
|
||||
Chemical Engineer, Support
|
||||
</td>
|
||||
<td class="text-secondary">
|
||||
<a href="#" class="text-reset">jlewzey1@seesaa.net</a>
|
||||
</td>
|
||||
<td class="text-secondary"><a href="#" class="text-reset">jlewzey1@seesaa.net</a></td>
|
||||
<td class="text-secondary">
|
||||
Admin
|
||||
</td>
|
||||
@@ -59,9 +54,7 @@ The `.table` class adds basic styling to a table:
|
||||
<td class="text-secondary">
|
||||
Geologist IV, Support
|
||||
</td>
|
||||
<td class="text-secondary">
|
||||
<a href="#" class="text-reset">mhulme2@domainmarket.com</a>
|
||||
</td>
|
||||
<td class="text-secondary"><a href="#" class="text-reset">mhulme2@domainmarket.com</a></td>
|
||||
<td class="text-secondary">
|
||||
User
|
||||
</td>
|
||||
@@ -74,9 +67,7 @@ The `.table` class adds basic styling to a table:
|
||||
<td class="text-secondary">
|
||||
Research Nurse, Sales
|
||||
</td>
|
||||
<td class="text-secondary">
|
||||
<a href="#" class="text-reset">dslane3@epa.gov</a>
|
||||
</td>
|
||||
<td class="text-secondary"><a href="#" class="text-reset">dslane3@epa.gov</a></td>
|
||||
<td class="text-secondary">
|
||||
Owner
|
||||
</td>
|
||||
@@ -89,9 +80,7 @@ The `.table` class adds basic styling to a table:
|
||||
<td class="text-secondary">
|
||||
VP Product Management, Accounting
|
||||
</td>
|
||||
<td class="text-secondary">
|
||||
<a href="#" class="text-reset">elevet4@senate.gov</a>
|
||||
</td>
|
||||
<td class="text-secondary"><a href="#" class="text-reset">elevet4@senate.gov</a></td>
|
||||
<td class="text-secondary">
|
||||
Admin
|
||||
</td>
|
||||
@@ -108,7 +97,7 @@ The `.table` class adds basic styling to a table:
|
||||
|
||||
Use the `.table-responsive` class across each breakpoint for horizontal scrolling tables. If you want to create responsive tables up to a specific breakpoint, use `.table-responsive{-sm|-md|-lg|-xl}`. From that breakpoint and up, the table will behave normally, rather than scroll horizontally.
|
||||
|
||||
```html example height="12rem"
|
||||
```html code example height="12rem"
|
||||
<table class="table table-responsive">
|
||||
<thead>
|
||||
<tr>
|
||||
@@ -195,7 +184,8 @@ If you don't want the table cell content to wrap to another line, use the `table
|
||||
|
||||
```html
|
||||
<div class="table-responsive">
|
||||
<table class="table table-vcenter table-nowrap">
|
||||
<table
|
||||
class="table table-vcenter table-nowrap">
|
||||
<thead>
|
||||
<tr>
|
||||
<th>Name</th>
|
||||
@@ -212,9 +202,7 @@ If you don't want the table cell content to wrap to another line, use the `table
|
||||
<td class="text-secondary">
|
||||
UI Designer, Training
|
||||
</td>
|
||||
<td class="text-secondary">
|
||||
<a href="#" class="text-reset">paweluna@howstuffworks.com</a>
|
||||
</td>
|
||||
<td class="text-secondary"><a href="#" class="text-reset">paweluna@howstuffworks.com</a></td>
|
||||
<td class="text-secondary">
|
||||
User
|
||||
</td>
|
||||
@@ -231,9 +219,7 @@ If you don't want the table cell content to wrap to another line, use the `table
|
||||
<td class="text-secondary">
|
||||
Chemical Engineer, Support
|
||||
</td>
|
||||
<td class="text-secondary">
|
||||
<a href="#" class="text-reset">jlewzey1@seesaa.net</a>
|
||||
</td>
|
||||
<td class="text-secondary"><a href="#" class="text-reset">jlewzey1@seesaa.net</a></td>
|
||||
<td class="text-secondary">
|
||||
Admin
|
||||
</td>
|
||||
@@ -250,9 +236,7 @@ If you don't want the table cell content to wrap to another line, use the `table
|
||||
<td class="text-secondary">
|
||||
Geologist IV, Support
|
||||
</td>
|
||||
<td class="text-secondary">
|
||||
<a href="#" class="text-reset">mhulme2@domainmarket.com</a>
|
||||
</td>
|
||||
<td class="text-secondary"><a href="#" class="text-reset">mhulme2@domainmarket.com</a></td>
|
||||
<td class="text-secondary">
|
||||
User
|
||||
</td>
|
||||
@@ -269,9 +253,7 @@ If you don't want the table cell content to wrap to another line, use the `table
|
||||
<td class="text-secondary">
|
||||
Research Nurse, Sales
|
||||
</td>
|
||||
<td class="text-secondary">
|
||||
<a href="#" class="text-reset">dslane3@epa.gov</a>
|
||||
</td>
|
||||
<td class="text-secondary"><a href="#" class="text-reset">dslane3@epa.gov</a></td>
|
||||
<td class="text-secondary">
|
||||
Owner
|
||||
</td>
|
||||
@@ -288,9 +270,7 @@ If you don't want the table cell content to wrap to another line, use the `table
|
||||
<td class="text-secondary">
|
||||
VP Product Management, Accounting
|
||||
</td>
|
||||
<td class="text-secondary">
|
||||
<a href="#" class="text-reset">elevet4@senate.gov</a>
|
||||
</td>
|
||||
<td class="text-secondary"><a href="#" class="text-reset">elevet4@senate.gov</a></td>
|
||||
<td class="text-secondary">
|
||||
Admin
|
||||
</td>
|
||||
@@ -309,7 +289,7 @@ If you don't want the table cell content to wrap to another line, use the `table
|
||||
|
||||
## Table Variants
|
||||
|
||||
```html example height="360px" scrollable
|
||||
```html code example height="360px" scrollable
|
||||
<table class="table">
|
||||
<thead>
|
||||
<tr>
|
||||
@@ -370,7 +350,7 @@ If you don't want the table cell content to wrap to another line, use the `table
|
||||
|
||||
## Table with sticky header
|
||||
|
||||
```html example scrollable
|
||||
```html example code scrollable
|
||||
<table class="table">
|
||||
<thead class="sticky-top">
|
||||
<tr>
|
||||
@@ -1,15 +1,14 @@
|
||||
---
|
||||
title: Tabs
|
||||
summary: Tabs allow users to alternate between equally important views within the same context. By dividing content into meaningful sections, they improve its organization and make it easy for users to navigate.
|
||||
description: Tabs allow users to alternate between equally important views within the same context. By dividing content into meaningful sections, they improve its organization and make it easy for users to navigate.
|
||||
bootstrapLink: components/navs/
|
||||
description: Organize content with interactive tabs.
|
||||
---
|
||||
|
||||
## Default markup
|
||||
|
||||
Use tabs to let users access different sections within one context quickly and with ease. In the default design, the current tab is highlighted, which makes the interface clear and user-friendly.
|
||||
|
||||
```html example centered columns={1} height="20rem"
|
||||
```html code example centered columns={1} height="20rem"
|
||||
<div class="card">
|
||||
<div class="card-header">
|
||||
<ul class="nav nav-tabs card-header-tabs" data-bs-toggle="tabs">
|
||||
@@ -40,32 +39,27 @@ Use tabs to let users access different sections within one context quickly and w
|
||||
|
||||
Add icons to your tab labels, if you want to use a visual element and make the tab content easier to identify.
|
||||
|
||||
```html example centered columns={1} height="20rem"
|
||||
```html example code centered columns={1} height="20rem"
|
||||
<div class="card">
|
||||
<div class="card-header">
|
||||
<ul class="nav nav-tabs card-header-tabs" data-bs-toggle="tabs">
|
||||
<li class="nav-item">
|
||||
<a href="#tabs-home-ex2" class="nav-link active" data-bs-toggle="tab">
|
||||
<svg xmlns="http://www.w3.org/2000/svg" class="icon me-2" width="24" height="24" viewBox="0 0 24 24" stroke-width="2" stroke="currentColor" fill="none" stroke-linecap="round" stroke-linejoin="round">
|
||||
<a href="#tabs-home-ex2" class="nav-link active" data-bs-toggle="tab"><svg xmlns="http://www.w3.org/2000/svg" class="icon me-2" width="24" height="24" viewBox="0 0 24 24" stroke-width="2" stroke="currentColor" fill="none" stroke-linecap="round" stroke-linejoin="round">
|
||||
<path stroke="none" d="M0 0h24v24H0z" fill="none" />
|
||||
<polyline points="5 12 3 12 12 3 21 12 19 12" />
|
||||
<path d="M5 12v7a2 2 0 0 0 2 2h10a2 2 0 0 0 2 -2v-7" />
|
||||
<path d="M9 21v-6a2 2 0 0 1 2 -2h2a2 2 0 0 1 2 2v6" />
|
||||
</svg> Home
|
||||
</a>
|
||||
</svg> Home</a>
|
||||
</li>
|
||||
<li class="nav-item">
|
||||
<a href="#tabs-profile-ex2" class="nav-link" data-bs-toggle="tab">
|
||||
<svg xmlns="http://www.w3.org/2000/svg" class="icon me-2" width="24" height="24" viewBox="0 0 24 24" stroke-width="2" stroke="currentColor" fill="none" stroke-linecap="round" stroke-linejoin="round">
|
||||
<a href="#tabs-profile-ex2" class="nav-link" data-bs-toggle="tab"><svg xmlns="http://www.w3.org/2000/svg" class="icon me-2" width="24" height="24" viewBox="0 0 24 24" stroke-width="2" stroke="currentColor" fill="none" stroke-linecap="round" stroke-linejoin="round">
|
||||
<path stroke="none" d="M0 0h24v24H0z" fill="none" />
|
||||
<circle cx="12" cy="7" r="4" />
|
||||
<path d="M6 21v-2a4 4 0 0 1 4 -4h4a4 4 0 0 1 4 4v2" />
|
||||
</svg> Profile
|
||||
</a>
|
||||
</svg> Profile</a>
|
||||
</li>
|
||||
<li class="nav-item ms-auto">
|
||||
<a href="#tabs-settings-ex2" class="nav-link" title="Settings" data-bs-toggle="tab">
|
||||
<svg xmlns="http://www.w3.org/2000/svg" class="icon" width="24" height="24" viewBox="0 0 24 24" stroke-width="2" stroke="currentColor" fill="none" stroke-linecap="round" stroke-linejoin="round">
|
||||
<a href="#tabs-settings-ex2" class="nav-link" title="Settings" data-bs-toggle="tab"><svg xmlns="http://www.w3.org/2000/svg" class="icon" width="24" height="24" viewBox="0 0 24 24" stroke-width="2" stroke="currentColor" fill="none" stroke-linecap="round" stroke-linejoin="round">
|
||||
<path stroke="none" d="M0 0h24v24H0z" fill="none" />
|
||||
<path d="M10.325 4.317c.426 -1.756 2.924 -1.756 3.35 0a1.724 1.724 0 0 0 2.573 1.066c1.543 -.94 3.31 .826 2.37 2.37a1.724 1.724 0 0 0 1.065 2.572c1.756 .426 1.756 2.924 0 3.35a1.724 1.724 0 0 0 -1.066 2.573c.94 1.543 -.826 3.31 -2.37 2.37a1.724 1.724 0 0 0 -2.572 1.065c-.426 1.756 -2.924 1.756 -3.35 0a1.724 1.724 0 0 0 -2.573 -1.066c-1.543 .94 -3.31 -.826 -2.37 -2.37a1.724 1.724 0 0 0 -1.065 -2.572c-1.756 -.426 -1.756 -2.924 0 -3.35a1.724 1.724 0 0 0 1.066 -2.573c-.94 -1.543 .826 -3.31 2.37 -2.37c1 .608 2.296 .07 2.572 -1.065z" />
|
||||
<circle cx="12" cy="12" r="3" />
|
||||
@@ -97,7 +91,7 @@ Add icons to your tab labels, if you want to use a visual element and make the t
|
||||
|
||||
Use tabs without label names to save space and make the tab content easy to recognize for international users.
|
||||
|
||||
```html example centered columns={1} height="20rem"
|
||||
```html code example centered columns={1} height="20rem"
|
||||
<div class="card">
|
||||
<div class="card-header">
|
||||
<ul class="nav nav-tabs card-header-tabs" data-bs-toggle="tabs">
|
||||
@@ -154,7 +148,7 @@ Use tabs without label names to save space and make the tab content easy to reco
|
||||
|
||||
Make one or more of your tabs into a dropdown to add more options within one element.
|
||||
|
||||
```html example centered columns={1} height="20rem"
|
||||
```html code example centered columns={1} height="20rem"
|
||||
<div class="card">
|
||||
<div class="card-header">
|
||||
<ul class="nav nav-tabs card-header-tabs" data-bs-toggle="tabs">
|
||||
@@ -196,7 +190,7 @@ Make one or more of your tabs into a dropdown to add more options within one ele
|
||||
|
||||
Add the `nav-fill` class to make the tabs take up the full space of the parent element.
|
||||
|
||||
```html example centered columns={1} height="20rem"
|
||||
```html code example centered columns={1} height="20rem"
|
||||
<div class="card">
|
||||
<div class="card-header">
|
||||
<ul class="nav nav-tabs card-header-tabs nav-fill" data-bs-toggle="tabs">
|
||||
@@ -1,14 +1,13 @@
|
||||
---
|
||||
title: Timelines
|
||||
summary: A timeline is a perfect way to visualize processes and projects, as it's easy to read and attractive for users. You can use it to give an overview of events, present an agenda or point out important points in time.
|
||||
description: Visualize events and processes clearly.
|
||||
description: A timeline is a perfect way to visualize processes and projects, as it's easy to read and attractive for users. You can use it to give an overview of events, present an agenda or point out important points in time.
|
||||
---
|
||||
|
||||
## Timeline
|
||||
|
||||
The available timeline design is comprised of many components that will help you visualize a process or show an outline of events. Thanks to the possibility of adding icons, avatars and links and the way of presenting the elements of content, your timeline will be clear for users and will make yor website or app more attractive.
|
||||
|
||||
```html example height="400px" scrollable background="base"
|
||||
```html example height="400px" scrollable
|
||||
<ul class="timeline">
|
||||
<li class="timeline-event">
|
||||
<div class="timeline-event-icon bg-twitter-lt">
|
||||
@@ -87,15 +86,9 @@ The available timeline design is comprised of many components that will help you
|
||||
<div class="text-secondary float-end">2 days ago</div>
|
||||
<h4>+3 Friend Requests</h4>
|
||||
<div class="avatar-list mt-3">
|
||||
<span class="avatar" style="background-image: url(...)">
|
||||
<span class="badge bg-success"></span>
|
||||
</span>
|
||||
<span class="avatar">
|
||||
<span class="badge bg-success"></span>JL
|
||||
</span>
|
||||
<span class="avatar" style="background-image: url(...)">
|
||||
<span class="badge bg-success"></span>
|
||||
</span>
|
||||
<span class="avatar" style="background-image: url(...)"><span class="badge bg-success"></span></span>
|
||||
<span class="avatar"><span class="badge bg-success"></span>JL</span>
|
||||
<span class="avatar" style="background-image: url(...)"><span class="badge bg-success"></span></span>
|
||||
</div>
|
||||
</div>
|
||||
</div>
|
||||
@@ -154,7 +147,7 @@ The available timeline design is comprised of many components that will help you
|
||||
```html
|
||||
<ul class="timeline">
|
||||
<li class="timeline-event">
|
||||
<div class="timeline-event-icon bg-twitter-lt"><!-- SVG icon from http://tabler.io/icons/icon/brand-twitter -->
|
||||
<div class="timeline-event-icon bg-twitter-lt"><!-- SVG icon from http://tabler-icons.io/i/brand-twitter -->
|
||||
<svg>...</svg>
|
||||
</div>
|
||||
<div class="card timeline-event-card">
|
||||
@@ -166,7 +159,7 @@ The available timeline design is comprised of many components that will help you
|
||||
</div>
|
||||
</li>
|
||||
<li class="timeline-event">
|
||||
<div class="timeline-event-icon"><!-- SVG icon from http://tabler.io/icons/icon/briefcase -->
|
||||
<div class="timeline-event-icon"><!-- SVG icon from http://tabler-icons.io/i/briefcase -->
|
||||
<svg>...</svg>
|
||||
</div>
|
||||
<div class="card timeline-event-card">
|
||||
@@ -178,7 +171,7 @@ The available timeline design is comprised of many components that will help you
|
||||
</div>
|
||||
</li>
|
||||
<li class="timeline-event">
|
||||
<div class="timeline-event-icon"><!-- SVG icon from http://tabler.io/icons/icon/check -->
|
||||
<div class="timeline-event-icon"><!-- SVG icon from http://tabler-icons.io/i/check -->
|
||||
<svg>...</svg>
|
||||
</div>
|
||||
<div class="card timeline-event-card">
|
||||
@@ -190,7 +183,7 @@ The available timeline design is comprised of many components that will help you
|
||||
</div>
|
||||
</li>
|
||||
<li class="timeline-event">
|
||||
<div class="timeline-event-icon bg-facebook-lt"><!-- SVG icon from http://tabler.io/icons/icon/brand-facebook -->
|
||||
<div class="timeline-event-icon bg-facebook-lt"><!-- SVG icon from http://tabler-icons.io/i/brand-facebook -->
|
||||
<svg>...</svg>
|
||||
</div>
|
||||
<div class="card timeline-event-card">
|
||||
@@ -202,7 +195,7 @@ The available timeline design is comprised of many components that will help you
|
||||
</div>
|
||||
</li>
|
||||
<li class="timeline-event">
|
||||
<div class="timeline-event-icon"><!-- SVG icon from http://tabler.io/icons/icon/user-plus -->
|
||||
<div class="timeline-event-icon"><!-- SVG icon from http://tabler-icons.io/i/user-plus -->
|
||||
<svg>...</svg>
|
||||
</div>
|
||||
<div class="card timeline-event-card">
|
||||
@@ -211,20 +204,17 @@ The available timeline design is comprised of many components that will help you
|
||||
<h4>+3 Friend Requests</h4>
|
||||
<div class="avatar-list mt-3">
|
||||
<span class="avatar" style="background-image: url(...)">
|
||||
<span class="badge bg-success"></span>
|
||||
</span>
|
||||
<span class="badge bg-success"></span></span>
|
||||
<span class="avatar">
|
||||
<span class="badge bg-success"></span>JL
|
||||
</span>
|
||||
<span class="badge bg-success"></span>JL</span>
|
||||
<span class="avatar" style="background-image: url(...)">
|
||||
<span class="badge bg-success"></span>
|
||||
</span>
|
||||
<span class="badge bg-success"></span></span>
|
||||
</div>
|
||||
</div>
|
||||
</div>
|
||||
</li>
|
||||
<li class="timeline-event">
|
||||
<div class="timeline-event-icon"><!-- SVG icon from http://tabler.io/icons/icon/photo -->
|
||||
<div class="timeline-event-icon"><!-- SVG icon from http://tabler-icons.io/i/photo -->
|
||||
<svg>...</svg>
|
||||
</div>
|
||||
<div class="card timeline-event-card">
|
||||
@@ -249,7 +239,7 @@ The available timeline design is comprised of many components that will help you
|
||||
</div>
|
||||
</li>
|
||||
<li class="timeline-event">
|
||||
<div class="timeline-event-icon"><!-- SVG icon from http://tabler.io/icons/icon/settings -->
|
||||
<div class="timeline-event-icon"><!-- SVG icon from http://tabler-icons.io/i/settings -->
|
||||
<svg>...</svg>
|
||||
</div>
|
||||
<div class="card timeline-event-card">
|
||||
@@ -268,7 +258,7 @@ The available timeline design is comprised of many components that will help you
|
||||
|
||||
Use a simplified version of the timeline, if it suits your design better. You can still make use of all the available timeline components.
|
||||
|
||||
```html example height="400px" scrollable background="base"
|
||||
```html example height="400px" scrollable
|
||||
<ul class="timeline timeline-simple">
|
||||
<li class="timeline-event">
|
||||
<div class="timeline-event-icon bg-twitter-lt">
|
||||
@@ -347,15 +337,9 @@ Use a simplified version of the timeline, if it suits your design better. You ca
|
||||
<div class="text-secondary float-end">2 days ago</div>
|
||||
<h4>+3 Friend Requests</h4>
|
||||
<div class="avatar-list mt-3">
|
||||
<span class="avatar" style="background-image: url(...)">
|
||||
<span class="badge bg-success"></span>
|
||||
</span>
|
||||
<span class="avatar">
|
||||
<span class="badge bg-success"></span>JL
|
||||
</span>
|
||||
<span class="avatar" style="background-image: url(...)">
|
||||
<span class="badge bg-success"></span>
|
||||
</span>
|
||||
<span class="avatar" style="background-image: url(...)"><span class="badge bg-success"></span></span>
|
||||
<span class="avatar"><span class="badge bg-success"></span>JL</span>
|
||||
<span class="avatar" style="background-image: url(...)"><span class="badge bg-success"></span></span>
|
||||
</div>
|
||||
</div>
|
||||
</div>
|
||||
@@ -414,7 +398,7 @@ Use a simplified version of the timeline, if it suits your design better. You ca
|
||||
```html
|
||||
<ul class="timeline timeline-simple">
|
||||
<li class="timeline-event">
|
||||
<div class="timeline-event-icon bg-twitter-lt"><!-- SVG icon from http://tabler.io/icons/icon/brand-twitter -->
|
||||
<div class="timeline-event-icon bg-twitter-lt"><!-- SVG icon from http://tabler-icons.io/i/brand-twitter -->
|
||||
<svg>...</svg>
|
||||
</div>
|
||||
<div class="card timeline-event-card">
|
||||
@@ -426,7 +410,7 @@ Use a simplified version of the timeline, if it suits your design better. You ca
|
||||
</div>
|
||||
</li>
|
||||
<li class="timeline-event">
|
||||
<div class="timeline-event-icon"><!-- SVG icon from http://tabler.io/icons/icon/briefcase -->
|
||||
<div class="timeline-event-icon"><!-- SVG icon from http://tabler-icons.io/i/briefcase -->
|
||||
<svg>...</svg>
|
||||
</div>
|
||||
<div class="card timeline-event-card">
|
||||
@@ -438,7 +422,7 @@ Use a simplified version of the timeline, if it suits your design better. You ca
|
||||
</div>
|
||||
</li>
|
||||
<li class="timeline-event">
|
||||
<div class="timeline-event-icon"><!-- SVG icon from http://tabler.io/icons/icon/check -->
|
||||
<div class="timeline-event-icon"><!-- SVG icon from http://tabler-icons.io/i/check -->
|
||||
<svg>...</svg>
|
||||
</div>
|
||||
<div class="card timeline-event-card">
|
||||
@@ -450,7 +434,7 @@ Use a simplified version of the timeline, if it suits your design better. You ca
|
||||
</div>
|
||||
</li>
|
||||
<li class="timeline-event">
|
||||
<div class="timeline-event-icon bg-facebook-lt"><!-- SVG icon from http://tabler.io/icons/icon/brand-facebook -->
|
||||
<div class="timeline-event-icon bg-facebook-lt"><!-- SVG icon from http://tabler-icons.io/i/brand-facebook -->
|
||||
<svg>...</svg>
|
||||
</div>
|
||||
<div class="card timeline-event-card">
|
||||
@@ -462,7 +446,7 @@ Use a simplified version of the timeline, if it suits your design better. You ca
|
||||
</div>
|
||||
</li>
|
||||
<li class="timeline-event">
|
||||
<div class="timeline-event-icon"><!-- SVG icon from http://tabler.io/icons/icon/user-plus -->
|
||||
<div class="timeline-event-icon"><!-- SVG icon from http://tabler-icons.io/i/user-plus -->
|
||||
<svg>...</svg>
|
||||
</div>
|
||||
<div class="card timeline-event-card">
|
||||
@@ -471,20 +455,17 @@ Use a simplified version of the timeline, if it suits your design better. You ca
|
||||
<h4>+3 Friend Requests</h4>
|
||||
<div class="avatar-list mt-3">
|
||||
<span class="avatar" style="background-image: url(...)">
|
||||
<span class="badge bg-success"></span>
|
||||
</span>
|
||||
<span class="badge bg-success"></span></span>
|
||||
<span class="avatar">
|
||||
<span class="badge bg-success"></span>JL
|
||||
</span>
|
||||
<span class="badge bg-success"></span>JL</span>
|
||||
<span class="avatar" style="background-image: url(...)">
|
||||
<span class="badge bg-success"></span>
|
||||
</span>
|
||||
<span class="badge bg-success"></span></span>
|
||||
</div>
|
||||
</div>
|
||||
</div>
|
||||
</li>
|
||||
<li class="timeline-event">
|
||||
<div class="timeline-event-icon"><!-- SVG icon from http://tabler.io/icons/icon/photo -->
|
||||
<div class="timeline-event-icon"><!-- SVG icon from http://tabler-icons.io/i/photo -->
|
||||
<svg>...</svg>
|
||||
</div>
|
||||
<div class="card timeline-event-card">
|
||||
@@ -509,7 +490,7 @@ Use a simplified version of the timeline, if it suits your design better. You ca
|
||||
</div>
|
||||
</li>
|
||||
<li class="timeline-event">
|
||||
<div class="timeline-event-icon"><!-- SVG icon from http://tabler.io/icons/icon/settings -->
|
||||
<div class="timeline-event-icon"><!-- SVG icon from http://tabler-icons.io/i/settings -->
|
||||
<svg>...</svg>
|
||||
</div>
|
||||
<div class="card timeline-event-card">
|
||||
@@ -1,8 +1,7 @@
|
||||
---
|
||||
title: TinyMCE
|
||||
libs: tinymce
|
||||
summary: The WYSIWYG editor that is flexible, customizable, and designed with the user in mind. TinyMCE can handle any challenge, from the most simple implementation through to the most complex use case.
|
||||
description: Flexible WYSIWYG editor for content.
|
||||
description: The WYSIWYG editor that is flexible, customizable, and designed with the user in mind. TinyMCE can handle any challenge, from the most simple implementation through to the most complex use case.
|
||||
---
|
||||
|
||||
[TinyMCE](https://www.tiny.cloud/docs/) documentation.
|
||||
@@ -11,10 +10,11 @@ description: Flexible WYSIWYG editor for content.
|
||||
|
||||
Initialize TinyMCE 6 on any element (or elements) on the web page by passing an object containing a selector value to `tinymce.init()`. The selector value can be any valid CSS selector.
|
||||
|
||||
```html example centered columns={2} height="25rem"
|
||||
```html example code centered columns={2} height="25rem"
|
||||
<form method="post">
|
||||
<textarea id="tinymce-default">Hello, <b>Tabler</b>!</textarea>
|
||||
</form>
|
||||
|
||||
<script src="$TABLER_CDN/dist/libs/tinymce/tinymce.min.js" defer></script>
|
||||
<script>
|
||||
document.addEventListener("DOMContentLoaded", function() {
|
||||
@@ -1,8 +1,7 @@
|
||||
---
|
||||
title: Toasts
|
||||
summary: Toasts are lightweight alert boxes which display for a few seconds after a user has taken an action, to inform them of the state or outcome. They can be used when a user clicks a button or submits a form and their aim is to provide feedback, rather than encourage to take action.
|
||||
description: Toasts are lightweight alert boxes which display for a few seconds after a user has taken an action, to inform them of the state or outcome. They can be used when a user clicks a button or submits a form and their aim is to provide feedback, rather than encourage to take action.
|
||||
bootstrapLink: components/toasts/
|
||||
description: Display lightweight alert notifications.
|
||||
---
|
||||
|
||||
## Default markup
|
||||
@@ -45,7 +44,7 @@ Toasts blend over the elements they appear over. If a browser supports the `back
|
||||
|
||||
Stack multiple toasts together by putting them within one `.toast-container`.
|
||||
|
||||
```html example height="260px"
|
||||
```html example code height="260px"
|
||||
<div class="toast-container">
|
||||
<div class="toast show" role="alert" aria-live="assertive" aria-atomic="true" data-bs-autohide="false" data-bs-toggle="toast">
|
||||
<div class="toast-header">
|
||||
@@ -1,15 +1,14 @@
|
||||
---
|
||||
title: Tooltips
|
||||
summary: Tooltips are text labels which appear when a user hovers over an interface element. They explain the interface elements that may be unclear for users and guide them when they need help. If used properly, tooltips can significantly enhance user experience and add value to your website or software.
|
||||
description: Tooltips are text labels which appear when a user hovers over an interface element. They explain the interface elements that may be unclear for users and guide them when they need help. If used properly, tooltips can significantly enhance user experience and add value to your website or software.
|
||||
bootstrapLink: components/tooltips/
|
||||
description: Guide users with informative tooltips.
|
||||
---
|
||||
|
||||
## Default markup
|
||||
|
||||
Use the default markup to create tooltips that will help users understand particular elements of your interface. You can decide where the text label is to be displayed - at the top, bottom or on either side of the element.
|
||||
|
||||
```html example centered separated
|
||||
```html code example centered separated
|
||||
<button type="button" class="btn" data-bs-toggle="tooltip" data-bs-placement="top" title="Tooltip on top">
|
||||
Tooltip on top
|
||||
</button>
|
||||
@@ -28,7 +27,7 @@ Use the default markup to create tooltips that will help users understand partic
|
||||
|
||||
If the default tooltip is not enough, you can add the option to use HTML code in the text to highlight particular bits of information and make the content more attractive.
|
||||
|
||||
```html example height="7rem"
|
||||
```html code example height="7rem"
|
||||
<button type="button" class="btn" data-bs-toggle="tooltip" data-bs-html="true" title="<em>Tooltip</em> <u>with</u> <b>HTML</b>">
|
||||
Tooltip with HTML
|
||||
</button>
|
||||
@@ -1,7 +1,6 @@
|
||||
---
|
||||
title: Tracking
|
||||
summary: Component for visualising activity logs or other monitoring-related data. With its ability to show data in a visually appealing and easily understandable way, the tracking component is an essential tool for any organization that relies on data monitoring and analysis to optimize performance and user experience.
|
||||
description: Monitor data activity visually.
|
||||
description: Component for visualising activity logs or other monitoring-related data. With its ability to show data in a visually appealing and easily understandable way, the tracking component is an essential tool for any organization that relies on data monitoring and analysis to optimize performance and user experience.
|
||||
---
|
||||
|
||||
## Basic example
|
||||
@@ -125,43 +124,39 @@ You can add a tracking component inside the cards to give your reports a fresh l
|
||||
```html
|
||||
<div class="card">
|
||||
<div class="card-body">
|
||||
<div class="d-flex align-items-center">
|
||||
<div class="subheader">Status monitoring</div>
|
||||
<div class="ms-auto lh-1">
|
||||
<div class="dropdown">
|
||||
<a class="dropdown-toggle text-secondary" href="#" data-bs-toggle="dropdown" aria-haspopup="true" aria-expanded="false">Current month</a>
|
||||
<div class="dropdown-menu dropdown-menu-end">
|
||||
<a class="dropdown-item active" href="#">Current month</a>
|
||||
<a class="dropdown-item" href="#">Last month</a>
|
||||
<a class="dropdown-item" href="#">Last 3 months</a>
|
||||
</div>
|
||||
</div>
|
||||
</div>
|
||||
</div>
|
||||
<div class="d-flex align-items-baseline">
|
||||
<div class="h1 mb-3 me-2">99.5%</div>
|
||||
<div class="me-auto">
|
||||
<span class="text-green d-inline-flex align-items-center lh-1">
|
||||
2%
|
||||
<svg xmlns="http://www.w3.org/2000/svg" class="icon ms-1" width="24" height="24" viewBox="0 0 24 24" stroke-width="2" stroke="currentColor" fill="none" stroke-linecap="round" stroke-linejoin="round">
|
||||
<path stroke="none" d="M0 0h24v24H0z" fill="none" />
|
||||
<polyline points="3 17 9 11 13 15 21 7" />
|
||||
<polyline points="14 7 21 7 21 14" />
|
||||
</svg>
|
||||
</span>
|
||||
</div>
|
||||
</div>
|
||||
<div class="mt-2">
|
||||
<div class="tracking">
|
||||
<div class="tracking-block bg-success" data-bs-toggle="tooltip" data-bs-placement="top" title="Operational"></div>
|
||||
<div class="tracking-block bg-danger" data-bs-toggle="tooltip" data-bs-placement="top" title="Downtime"></div>
|
||||
<div class="tracking-block bg-success" data-bs-toggle="tooltip" data-bs-placement="top" title="Operational"></div>
|
||||
<div class="tracking-block bg-warning" data-bs-toggle="tooltip" data-bs-placement="top" title="Big load"></div>
|
||||
<div class="tracking-block" data-bs-toggle="tooltip" data-bs-placement="top" title="No data"></div>
|
||||
<div class="tracking-block" data-bs-toggle="tooltip" data-bs-placement="top" title="No data"></div>
|
||||
...
|
||||
</div>
|
||||
</div>
|
||||
<div class="d-flex align-items-center">
|
||||
<div class="subheader">Status monitoring</div>
|
||||
<div class="ms-auto lh-1">
|
||||
<div class="dropdown">
|
||||
<a class="dropdown-toggle text-secondary" href="#" data-bs-toggle="dropdown" aria-haspopup="true" aria-expanded="false">Current month</a>
|
||||
<div class="dropdown-menu dropdown-menu-end">
|
||||
<a class="dropdown-item active" href="#">Current month</a>
|
||||
<a class="dropdown-item" href="#">Last month</a>
|
||||
<a class="dropdown-item" href="#">Last 3 months</a>
|
||||
</div>
|
||||
</div>
|
||||
</div>
|
||||
</div>
|
||||
<div class="d-flex align-items-baseline">
|
||||
<div class="h1 mb-3 me-2">99.5%</div>
|
||||
<div class="me-auto">
|
||||
<span class="text-green d-inline-flex align-items-center lh-1">
|
||||
2%
|
||||
<svg xmlns="http://www.w3.org/2000/svg" class="icon ms-1" width="24" height="24" viewBox="0 0 24 24" stroke-width="2" stroke="currentColor" fill="none" stroke-linecap="round" stroke-linejoin="round"><path stroke="none" d="M0 0h24v24H0z" fill="none"/><polyline points="3 17 9 11 13 15 21 7" /><polyline points="14 7 21 7 21 14" /></svg>
|
||||
</span>
|
||||
</div>
|
||||
</div>
|
||||
<div class="mt-2">
|
||||
<div class="tracking">
|
||||
<div class="tracking-block bg-success" data-bs-toggle="tooltip" data-bs-placement="top" title="Operational"></div>
|
||||
<div class="tracking-block bg-danger" data-bs-toggle="tooltip" data-bs-placement="top" title="Downtime"></div>
|
||||
<div class="tracking-block bg-success" data-bs-toggle="tooltip" data-bs-placement="top" title="Operational"></div>
|
||||
<div class="tracking-block bg-warning" data-bs-toggle="tooltip" data-bs-placement="top" title="Big load"></div>
|
||||
<div class="tracking-block" data-bs-toggle="tooltip" data-bs-placement="top" title="No data"></div>
|
||||
<div class="tracking-block" data-bs-toggle="tooltip" data-bs-placement="top" title="No data"></div>
|
||||
...
|
||||
</div>
|
||||
</div>
|
||||
</div>
|
||||
</div>
|
||||
```
|
||||
@@ -1,21 +1,10 @@
|
||||
---
|
||||
title: Color check
|
||||
summary: The color check is a great way to make your form more user-friendly and engaging. You can use the color check to create a visually appealing form that will help users make decisions quickly and easily.
|
||||
description: Enhance forms with color checks.
|
||||
---
|
||||
|
||||
Your input controls can come in a variety of colors, depending on your preferences. Click [here](/docs/ui/base/colors) to see the list of available colors.
|
||||
Your input controls can come in a variety of colors, depending on your preferences. Click [here](/docs/getting-started/colors) to see the list of available colors.
|
||||
|
||||
```html
|
||||
<label class="form-colorinput">
|
||||
<input name="..." type="radio" value="..." class="form-colorinput-input" />
|
||||
<span class="form-colorinput-color bg-lime"></span>
|
||||
</label>
|
||||
```
|
||||
|
||||
There is also an example of a color input:
|
||||
|
||||
```html example centered background="bg-light"
|
||||
```html example centered
|
||||
<div class="mb-3">
|
||||
<label class="form-label">Color Input</label>
|
||||
<div class="row g-2">
|
||||
@@ -85,20 +74,18 @@ There is also an example of a color input:
|
||||
<span class="form-colorinput-color bg-lime"></span>
|
||||
</label>
|
||||
</div>
|
||||
<div class="col-auto">
|
||||
<label class="form-colorinput">
|
||||
<input name="color" type="radio" value="green" class="form-colorinput-input" />
|
||||
<span class="form-colorinput-color bg-green"></span>
|
||||
</label>
|
||||
</div>
|
||||
</div>
|
||||
</div>
|
||||
```
|
||||
|
||||
If you need to select only one color, you can use the radio input type:
|
||||
```html
|
||||
<label class="form-colorinput">
|
||||
<input name="color" type="radio" value="lime" class="form-colorinput-input" />
|
||||
<span class="form-colorinput-color bg-lime"></span>
|
||||
</label>
|
||||
```
|
||||
|
||||
|
||||
```html example centered background="bg-light"
|
||||
```html example centered
|
||||
<div class="mb-3">
|
||||
<label class="form-label">Color Input</label>
|
||||
<div class="row g-2">
|
||||
@@ -168,19 +155,13 @@ If you need to select only one color, you can use the radio input type:
|
||||
<span class="form-colorinput-color bg-lime rounded-circle"></span>
|
||||
</label>
|
||||
</div>
|
||||
<div class="col-auto">
|
||||
<label class="form-colorinput">
|
||||
<input name="color-rounded" type="radio" value="green" class="form-colorinput-input" />
|
||||
<span class="form-colorinput-color bg-green rounded-circle"></span>
|
||||
</label>
|
||||
</div>
|
||||
</div>
|
||||
</div>
|
||||
```
|
||||
|
||||
```html
|
||||
<label class="form-colorinput">
|
||||
<input name="..." type="radio" value="..." class="form-colorinput-input" />
|
||||
<input name="color-rounded" type="radio" value="dark" class="form-colorinput-input" />
|
||||
<span class="form-colorinput-color bg-dark rounded-circle"></span>
|
||||
</label>
|
||||
```
|
||||
@@ -189,13 +170,7 @@ If you need to select only one color, you can use the radio input type:
|
||||
|
||||
Add an color picker to your form to let users customise it according to their preferences.
|
||||
|
||||
```html
|
||||
<input type="color" class="form-control form-control-color" value="#066fd1" title="Choose your color">
|
||||
```
|
||||
|
||||
There is also an example of a color picker input:
|
||||
|
||||
```html example centered
|
||||
```html example code centered
|
||||
<div class="mb-3">
|
||||
<label class="form-label">Color picker</label>
|
||||
<input type="color" class="form-control form-control-color" value="#066fd1" title="Choose your color">
|
||||
@@ -1,38 +1,22 @@
|
||||
---
|
||||
title: Form elements
|
||||
summary: Forms are one of the most important types of interaction with a website or app. Since their aim is to enable users to make a purchase, subscribe to a service or sign up to create an account, it's important to make sure they are easy to complete and help increase conversion rates. Use the available elements to create forms which are well-structured and user-friendly.
|
||||
description: Forms are one of the most important types of interaction with a website or app. Since their aim is to enable users to make a purchase, subscribe to a service or sign up to create an account, it's important to make sure they are easy to complete and help increase conversion rates. Use the available elements to create forms which are well-structured and user-friendly.
|
||||
bootstrapLink: components/forms/
|
||||
libs: nouislider
|
||||
description: Design user-friendly and effective forms.
|
||||
order: 1
|
||||
---
|
||||
|
||||
## Classic inputs
|
||||
|
||||
Use classic, user-friendly inputs, label them appropriately and include input placeholders that will help users avoid confusion when completing a form. Add the `form-control` class to style your input controls.
|
||||
Use classic, user-friendly inputs, label them appropriately and include input placeholders that will help users avoid confusion when completing a form.
|
||||
|
||||
```html
|
||||
<input type="text" class="form-control" name="example-text-input" placeholder="Input placeholder" />
|
||||
```
|
||||
|
||||
All variants of the input control are available in the examples below:
|
||||
|
||||
```html example columns={1} height="25rem"
|
||||
```html code example centered columns={1} height="20rem"
|
||||
<div class="mb-3">
|
||||
<label class="form-label">Text</label>
|
||||
<input type="text" class="form-control" name="example-text-input" placeholder="Input placeholder" />
|
||||
</div>
|
||||
<div class="mb-3">
|
||||
<label class="form-label">Password</label>
|
||||
<input type="password" class="form-control" name="example-password-input" placeholder="Input placeholder" />
|
||||
</div>
|
||||
<div class="mb-3">
|
||||
<label class="form-label">Disabled</label>
|
||||
<input type="text" class="form-control" name="example-password-input" placeholder="Input placeholder" disabled />
|
||||
</div>
|
||||
<div class="mb-3">
|
||||
<label class="form-label">Readonly</label>
|
||||
<input type="text" class="form-control" name="example-password-input" value="Readolny value" readonly />
|
||||
<input type="text" class="form-control" name="example-password-input" placeholder="Input placeholder" />
|
||||
</div>
|
||||
```
|
||||
|
||||
@@ -64,7 +48,7 @@ Use the `form-control-rounded` class if you prefer form controls with rounded co
|
||||
<div class="input-icon">
|
||||
<input type="text" value="" class="form-control form-control-rounded" placeholder="Search…" />
|
||||
<span class="input-icon-addon">
|
||||
<!-- SVG icon from http://tabler.io/icons/icon/search -->
|
||||
<!-- SVG icon from http://tabler-icons.io/i/search -->
|
||||
<svg>...</svg>
|
||||
</span>
|
||||
</div>
|
||||
@@ -75,7 +59,7 @@ Use the `form-control-rounded` class if you prefer form controls with rounded co
|
||||
|
||||
You can remove borders from your form control by adding the `form-control-flush` class.
|
||||
|
||||
```html example centered columns={1} height="20rem"
|
||||
```html code example centered columns={1} height="20rem"
|
||||
<div class="mb-3">
|
||||
<label class="form-label">Form control flush</label>
|
||||
<input type="text" class="form-control form-control-flush" name="Form control flush" placeholder="Text.." />
|
||||
@@ -86,7 +70,7 @@ You can remove borders from your form control by adding the `form-control-flush`
|
||||
|
||||
Add icons to your input controls to suggest users what they should enter or inform them of the current state of a form element.
|
||||
|
||||
```html example centered columns={1} height="20rem"
|
||||
```html example code centered columns={1} height="20rem"
|
||||
<div class="mb-3">
|
||||
<label class="form-label">Icon input</label>
|
||||
<div class="input-icon mb-3">
|
||||
@@ -131,7 +115,7 @@ Add icons to your input controls to suggest users what they should enter or info
|
||||
|
||||
Include an additional element in your input section, such as a button which can be used to submit the information enetered in the input control.
|
||||
|
||||
```html example centered columns={1} height="20rem"
|
||||
```html example code centered columns={1} height="20rem"
|
||||
<div class="mb-3">
|
||||
<label class="form-label">Separated inputs</label>
|
||||
<div class="row g-2">
|
||||
@@ -140,6 +124,7 @@ Include an additional element in your input section, such as a button which can
|
||||
</div>
|
||||
<div class="col-auto">
|
||||
<a href="#" class="btn btn-icon" aria-label="Button">
|
||||
|
||||
<svg xmlns="http://www.w3.org/2000/svg" class="icon" width="24" height="24" viewBox="0 0 24 24" stroke-width="2" stroke="currentColor" fill="none" stroke-linecap="round" stroke-linejoin="round">
|
||||
<path stroke="none" d="M0 0h24v24H0z" fill="none" />
|
||||
<circle cx="10" cy="10" r="7" />
|
||||
@@ -157,7 +142,7 @@ Use a multi-line text input control to enable users to enter longer pieces of te
|
||||
|
||||
Add one of the available selects - either a dropdown or a multiple choice select - to let users choose from a predefined set of options.
|
||||
|
||||
```html example centered columns={1} height="30rem"
|
||||
```html code example centered columns={1} height="30rem"
|
||||
<div class="mb-3">
|
||||
<label class="form-label">Textarea</label>
|
||||
<textarea class="form-control" name="example-textarea" placeholder="Textarea placeholder"></textarea>
|
||||
@@ -184,7 +169,7 @@ Add one of the available selects - either a dropdown or a multiple choice select
|
||||
|
||||
Choose the size of an input control that will go well with your form design. Apart from the default size, you can also use small and large input controls.
|
||||
|
||||
```html example centered columns={1} height="20rem"
|
||||
```html code example centered columns={1} height="20rem"
|
||||
<div class="mb-3">
|
||||
<label class="form-label">Input sizing</label>
|
||||
<input class="form-control form-control-lg mb-2" type="text" placeholder=".form-control-lg" />
|
||||
@@ -365,7 +350,7 @@ Add a range slider to make it possible for users to set a value or range, such a
|
||||
|
||||
Create a group of input controls and place add-ons on either side of an input.
|
||||
|
||||
```html example centered columns={1} height="20rem"
|
||||
```html code example centered columns={1} height="20rem"
|
||||
<div class="mb-3">
|
||||
<label class="form-label">Input group</label>
|
||||
<div class="input-group mb-2">
|
||||
@@ -396,7 +381,7 @@ Create a group of input controls and place add-ons on either side of an input.
|
||||
|
||||
Add checkboxes or radio buttons on either side of your input control.
|
||||
|
||||
```html example centered columns={1} height="20rem"
|
||||
```html code example centered columns={1} height="20rem"
|
||||
<div class="mb-3">
|
||||
<label class="form-label">Input with checkbox or radios</label>
|
||||
<div class="input-group mb-2">
|
||||
@@ -418,7 +403,7 @@ Add checkboxes or radio buttons on either side of your input control.
|
||||
|
||||
Add text to your input control, either before or after the text which is to be entered by a user.
|
||||
|
||||
```html example centered columns={1} height="20rem"
|
||||
```html code example centered columns={1} height="20rem"
|
||||
<div class="mb-3">
|
||||
<label class="form-label">Input with prepended text</label>
|
||||
<div class="input-group input-group-flat mb-2">
|
||||
@@ -440,7 +425,7 @@ Add text to your input control, either before or after the text which is to be e
|
||||
|
||||
Include a link in your input control to add a clickable element within the control.
|
||||
|
||||
```html example centered columns={1} height="20rem"
|
||||
```html code example centered columns={1} height="20rem"
|
||||
<div class="mb-3">
|
||||
<label class="form-label">Input with appended link</label>
|
||||
<div class="input-group input-group-flat">
|
||||
@@ -456,7 +441,7 @@ Include a link in your input control to add a clickable element within the contr
|
||||
|
||||
Include a `<kbd>` in your input control to add shortcut to the control.
|
||||
|
||||
```html example centered columns={1}
|
||||
```html code example centered columns={1}
|
||||
<div class="mb-3">
|
||||
<label class="form-label">Input with appended link</label>
|
||||
<div class="input-group input-group-flat">
|
||||
@@ -472,7 +457,7 @@ Include a `<kbd>` in your input control to add shortcut to the control.
|
||||
|
||||
Add an icon link which you want to display at the end of your input control to visually represent actions which a user can take.
|
||||
|
||||
```html example centered columns={1} height="20rem"
|
||||
```html example code centered columns={1} height="20rem"
|
||||
<div class="mb-3">
|
||||
<label class="form-label">Input with appended icon links</label>
|
||||
<div class="input-group input-group-flat">
|
||||
@@ -1,7 +1,6 @@
|
||||
---
|
||||
title: Form fieldset
|
||||
summary: By grouping form elements together with the fieldset element, you can improve the organization and accessibility of your forms, making it easier for users to understand the purpose of each input and provide accurate information.
|
||||
description: Group form elements for clarity.
|
||||
description: By grouping form elements together with the fieldset element, you can improve the organization and accessibility of your forms, making it easier for users to understand the purpose of each input and provide accurate information.
|
||||
---
|
||||
|
||||
## Default markup
|
||||
@@ -38,7 +37,7 @@ Group parts of your form to make it well-structured and clearer for users, using
|
||||
...
|
||||
<div class="mb-3">
|
||||
<label class="form-label required">Company</label>
|
||||
<input type="text" class="form-control" autocomplete="off" />
|
||||
<input type="text" class="form-control" autocomplete="off"/>
|
||||
</div>
|
||||
...
|
||||
</fieldset>
|
||||
12
docs/forms/form-helpers.mdx
Normal file
12
docs/forms/form-helpers.mdx
Normal file
@@ -0,0 +1,12 @@
|
||||
---
|
||||
title: Form helpers
|
||||
description: A form helper can be used to provide users with additional information about the elements of a form that may be unclear.
|
||||
---
|
||||
|
||||
## Input help
|
||||
|
||||
Use an input helper to display additional information about a form element. The text label will appear once a user hovers over the helper.
|
||||
|
||||
```html example code centered
|
||||
<span class="form-help" data-bs-toggle="popover" data-bs-placement="top" data-bs-html="true" data-bs-content="<p>ZIP Code must be US or CDN format. You can use an extended ZIP+4 code to determine address more accurately.</p><p class='mb-0'><a href=''>USP ZIP codes lookup tools</a></p>">?</span>
|
||||
```
|
||||
@@ -1,23 +1,8 @@
|
||||
---
|
||||
title: Image check
|
||||
summary: The image check is a great way to make your form more user-friendly and engaging. You can use the image check to create a visually appealing form that will help users make decisions quickly and easily.
|
||||
description: Add visual appeal to forms with images.
|
||||
---
|
||||
|
||||
## Default markup
|
||||
|
||||
To build an image check, you need to use the `.form-imagecheck` class and the `.form-imagecheck-input` class for the input element. You can also use the `.form-imagecheck-figure` class to style the image and the `.form-imagecheck-image` class to style the image itself.
|
||||
|
||||
```html
|
||||
<label class="form-imagecheck">
|
||||
<input name="..." type="checkbox" value="" class="form-imagecheck-input" checked />
|
||||
<span class="form-imagecheck-figure">
|
||||
<img src="..." alt="" class="form-imagecheck-image" />
|
||||
</span>
|
||||
</label>
|
||||
```
|
||||
|
||||
Look at the examples below to see how the image check works:
|
||||
Add an image check to your form and give users visually attractive options to choose from.
|
||||
|
||||
```html example centered columns="2" height="15rem"
|
||||
<div class="mb-3">
|
||||
@@ -25,7 +10,7 @@ Look at the examples below to see how the image check works:
|
||||
<div class="row g-2">
|
||||
<div class="col-3">
|
||||
<label class="form-imagecheck">
|
||||
<input name="image" type="checkbox" value="1" class="form-imagecheck-input" />
|
||||
<input name="form-imagecheck" type="checkbox" value="1" class="form-imagecheck-input" />
|
||||
<span class="form-imagecheck-figure">
|
||||
<img src="/samples/photos/everything-you-need-to-work-from-your-bed-2.jpg" alt="" class="form-imagecheck-image" />
|
||||
</span>
|
||||
@@ -33,7 +18,7 @@ Look at the examples below to see how the image check works:
|
||||
</div>
|
||||
<div class="col-3">
|
||||
<label class="form-imagecheck">
|
||||
<input name="image" type="checkbox" value="2" class="form-imagecheck-input" checked />
|
||||
<input name="form-imagecheck" type="checkbox" value="2" class="form-imagecheck-input" checked />
|
||||
<span class="form-imagecheck-figure">
|
||||
<img src="/samples/photos/color-palette-guide-sample-colors-catalog-.jpg" alt="" class="form-imagecheck-image" />
|
||||
</span>
|
||||
@@ -41,7 +26,7 @@ Look at the examples below to see how the image check works:
|
||||
</div>
|
||||
<div class="col-3">
|
||||
<label class="form-imagecheck">
|
||||
<input name="image" type="checkbox" value="3" class="form-imagecheck-input" />
|
||||
<input name="form-imagecheck" type="checkbox" value="3" class="form-imagecheck-input" />
|
||||
<span class="form-imagecheck-figure">
|
||||
<img src="/samples/photos/woman-read-book-and-drink-coffee-2.jpg" alt="" class="form-imagecheck-image" />
|
||||
</span>
|
||||
@@ -49,7 +34,7 @@ Look at the examples below to see how the image check works:
|
||||
</div>
|
||||
<div class="col-3">
|
||||
<label class="form-imagecheck">
|
||||
<input name="image" type="checkbox" value="4" class="form-imagecheck-input" checked />
|
||||
<input name="form-imagecheck" type="checkbox" value="4" class="form-imagecheck-input" checked />
|
||||
<span class="form-imagecheck-figure">
|
||||
<img src="/samples/photos/stylish-workspace-with-macbook-pro-2.jpg" alt="" class="form-imagecheck-image" />
|
||||
</span>
|
||||
@@ -59,9 +44,14 @@ Look at the examples below to see how the image check works:
|
||||
</div>
|
||||
```
|
||||
|
||||
## Radio buttons
|
||||
|
||||
If you want to use the image check as a radio button, you can change the input type to `radio`.
|
||||
```html
|
||||
<label class="form-imagecheck">
|
||||
<input name="" type="checkbox" value="" class="form-imagecheck-input" checked />
|
||||
<span class="form-imagecheck-figure">
|
||||
<img src="..." alt="" class="form-imagecheck-image" />
|
||||
</span>
|
||||
</label>
|
||||
```
|
||||
|
||||
```html example centered columns="2" height="15rem"
|
||||
<div class="mb-3">
|
||||
@@ -69,7 +59,7 @@ If you want to use the image check as a radio button, you can change the input t
|
||||
<div class="row g-2">
|
||||
<div class="col-3">
|
||||
<label class="form-imagecheck mb-2">
|
||||
<input name="image" type="radio" value="1" class="form-imagecheck-input" />
|
||||
<input name="form-imagecheck-radio" type="radio" value="1" class="form-imagecheck-input" />
|
||||
<span class="form-imagecheck-figure">
|
||||
<img src="/samples/photos/woman-drinking-hot-tea-in-her-home-office.jpg" alt="" class="form-imagecheck-image" />
|
||||
</span>
|
||||
@@ -77,7 +67,7 @@ If you want to use the image check as a radio button, you can change the input t
|
||||
</div>
|
||||
<div class="col-3">
|
||||
<label class="form-imagecheck mb-2">
|
||||
<input name="image" type="radio" value="2" class="form-imagecheck-input" checked />
|
||||
<input name="form-imagecheck-radio" type="radio" value="2" class="form-imagecheck-input" checked />
|
||||
<span class="form-imagecheck-figure">
|
||||
<img src="/samples/photos/young-woman-sitting-on-the-sofa-and-working-on-her-laptop-3.jpg" alt="" class="form-imagecheck-image" />
|
||||
</span>
|
||||
@@ -85,7 +75,7 @@ If you want to use the image check as a radio button, you can change the input t
|
||||
</div>
|
||||
<div class="col-3">
|
||||
<label class="form-imagecheck mb-2">
|
||||
<input name="image" type="radio" value="3" class="form-imagecheck-input" />
|
||||
<input name="form-imagecheck-radio" type="radio" value="3" class="form-imagecheck-input" />
|
||||
<span class="form-imagecheck-figure">
|
||||
<img src="/samples/photos/beautiful-blonde-woman-relaxing-with-a-can-of-coke-on-a-tree-stump-by-the-beach.jpg" alt="" class="form-imagecheck-image" />
|
||||
</span>
|
||||
@@ -93,7 +83,7 @@ If you want to use the image check as a radio button, you can change the input t
|
||||
</div>
|
||||
<div class="col-3">
|
||||
<label class="form-imagecheck mb-2">
|
||||
<input name="image" type="radio" value="4" class="form-imagecheck-input" checked />
|
||||
<input name="form-imagecheck-radio" type="radio" value="4" class="form-imagecheck-input" checked />
|
||||
<span class="form-imagecheck-figure">
|
||||
<img src="/samples/photos/book-on-the-grass.jpg" alt="" class="form-imagecheck-image" />
|
||||
</span>
|
||||
@@ -105,57 +95,53 @@ If you want to use the image check as a radio button, you can change the input t
|
||||
|
||||
```html
|
||||
<label class="form-imagecheck">
|
||||
<input name="..." type="radio" value="1" class="form-imagecheck-input" />
|
||||
<input name="form-imagecheck-radio" type="radio" value="1" class="form-imagecheck-input" />
|
||||
<span class="form-imagecheck-figure">
|
||||
<img src="..." alt="" class="form-imagecheck-image" />
|
||||
<img src="/samples/photos/woman-drinking-hot-tea-in-her-home-office.jpg" alt="" class="form-imagecheck-image" />
|
||||
</span>
|
||||
</label>
|
||||
```
|
||||
|
||||
## Avatars
|
||||
|
||||
If you want to use the image check with avatars, you can use the `.avatar` instead of the image.
|
||||
|
||||
```html example centered columns={2} height="15rem"
|
||||
```html example centered columns="1" height="15rem"
|
||||
<div class="mb-3">
|
||||
<label class="form-label">Person Check</label>
|
||||
<div class="row g-2">
|
||||
<div class="col-auto">
|
||||
<label class="form-imagecheck mb-2">
|
||||
<input name="image" type="checkbox" value="1" class="form-imagecheck-input" />
|
||||
<input name="form-imagecheck" type="checkbox" value="1" class="form-imagecheck-input" />
|
||||
<span class="form-imagecheck-figure">
|
||||
<span class="form-imagecheck-image">
|
||||
<span class="avatar avatar-xl" style="background-image: url(/samples/avatars/057f.jpg)"></span>
|
||||
<span class="avatar avatar-md" style="background-image: url(/samples/avatars/057f.jpg)"></span>
|
||||
</span>
|
||||
</span>
|
||||
</label>
|
||||
</div>
|
||||
<div class="col-auto">
|
||||
<label class="form-imagecheck mb-2">
|
||||
<input name="image" type="checkbox" value="2" class="form-imagecheck-input" checked />
|
||||
<input name="form-imagecheck" type="checkbox" value="2" class="form-imagecheck-input" checked />
|
||||
<span class="form-imagecheck-figure">
|
||||
<span class="form-imagecheck-image">
|
||||
<span class="avatar avatar-xl">HS</span>
|
||||
<span class="avatar avatar-md">HS</span>
|
||||
</span>
|
||||
</span>
|
||||
</label>
|
||||
</div>
|
||||
<div class="col-auto">
|
||||
<label class="form-imagecheck mb-2">
|
||||
<input name="image" type="checkbox" value="3" class="form-imagecheck-input" />
|
||||
<input name="form-imagecheck" type="checkbox" value="3" class="form-imagecheck-input" />
|
||||
<span class="form-imagecheck-figure">
|
||||
<span class="form-imagecheck-image">
|
||||
<span class="avatar avatar-xl" style="background-image: url(/samples/avatars/062m.jpg)"></span>
|
||||
<span class="avatar avatar-md" style="background-image: url(/samples/avatars/062m.jpg)"></span>
|
||||
</span>
|
||||
</span>
|
||||
</label>
|
||||
</div>
|
||||
<div class="col-auto">
|
||||
<label class="form-imagecheck mb-2">
|
||||
<input name="image" type="checkbox" value="4" class="form-imagecheck-input" checked />
|
||||
<input name="form-imagecheck" type="checkbox" value="4" class="form-imagecheck-input" checked />
|
||||
<span class="form-imagecheck-figure">
|
||||
<span class="form-imagecheck-image">
|
||||
<span class="avatar avatar-xl" style="background-image: url(/samples/avatars/070m.jpg)"></span>
|
||||
<span class="avatar avatar-md" style="background-image: url(/samples/avatars/070m.jpg)"></span>
|
||||
</span>
|
||||
</span>
|
||||
</label>
|
||||
@@ -166,7 +152,7 @@ If you want to use the image check with avatars, you can use the `.avatar` inste
|
||||
|
||||
```html
|
||||
<label class="form-imagecheck">
|
||||
<input name="..." type="checkbox" value="..." class="form-imagecheck-input" />
|
||||
<input name="" type="checkbox" value="" class="form-imagecheck-input" />
|
||||
<span class="form-imagecheck-figure">
|
||||
<span class="form-imagecheck-image">
|
||||
<span class="avatar avatar-md" style="background-image: url(...)"></span>
|
||||
18
docs/forms/form-input-mask.mdx
Normal file
18
docs/forms/form-input-mask.mdx
Normal file
@@ -0,0 +1,18 @@
|
||||
---
|
||||
title: Input mask
|
||||
description: An input mask is a used to clarify the input format required in a given field and is helpful for users, removing confusion and reducing the number of validation errors.
|
||||
---
|
||||
|
||||
<Callout>
|
||||
To be able to use the input mask in your application you will need to install the imask dependency with `npm install imask`.
|
||||
</Callout>
|
||||
|
||||
## Default markup
|
||||
|
||||
Use an input mask in the fields where users have to enter their phone number, to make the formatting rules clear and help them avoid confusion.
|
||||
|
||||
```html example code centered columns={1}
|
||||
<label class="form-label">Telephone mask</label>
|
||||
<input type="text" name="input-mask" class="form-control" data-mask="(00) 0000-0000" data-mask-visible="true" placeholder="(00) 0000-0000" autocomplete="off" />
|
||||
```
|
||||
|
||||
@@ -1,60 +1,12 @@
|
||||
---
|
||||
title: Form selectgroup
|
||||
summary: Use selectgroup to make your form more intuitive by providing users with a set of options to choose from. You can add simple selectgroup with a label, use icons only or icons with labels. Alternatively, you can use pill selectgroup if they go well with your design.
|
||||
description: Improve form UX with select groups.
|
||||
title: Form selectboxes
|
||||
---
|
||||
|
||||
## Simple selectgroup
|
||||
Add selectboxes to make your form more intuitive by providing users with a set of options to choose from. You can add simple selectboxes with a label, use icons only or icons with labels. Alternatively, you can use pill selectboxes if they go well with your design.
|
||||
|
||||
To create a simple selectgroup, use the `.form-selectgroup` class. You should add a label to the selectgroup by using the `.form-selectgroup-item` class for the input element and the `.form-selectgroup-label` class for the label.
|
||||
|
||||
```html
|
||||
<label class="form-selectgroup-item">
|
||||
<input type="checkbox" name="name" value="..." class="form-selectgroup-input" checked />
|
||||
<span class="form-selectgroup-label">...</span>
|
||||
</label>
|
||||
```
|
||||
|
||||
Look at the example below to see how the simple selectgroup works:
|
||||
|
||||
```html example columns={1} centered
|
||||
<div>
|
||||
<div class="form-selectgroup">
|
||||
<label class="form-selectgroup-item">
|
||||
<input type="radio" name="name" value="HTML" class="form-selectgroup-input" checked />
|
||||
<span class="form-selectgroup-label">HTML</span>
|
||||
</label>
|
||||
<label class="form-selectgroup-item">
|
||||
<input type="radio" name="name" value="CSS" class="form-selectgroup-input" />
|
||||
<span class="form-selectgroup-label">CSS</span>
|
||||
</label>
|
||||
<label class="form-selectgroup-item">
|
||||
<input type="radio" name="name" value="PHP" class="form-selectgroup-input" />
|
||||
<span class="form-selectgroup-label">PHP</span>
|
||||
</label>
|
||||
<label class="form-selectgroup-item">
|
||||
<input type="radio" name="name" value="JavaScript" class="form-selectgroup-input" />
|
||||
<span class="form-selectgroup-label">JavaScript</span>
|
||||
</label>
|
||||
</div>
|
||||
</div>
|
||||
```
|
||||
|
||||
## Multiple choices
|
||||
|
||||
You can also create a selectgroup with multiple choices. To do this, change the `type` attribute of the input element to `checkbox`.
|
||||
|
||||
```html
|
||||
<label class="form-selectgroup-item">
|
||||
<input type="checkbox" name="name" value="..." class="form-selectgroup-input" checked />
|
||||
<span class="form-selectgroup-label">...</span>
|
||||
</label>
|
||||
```
|
||||
|
||||
Look at the example below to see how the multiple choices selectgroup works:
|
||||
|
||||
```html example columns={1} centered
|
||||
<div>
|
||||
```html example code columns={1} centered
|
||||
<div class="mb-3">
|
||||
<label class="form-label">Simple selectgroup</label>
|
||||
<div class="form-selectgroup">
|
||||
<label class="form-selectgroup-item">
|
||||
<input type="checkbox" name="name" value="HTML" class="form-selectgroup-input" checked />
|
||||
@@ -76,22 +28,7 @@ Look at the example below to see how the multiple choices selectgroup works:
|
||||
</div>
|
||||
```
|
||||
|
||||
## Icon input
|
||||
|
||||
To create an icon input, use the `.form-selectgroup` class. You should add a label to the selectgroup by using the `.form-selectgroup-item` class for the input element and the `.form-selectgroup-label` class for the label. You can use the `.icon` class to style the icon.
|
||||
|
||||
```html
|
||||
<label class="form-selectgroup-item">
|
||||
<input type="checkbox" name="name" value="sun" class="form-selectgroup-input" checked />
|
||||
<span class="form-selectgroup-label">
|
||||
<svg class="icon" width="24" height="24">...</svg>
|
||||
</span>
|
||||
</label>
|
||||
```
|
||||
|
||||
We recommend you use Tabler Icons for the best experience. You can find over <IconsCount rounded /> free icons in the [Tabler Icons](https://tabler-icons.io/) library. Just copy the SVG code and paste it into your project.
|
||||
|
||||
```html example columns={1} centered
|
||||
```html example code columns={1} centered
|
||||
<div class="mb-3">
|
||||
<label class="form-label">Icon input</label>
|
||||
<div class="form-selectgroup">
|
||||
@@ -141,68 +78,46 @@ We recommend you use Tabler Icons for the best experience. You can find over <Ic
|
||||
</div>
|
||||
```
|
||||
|
||||
You can also add text to the element. Look at the example below to see how it works:
|
||||
|
||||
```html example columns={1} centered
|
||||
```html example code columns={1} centered
|
||||
<div class="mb-3">
|
||||
<label class="form-label">Selectgroup with icons and text</label>
|
||||
<div class="form-selectgroup">
|
||||
<label class="form-selectgroup-item">
|
||||
<input type="radio" name="icons" value="home" class="form-selectgroup-input" checked />
|
||||
<span class="form-selectgroup-label">
|
||||
<svg xmlns="http://www.w3.org/2000/svg" class="icon me-1" width="24" height="24" viewBox="0 0 24 24" stroke-width="2" stroke="currentColor" fill="none" stroke-linecap="round" stroke-linejoin="round">
|
||||
<span class="form-selectgroup-label"><svg xmlns="http://www.w3.org/2000/svg" class="icon me-1" width="24" height="24" viewBox="0 0 24 24" stroke-width="2" stroke="currentColor" fill="none" stroke-linecap="round" stroke-linejoin="round">
|
||||
<path stroke="none" d="M0 0h24v24H0z" fill="none" />
|
||||
<polyline points="5 12 3 12 12 3 21 12 19 12" />
|
||||
<path d="M5 12v7a2 2 0 0 0 2 2h10a2 2 0 0 0 2 -2v-7" />
|
||||
<path d="M9 21v-6a2 2 0 0 1 2 -2h2a2 2 0 0 1 2 2v6" />
|
||||
</svg> Home
|
||||
</span>
|
||||
</svg> Home</span>
|
||||
</label>
|
||||
<label class="form-selectgroup-item">
|
||||
<input type="radio" name="icons" value="user" class="form-selectgroup-input" />
|
||||
<span class="form-selectgroup-label">
|
||||
<svg xmlns="http://www.w3.org/2000/svg" class="icon me-1" width="24" height="24" viewBox="0 0 24 24" stroke-width="2" stroke="currentColor" fill="none" stroke-linecap="round" stroke-linejoin="round">
|
||||
<span class="form-selectgroup-label"><svg xmlns="http://www.w3.org/2000/svg" class="icon me-1" width="24" height="24" viewBox="0 0 24 24" stroke-width="2" stroke="currentColor" fill="none" stroke-linecap="round" stroke-linejoin="round">
|
||||
<path stroke="none" d="M0 0h24v24H0z" fill="none" />
|
||||
<circle cx="12" cy="7" r="4" />
|
||||
<path d="M6 21v-2a4 4 0 0 1 4 -4h4a4 4 0 0 1 4 4v2" />
|
||||
</svg> User
|
||||
</span>
|
||||
</svg> User</span>
|
||||
</label>
|
||||
<label class="form-selectgroup-item">
|
||||
<input type="radio" name="icons" value="circle" class="form-selectgroup-input" />
|
||||
<span class="form-selectgroup-label">
|
||||
<svg xmlns="http://www.w3.org/2000/svg" class="icon me-1" width="24" height="24" viewBox="0 0 24 24" stroke-width="2" stroke="currentColor" fill="none" stroke-linecap="round" stroke-linejoin="round">
|
||||
<span class="form-selectgroup-label"><svg xmlns="http://www.w3.org/2000/svg" class="icon me-1" width="24" height="24" viewBox="0 0 24 24" stroke-width="2" stroke="currentColor" fill="none" stroke-linecap="round" stroke-linejoin="round">
|
||||
<path stroke="none" d="M0 0h24v24H0z" fill="none" />
|
||||
<circle cx="12" cy="12" r="9" />
|
||||
</svg> Circle
|
||||
</span>
|
||||
</svg> Circle</span>
|
||||
</label>
|
||||
<label class="form-selectgroup-item">
|
||||
<input type="radio" name="icons" value="square" class="form-selectgroup-input" />
|
||||
<span class="form-selectgroup-label">
|
||||
<svg xmlns="http://www.w3.org/2000/svg" class="icon me-1" width="24" height="24" viewBox="0 0 24 24" stroke-width="2" stroke="currentColor" fill="none" stroke-linecap="round" stroke-linejoin="round">
|
||||
<span class="form-selectgroup-label"><svg xmlns="http://www.w3.org/2000/svg" class="icon me-1" width="24" height="24" viewBox="0 0 24 24" stroke-width="2" stroke="currentColor" fill="none" stroke-linecap="round" stroke-linejoin="round">
|
||||
<path stroke="none" d="M0 0h24v24H0z" fill="none" />
|
||||
<rect x="4" y="4" width="16" height="16" rx="2" />
|
||||
</svg> Square
|
||||
</span>
|
||||
</svg> Square</span>
|
||||
</label>
|
||||
</div>
|
||||
</div>
|
||||
```
|
||||
|
||||
## Pill selectgroup
|
||||
|
||||
If you want to use pill selectgroup, use the `.form-selectgroup-pills` class. All the other classes are the same as in the simple selectgroup.
|
||||
|
||||
```html
|
||||
<div class="form-selectgroup form-selectgroup-pills">
|
||||
...
|
||||
</div>
|
||||
```
|
||||
|
||||
Look at the example below to see how the pill selectgroup works:
|
||||
|
||||
```html example columns={1} centered
|
||||
```html example code columns={1} centered
|
||||
<div class="mb-3">
|
||||
<label class="form-label">Different style</label>
|
||||
<div class="form-selectgroup form-selectgroup-pills">
|
||||
25
docs/forms/form-validation.mdx
Normal file
25
docs/forms/form-validation.mdx
Normal file
@@ -0,0 +1,25 @@
|
||||
---
|
||||
title: Validation states
|
||||
description: To inform users whether the entered value is correct or not, use either of the validation states. Thanks to that, users will immediately know which form elements they need to correct and, if the state displays as invalid, why the value is incorrect.
|
||||
---
|
||||
|
||||
```html example code centered columns="1" height="20rem"
|
||||
<div class="mb-3">
|
||||
<label class="form-label">Validation States </label>
|
||||
<input type="text" class="form-control is-valid mb-2" placeholder="Valid State..." />
|
||||
<input type="text" class="form-control is-invalid" placeholder="Invalid State..." />
|
||||
<div class="invalid-feedback">Invalid feedback</div>
|
||||
</div>
|
||||
```
|
||||
|
||||
## Subtle validation states
|
||||
|
||||
If you prefer a more subtle manner of informing users of the input control validation state, you can use tick and cross symbols and resign from colored control frames and the validation feedback.
|
||||
|
||||
```html example code centered columns="1" height="20rem"
|
||||
<div class="mb-3">
|
||||
<label class="form-label">Validation States (lite)</label>
|
||||
<input type="text" class="form-control is-valid is-valid-lite mb-2" placeholder="Valid State..." />
|
||||
<input type="text" class="form-control is-invalid is-invalid-lite" placeholder="Invalid State..." />
|
||||
</div>
|
||||
```
|
||||
20
docs/getting-started/browser-support.mdx
Normal file
20
docs/getting-started/browser-support.mdx
Normal file
@@ -0,0 +1,20 @@
|
||||
---
|
||||
title: Browser Support
|
||||
---
|
||||
|
||||
As of this latest release, Tabler has launched many new features that may not be compatible with all browsers, especially older ones.
|
||||
|
||||
For instance, Tabler no longer uses **vendor prefixes** in styles that are known to have some compatibility issues except for a few parts. Tabler also supports new features such as **CSS grid**, **object fit**, and **sticky positioning** which is not yet supported on all browsers. In short, Tabler supports all the latest supported browsers with **only** partial support for Internet Explorer.
|
||||
|
||||
## Supported Browsers
|
||||
|
||||
Browser|Version
|
||||
---|----------
|
||||
<img src="/docs/browsers/edge.svg" width="48" height="48" alt="Edge Logo"/>|last 3 versions
|
||||
<img src="/docs/browsers/firefox.svg" width="48" height="48" alt="Firefox Logo"/>|last 3 versions, ESR
|
||||
<img src="/docs/browsers/chrome.svg" width="48" height="48" alt="Chrome Logo"/>|last 3 versions
|
||||
<img src="/docs/browsers/safari.svg" width="48" height="48" alt="Safari Logo"/>|last 3 versions
|
||||
<img src="/docs/browsers/opera.svg" width="48" height="48" alt="Opera Logo"/>|last 3 versions
|
||||
<img src="/docs/browsers/electron.svg" width="48" height="48" alt="Electron Logo"/>|last 3 versions
|
||||
<img src="/docs/browsers/brave.svg" width="48" height="48" alt="Brave Logo"/>|last 3 versions
|
||||
<img src="/docs/browsers/vivaldi.svg" width="48" height="48" alt="Vivaldi Logo"/>|last 3 versions
|
||||
@@ -1,7 +1,6 @@
|
||||
---
|
||||
title: Customize Tabler
|
||||
summary: Tabler has been designed so that it can be adjusted to your needs and requirements as much as possible. You can customize your own fonts, colors, font sizes, etc in it.
|
||||
description: Adjust fonts, colors, and styles.
|
||||
description: Tabler has been designed so that it can be adjusted to your needs and requirements as much as possible. You can customize your own fonts, colors, font sizes, etc in it.
|
||||
---
|
||||
|
||||
## Custom Google Font
|
||||
@@ -18,8 +17,8 @@ Now you just need to tell Tabler to use your favorite font:
|
||||
|
||||
```html
|
||||
<style>
|
||||
:root {
|
||||
--tblr-font-sans-serif: 'Inter';
|
||||
}
|
||||
:root {
|
||||
--tblr-font-sans-serif: 'Inter';
|
||||
}
|
||||
</style>
|
||||
```
|
||||
@@ -1,7 +1,6 @@
|
||||
---
|
||||
title: Download
|
||||
summary: Download Tabler to get the compiled CSS and JavaScript, source code, or include it with your favorite package managers like npm, yarn and more.
|
||||
description: Get Tabler CSS, JS, and source code.
|
||||
description: Download Tabler to get the compiled CSS and JavaScript, source code, or include it with your favorite package managers like npm, yarn and more.
|
||||
---
|
||||
|
||||
## CDN via jsDelivr
|
||||
@@ -18,7 +17,6 @@ You can also include additional Tabler plugins:
|
||||
```html
|
||||
<link rel="stylesheet" href="$TABLER_CDN/dist/css/tabler-flags.min.css">
|
||||
<link rel="stylesheet" href="$TABLER_CDN/dist/css/tabler-payments.min.css">
|
||||
<link rel="stylesheet" href="$TABLER_CDN/dist/css/tabler-social.min.css">
|
||||
<link rel="stylesheet" href="$TABLER_CDN/dist/css/tabler-vendors.min.css">
|
||||
```
|
||||
|
||||
@@ -28,6 +26,10 @@ Install Tabler in your Node.js powered apps with the npm package:
|
||||
|
||||
<TabsPackage name="@tabler/core" />
|
||||
|
||||
OR install for Webfonts
|
||||
|
||||
<TabsPackage name="@tabler/icons-webfont" />
|
||||
|
||||
Tabler uses other packages to enhance the functionality for example charts and input masks. These are not automatically installed to avoid huge
|
||||
dependency trees and need to be installed by using npm install. We support the following packages as of writing.
|
||||
|
||||
@@ -1,8 +1,6 @@
|
||||
---
|
||||
title: FAQ
|
||||
summary: Answers to the most frequently asked questions.
|
||||
description: Common questions and answers.
|
||||
order: 12
|
||||
description: Answers to the most frequently asked questions.
|
||||
---
|
||||
|
||||
## I found an issue, what can I do?
|
||||
40
docs/getting-started/index.mdx
Normal file
40
docs/getting-started/index.mdx
Normal file
@@ -0,0 +1,40 @@
|
||||
---
|
||||
title: Introduction
|
||||
description: Free and open-source HTML Dashboard UI Kit built on Bootstrap
|
||||
---
|
||||
|
||||
## What is Tabler?
|
||||
|
||||
Tabler is fully responsive and compatible with all modern browsers. Thanks to its modern and user-friendly design you can create a fully functional interface that users will love! Choose the layouts and components you need and customize them to make your design consistent and eye-catching. Every component has been created with attention to detail to make your interface beautiful!
|
||||
|
||||
## What are the benefits?
|
||||
|
||||
Tabler is a perfect solution if you want to create an interface which is not only user-friendly but also fully responsive. Thanks to the big choice of ready-made components, you can customize your design and adapt it to the needs of even the most demanding users. On top of that, Tabler is an open source solution, continuously developed and improved by the open source community.
|
||||
|
||||
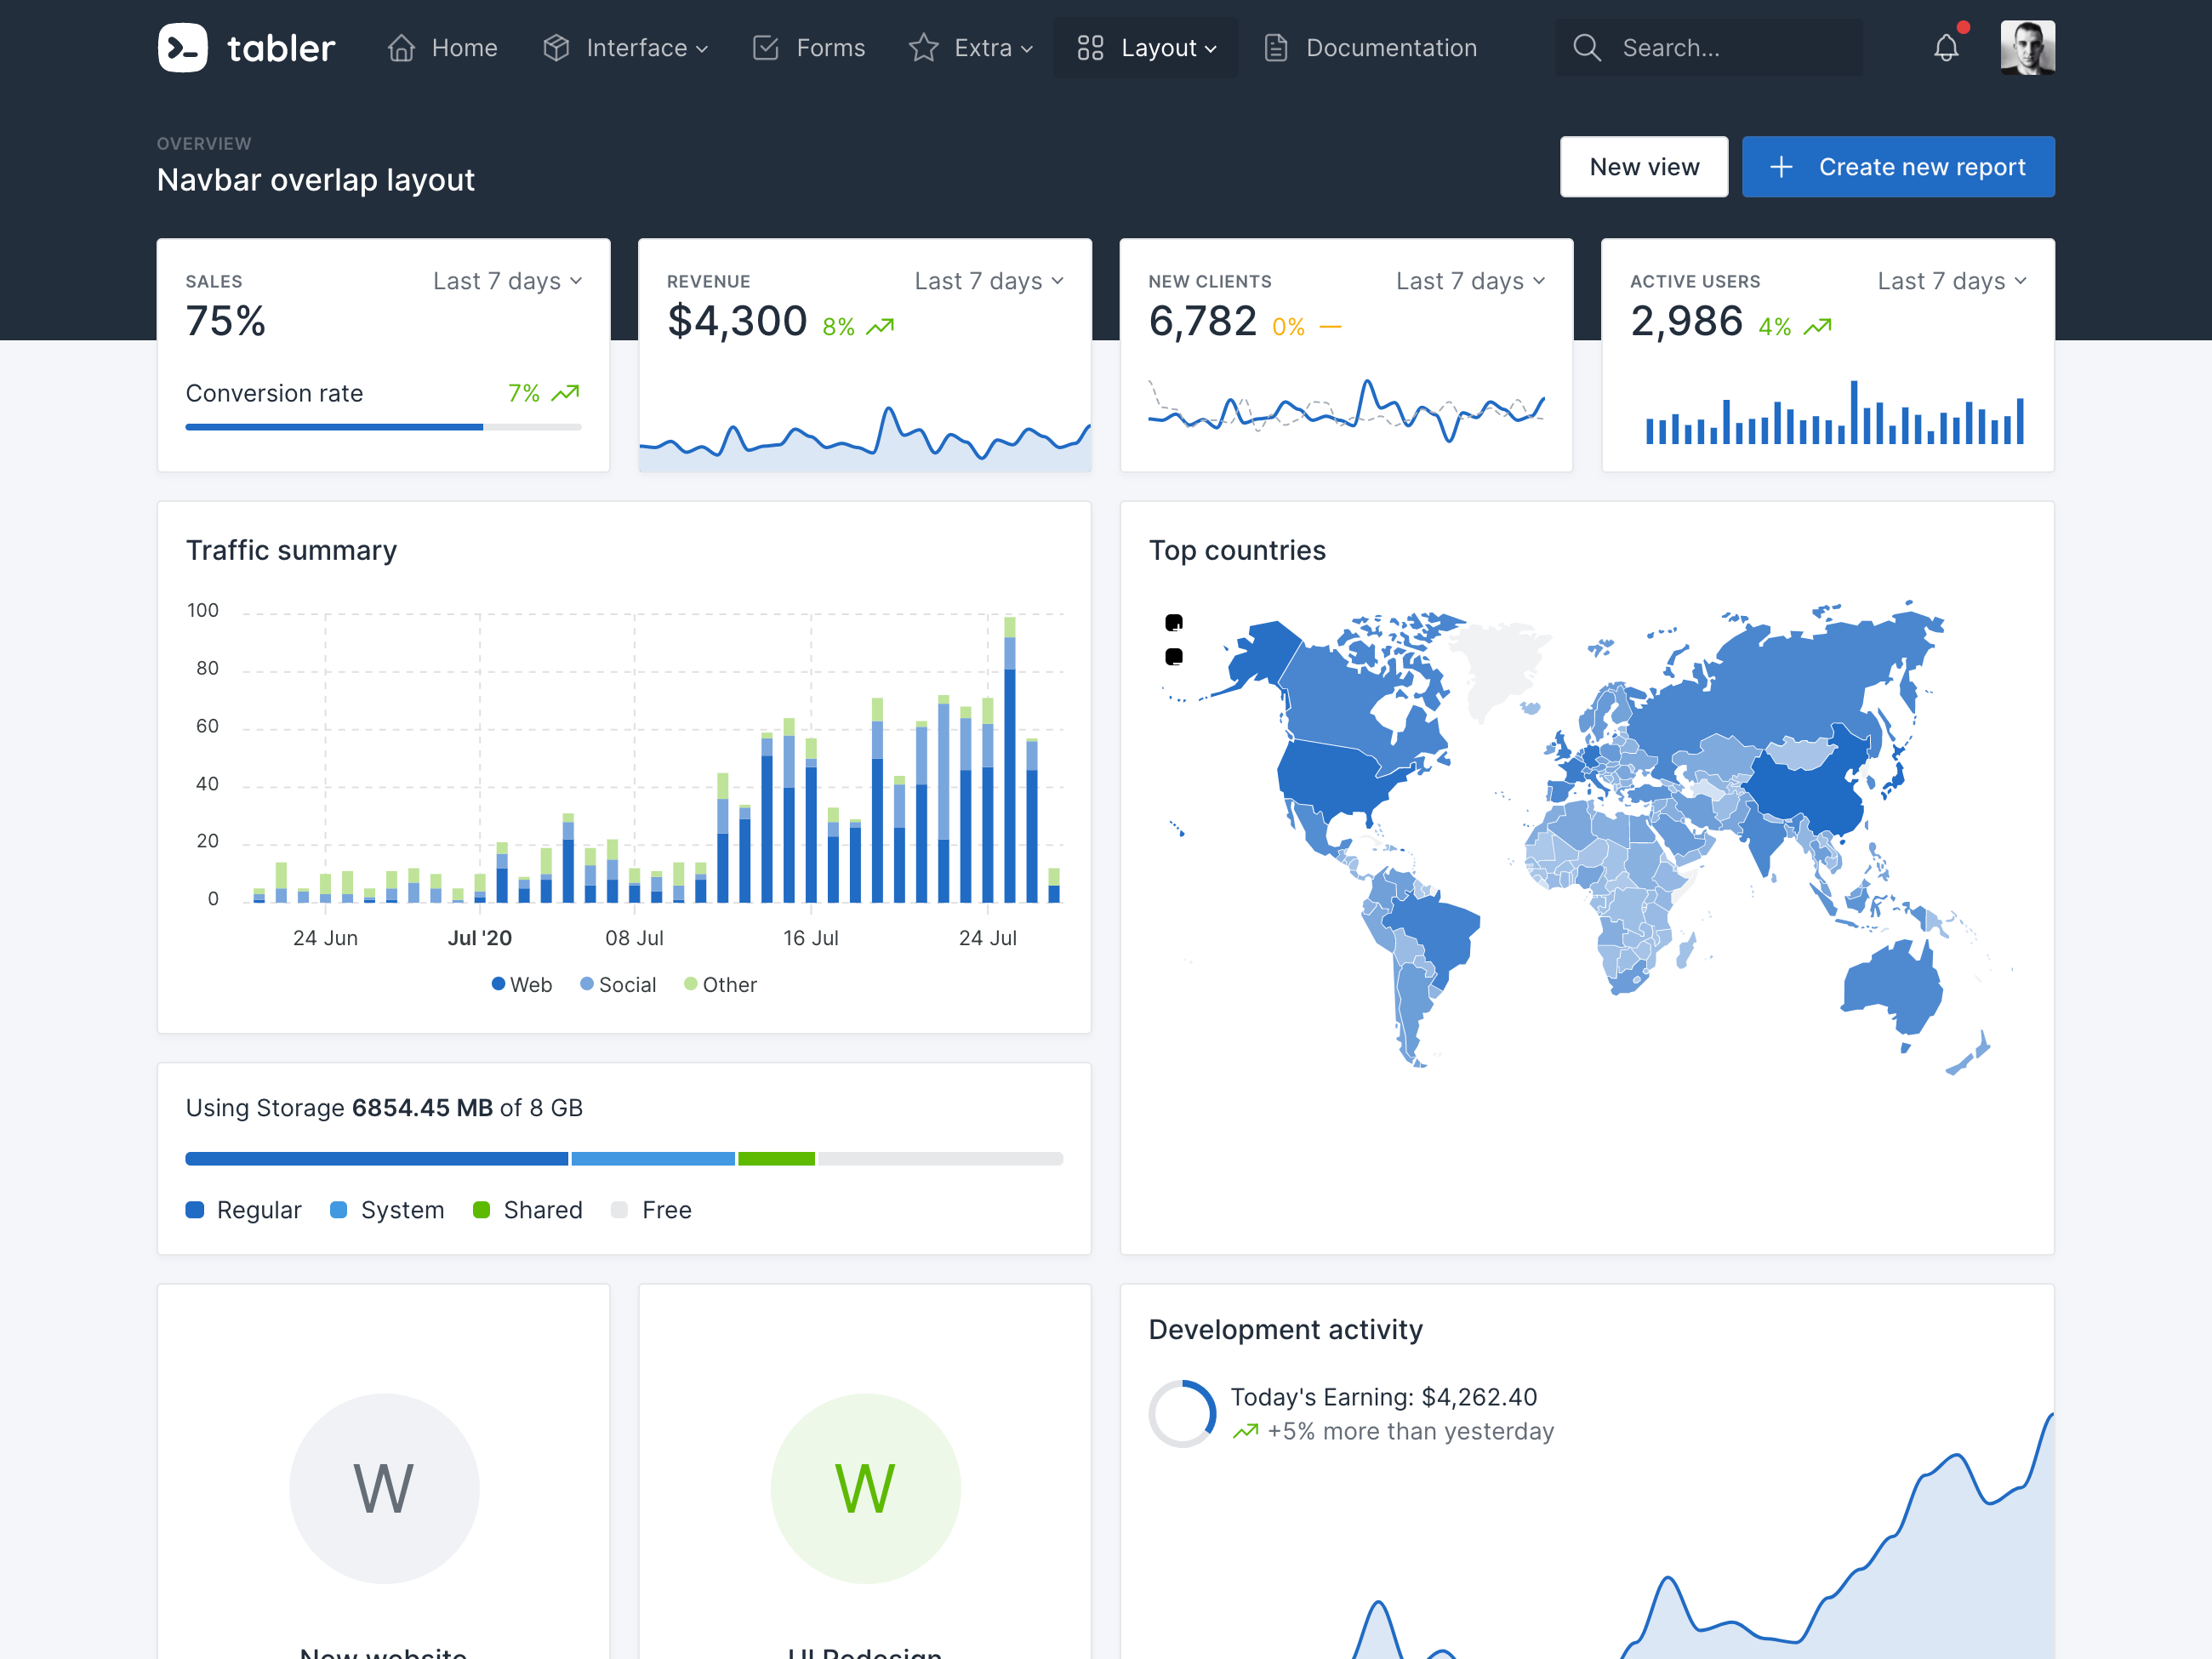
|
||||
|
||||
## Set up the environment
|
||||
|
||||
To use our build system and run our documentation locally, you'll need a copy of Tabler's source files. Follow the steps below:
|
||||
|
||||
1. [Install Node.js](https://nodejs.org/download/), which we use to manage our dependencies.
|
||||
2. Navigate to the root `/tabler` directory and run `npm install` to install our local dependencies listed in `package.json`.
|
||||
3. [Install Ruby](https://ruby-lang.org/en/documentation/installation/) - the recommended version is [2.5.5](https://cache.ruby-lang.org/pub/ruby/2.5/ruby-2.5.5.tar.gz).
|
||||
4. [Install Bundler](https://bundler.io) with `gem install bundler` and, finally, run `bundle install`. It will install all Ruby dependencies, such as [Jekyll and plugins](https://jekyllrb.com).
|
||||
|
||||
### Windows users
|
||||
1. [Install Git](https://git-scm.com/download/win) in `C:\Program Files\git\bin` directory and run `npm config set script-shell "C:\Program Files\git\bin\bash.exe"` to change the default shell.
|
||||
2. [Install Ruby+Devkit](https://rubyinstaller.org/downloads/) - recommended version is [2.5.5](https://github.com/oneclick/rubyinstaller2/releases/download/RubyInstaller-2.5.5-1/rubyinstaller-devkit-2.5.5-1-x86.exe).
|
||||
3. [Read guide](https://jekyllrb.com/docs/installation/windows/) to get Jekyll up and running without problems.
|
||||
|
||||
Once you've completed the setup, you'll be able to run the various commands provided from the command line.
|
||||
|
||||
## Build Tabler locally
|
||||
|
||||
1. From the root `/tabler` directory, run `npm run start` in the command line.
|
||||
2. Open [http://localhost:3000](http://localhost:3000) in your browser, and voilà.
|
||||
3. Any change in `/src` directory will build the application and refresh the page.
|
||||
|
||||
## Bugs and feature requests
|
||||
|
||||
Found a bug or have a feature request? [Please open a new issue](https://github.com/tabler/tabler/issues/new).
|
||||
@@ -1,10 +1,8 @@
|
||||
---
|
||||
title: EPS version
|
||||
description: Download Tabler Icons in EPS format.
|
||||
---
|
||||
|
||||

|
||||
|
||||

|
||||
|
||||
## Installation
|
||||
|
||||
7
docs/icons/figma.mdx
Normal file
7
docs/icons/figma.mdx
Normal file
@@ -0,0 +1,7 @@
|
||||
---
|
||||
title: Figma plugin
|
||||
---
|
||||
|
||||

|
||||
|
||||
[Download Plugin](https://www.figma.com/community/plugin/1169807996149376642/Tabler-Icons)
|
||||
@@ -1,10 +1,100 @@
|
||||
---
|
||||
title: Tabler Icons
|
||||
summary: Tabler Icons is a powerful and versatile icon library that offers a huge collection of high quality icons suitable for a wide range of applications. With its clean and modern aesthetic, extensive customisation options, and user-friendly website and plugins, Tabler Icons is an excellent resource for designers and developers looking to enhance their projects with high-quality icons.
|
||||
order: 2
|
||||
description: Over 5000 pixel-perfect icons for web design and development
|
||||
description: Tabler Icons is a powerful and versatile icon library that offers a huge collection of high quality icons suitable for a wide range of applications. With its clean and modern aesthetic, extensive customisation options, and user-friendly website and plugins, Tabler Icons is an excellent resource for designers and developers looking to enhance their projects with high-quality icons.
|
||||
---
|
||||
|
||||
```html example centered separated
|
||||
<svg xmlns="http://www.w3.org/2000/svg" class="icon icon-lg icon-tabler icon-tabler-ghost" width="24" height="24" viewBox="0 0 24 24" stroke-width="2" stroke="currentColor" fill="none" stroke-linecap="round" stroke-linejoin="round">
|
||||
<path stroke="none" d="M0 0h24v24H0z" fill="none"></path>
|
||||
<path d="M5 11a7 7 0 0 1 14 0v7a1.78 1.78 0 0 1 -3.1 1.4a1.65 1.65 0 0 0 -2.6 0a1.65 1.65 0 0 1 -2.6 0a1.65 1.65 0 0 0 -2.6 0a1.78 1.78 0 0 1 -3.1 -1.4v-7"></path>
|
||||
<path d="M10 10l.01 0"></path>
|
||||
<path d="M14 10l.01 0"></path>
|
||||
<path d="M10 14a3.5 3.5 0 0 0 4 0"></path>
|
||||
</svg>
|
||||
<svg xmlns="http://www.w3.org/2000/svg" class="icon icon-lg icon-tabler icon-tabler-star" width="24" height="24" viewBox="0 0 24 24" stroke-width="2" stroke="currentColor" fill="none" stroke-linecap="round" stroke-linejoin="round">
|
||||
<path stroke="none" d="M0 0h24v24H0z" fill="none"></path>
|
||||
<path d="M12 17.75l-6.172 3.245l1.179 -6.873l-5 -4.867l6.9 -1l3.086 -6.253l3.086 6.253l6.9 1l-5 4.867l1.179 6.873z"></path>
|
||||
</svg>
|
||||
<svg xmlns="http://www.w3.org/2000/svg" class="icon icon-lg icon-tabler icon-tabler-yin-yang" width="24" height="24" viewBox="0 0 24 24" stroke-width="2" stroke="currentColor" fill="none" stroke-linecap="round" stroke-linejoin="round">
|
||||
<path stroke="none" d="M0 0h24v24H0z" fill="none"></path>
|
||||
<path d="M12 12m-9 0a9 9 0 1 0 18 0a9 9 0 1 0 -18 0"></path>
|
||||
<path d="M12 3a4.5 4.5 0 0 0 0 9a4.5 4.5 0 0 1 0 9"></path>
|
||||
<circle cx="12" cy="7.5" r=".5" fill="currentColor"></circle>
|
||||
<circle cx="12" cy="16.5" r=".5" fill="currentColor"></circle>
|
||||
</svg>
|
||||
<svg xmlns="http://www.w3.org/2000/svg" class="icon icon-lg icon-tabler icon-tabler-heart" width="24" height="24" viewBox="0 0 24 24" stroke-width="2" stroke="currentColor" fill="none" stroke-linecap="round" stroke-linejoin="round">
|
||||
<path stroke="none" d="M0 0h24v24H0z" fill="none"></path>
|
||||
<path d="M19.5 12.572l-7.5 7.428l-7.5 -7.428a5 5 0 1 1 7.5 -6.566a5 5 0 1 1 7.5 6.572"></path>
|
||||
</svg>
|
||||
```
|
||||
|
||||
## Customize stroke
|
||||
|
||||
The `stroke-width` property is a powerful tool for customizing icons. This property allows you to control the thickness of the stroke used to outline an icon, giving you precise control over its appearance. By adjusting the `stroke-width` property, you can make an icon more or less prominent, change its emphasis, or create unique visual effects. For example, a thinner stroke may be ideal for icons with intricate designs or fine details, while a thicker stroke can add visual weight and impact to simpler, bolder icons.
|
||||
|
||||
All icons are designed by default with `2px` stroke.
|
||||
|
||||
```html example centered separated
|
||||
<svg xmlns="http://www.w3.org/2000/svg" class="icon icon-lg icon-tabler icon-tabler-cherry" width="24" height="24" viewBox="0 0 24 24" stroke-width="1" stroke="currentColor" fill="none" stroke-linecap="round" stroke-linejoin="round" style="stroke-width: 1">
|
||||
<path stroke="none" d="M0 0h24v24H0z" fill="none"></path>
|
||||
<path d="M7.5 16.5m-3.5 0a3.5 3.5 0 1 0 7 0a3.5 3.5 0 1 0 -7 0"></path>
|
||||
<path d="M17 18m-3 0a3 3 0 1 0 6 0a3 3 0 1 0 -6 0"></path>
|
||||
<path d="M9 13c.366 -2 1.866 -3.873 4.5 -5.6"></path>
|
||||
<path d="M17 15c-1.333 -2.333 -2.333 -5.333 -1 -9"></path>
|
||||
<path d="M5 6c3.667 -2.667 7.333 -2.667 11 0c-3.667 2.667 -7.333 2.667 -11 0"></path>
|
||||
</svg>
|
||||
<svg xmlns="http://www.w3.org/2000/svg" class="icon icon-lg icon-tabler icon-tabler-cherry" width="24" height="24" viewBox="0 0 24 24" stroke-width="1.5" stroke="currentColor" fill="none" stroke-linecap="round" stroke-linejoin="round" style="stroke-width: 1.5">
|
||||
<path stroke="none" d="M0 0h24v24H0z" fill="none"></path>
|
||||
<path d="M7.5 16.5m-3.5 0a3.5 3.5 0 1 0 7 0a3.5 3.5 0 1 0 -7 0"></path>
|
||||
<path d="M17 18m-3 0a3 3 0 1 0 6 0a3 3 0 1 0 -6 0"></path>
|
||||
<path d="M9 13c.366 -2 1.866 -3.873 4.5 -5.6"></path>
|
||||
<path d="M17 15c-1.333 -2.333 -2.333 -5.333 -1 -9"></path>
|
||||
<path d="M5 6c3.667 -2.667 7.333 -2.667 11 0c-3.667 2.667 -7.333 2.667 -11 0"></path>
|
||||
</svg>
|
||||
<svg xmlns="http://www.w3.org/2000/svg" class="icon icon-lg icon-tabler icon-tabler-cherry" width="24" height="24" viewBox="0 0 24 24" stroke-width="2" stroke="currentColor" fill="none" stroke-linecap="round" stroke-linejoin="round" style="stroke-width: 2">
|
||||
<path stroke="none" d="M0 0h24v24H0z" fill="none"></path>
|
||||
<path d="M7.5 16.5m-3.5 0a3.5 3.5 0 1 0 7 0a3.5 3.5 0 1 0 -7 0"></path>
|
||||
<path d="M17 18m-3 0a3 3 0 1 0 6 0a3 3 0 1 0 -6 0"></path>
|
||||
<path d="M9 13c.366 -2 1.866 -3.873 4.5 -5.6"></path>
|
||||
<path d="M17 15c-1.333 -2.333 -2.333 -5.333 -1 -9"></path>
|
||||
<path d="M5 6c3.667 -2.667 7.333 -2.667 11 0c-3.667 2.667 -7.333 2.667 -11 0"></path>
|
||||
</svg>
|
||||
```
|
||||
|
||||
```html
|
||||
<svg stroke-width="1" ...>
|
||||
...
|
||||
</svg>
|
||||
<svg stroke-width="1.5" ...>
|
||||
...
|
||||
</svg>
|
||||
<svg stroke-width="2" ...>
|
||||
...
|
||||
</svg>
|
||||
```
|
||||
|
||||
## Filled version of icons
|
||||
|
||||
```html example centered separated
|
||||
<svg xmlns="http://www.w3.org/2000/svg" class="icon icon-lg icon-tabler icon-tabler-bell-filled" width="24" height="24" viewBox="0 0 24 24" stroke-width="2" stroke="currentColor" fill="none" stroke-linecap="round" stroke-linejoin="round">
|
||||
<path stroke="none" d="M0 0h24v24H0z" fill="none"></path>
|
||||
<path d="M14.235 19c.865 0 1.322 1.024 .745 1.668a3.992 3.992 0 0 1 -2.98 1.332a3.992 3.992 0 0 1 -2.98 -1.332c-.552 -.616 -.158 -1.579 .634 -1.661l.11 -.006h4.471z" stroke-width="0" fill="currentColor"></path>
|
||||
<path d="M12 2c1.358 0 2.506 .903 2.875 2.141l.046 .171l.008 .043a8.013 8.013 0 0 1 4.024 6.069l.028 .287l.019 .289v2.931l.021 .136a3 3 0 0 0 1.143 1.847l.167 .117l.162 .099c.86 .487 .56 1.766 -.377 1.864l-.116 .006h-16c-1.028 0 -1.387 -1.364 -.493 -1.87a3 3 0 0 0 1.472 -2.063l.021 -.143l.001 -2.97a8 8 0 0 1 3.821 -6.454l.248 -.146l.01 -.043a3.003 3.003 0 0 1 2.562 -2.29l.182 -.017l.176 -.004z" stroke-width="0" fill="currentColor"></path>
|
||||
</svg>
|
||||
<svg xmlns="http://www.w3.org/2000/svg" class="icon icon-lg icon-tabler icon-tabler-diamond-filled" width="24" height="24" viewBox="0 0 24 24" stroke-width="2" stroke="currentColor" fill="none" stroke-linecap="round" stroke-linejoin="round">
|
||||
<path stroke="none" d="M0 0h24v24H0z" fill="none"></path>
|
||||
<path d="M18 4a1 1 0 0 1 .783 .378l.074 .108l3 5a1 1 0 0 1 -.032 1.078l-.08 .103l-8.53 9.533a1.7 1.7 0 0 1 -1.215 .51c-.4 0 -.785 -.14 -1.11 -.417l-.135 -.126l-8.5 -9.5a1 1 0 0 1 -.172 -1.067l.06 -.115l3.013 -5.022l.064 -.09a.982 .982 0 0 1 .155 -.154l.089 -.064l.088 -.05l.05 -.023l.06 -.025l.109 -.032l.112 -.02l.117 -.005h12zm-8.886 3.943a1 1 0 0 0 -1.371 .343l-.6 1l-.06 .116a1 1 0 0 0 .177 1.07l2 2.2l.09 .088a1 1 0 0 0 1.323 -.02l.087 -.09a1 1 0 0 0 -.02 -1.323l-1.501 -1.65l.218 -.363l.055 -.103a1 1 0 0 0 -.398 -1.268z" stroke-width="0" fill="currentColor"></path>
|
||||
</svg>
|
||||
<svg xmlns="http://www.w3.org/2000/svg" class="icon icon-lg icon-tabler icon-tabler-discount-check-filled" width="24" height="24" viewBox="0 0 24 24" stroke-width="2" stroke="currentColor" fill="none" stroke-linecap="round" stroke-linejoin="round">
|
||||
<path stroke="none" d="M0 0h24v24H0z" fill="none"></path>
|
||||
<path d="M12.01 2.011a3.2 3.2 0 0 1 2.113 .797l.154 .145l.698 .698a1.2 1.2 0 0 0 .71 .341l.135 .008h1a3.2 3.2 0 0 1 3.195 3.018l.005 .182v1c0 .27 .092 .533 .258 .743l.09 .1l.697 .698a3.2 3.2 0 0 1 .147 4.382l-.145 .154l-.698 .698a1.2 1.2 0 0 0 -.341 .71l-.008 .135v1a3.2 3.2 0 0 1 -3.018 3.195l-.182 .005h-1a1.2 1.2 0 0 0 -.743 .258l-.1 .09l-.698 .697a3.2 3.2 0 0 1 -4.382 .147l-.154 -.145l-.698 -.698a1.2 1.2 0 0 0 -.71 -.341l-.135 -.008h-1a3.2 3.2 0 0 1 -3.195 -3.018l-.005 -.182v-1a1.2 1.2 0 0 0 -.258 -.743l-.09 -.1l-.697 -.698a3.2 3.2 0 0 1 -.147 -4.382l.145 -.154l.698 -.698a1.2 1.2 0 0 0 .341 -.71l.008 -.135v-1l.005 -.182a3.2 3.2 0 0 1 3.013 -3.013l.182 -.005h1a1.2 1.2 0 0 0 .743 -.258l.1 -.09l.698 -.697a3.2 3.2 0 0 1 2.269 -.944zm3.697 7.282a1 1 0 0 0 -1.414 0l-3.293 3.292l-1.293 -1.292l-.094 -.083a1 1 0 0 0 -1.32 1.497l2 2l.094 .083a1 1 0 0 0 1.32 -.083l4 -4l.083 -.094a1 1 0 0 0 -.083 -1.32z" stroke-width="0" fill="currentColor"></path>
|
||||
</svg>
|
||||
<svg xmlns="http://www.w3.org/2000/svg" class="icon icon-lg icon-tabler icon-tabler-shield-check-filled" width="24" height="24" viewBox="0 0 24 24" stroke-width="2" stroke="currentColor" fill="none" stroke-linecap="round" stroke-linejoin="round">
|
||||
<path stroke="none" d="M0 0h24v24H0z" fill="none"></path>
|
||||
<path d="M11.998 2l.118 .007l.059 .008l.061 .013l.111 .034a.993 .993 0 0 1 .217 .112l.104 .082l.255 .218a11 11 0 0 0 7.189 2.537l.342 -.01a1 1 0 0 1 1.005 .717a13 13 0 0 1 -9.208 16.25a1 1 0 0 1 -.502 0a13 13 0 0 1 -9.209 -16.25a1 1 0 0 1 1.005 -.717a11 11 0 0 0 7.531 -2.527l.263 -.225l.096 -.075a.993 .993 0 0 1 .217 -.112l.112 -.034a.97 .97 0 0 1 .119 -.021l.115 -.007zm3.71 7.293a1 1 0 0 0 -1.415 0l-3.293 3.292l-1.293 -1.292l-.094 -.083a1 1 0 0 0 -1.32 1.497l2 2l.094 .083a1 1 0 0 0 1.32 -.083l4 -4l.083 -.094a1 1 0 0 0 -.083 -1.32z" stroke-width="0" fill="currentColor"></path>
|
||||
</svg>
|
||||
```
|
||||
|
||||
## Browse icons
|
||||
|
||||
Tabler Icons is a comprehensive icon library that features over <IconsCount rounded /> high-quality icons. These icons are designed with a clean and modern aesthetic, making them suitable for a wide range of applications.
|
||||
|
||||
Some files were not shown because too many files have changed in this diff Show More
Reference in New Issue
Block a user